


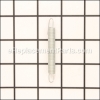
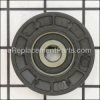
This replacement belt is a genuine item that is sourced directly from original equipment manufacturer. It is commonly used v-belt for high wheeled trimmers. This is the the main belt that drives the cutter head. Inspect belt periodically and replace it when worn or stretched to maintain peak performance. This part is made out of rubber material and it is sold individually.
To complete this repair you will need a set of wrenches and a screwdriver.
• First remove screw at front of chassis cover
• Lift cover up and away from trimmer
• Remove the two (2) screws on sides of trimmer securing the debris shield
• Turn trimmer on its side with carburetor and fuel cap up
• Remove the two (2) screws on under-side of trimmer securing the debris shield
• Slide the debris shield rearward and remove
• Remove belt from engine pulley on crankshaft
• Remove belt from trimmer head pulley
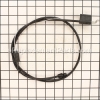
• Note the position of the control cable and idler return spring
• Remove idler assembly from chassis and re-move belt and idler from trimmer
• Remove belt from idler assembly by removing bottom belt keeper and idler pulleys
• Assemble new belt, idler pulleys and bottom belt keeper to idler bracket
• Tighten pulley bolts securely
• Position belt and idler assembly in trimmer, reconnect idler spring and reattach idler to chassis
V-belt 532185476
OEM part for: Husqvarna, Poulan, Weed Eater
Part Number: 532185476
Jump To:
Product Description ?
- Classification: Part
- Weight: 0.09 lbs.
- Shipping: Ships Worldwide
Frequently Purchased Together ?


Compatibility
This V-belt will fit the following 68 machines. Confirm this part works with your model, and view the detailed model diagrams and repair help we have to offer.
This item works with the following types of products:
- Trimmer Parts
This part replaces obsolete part #: 185476, 169790
Customer Part Reviews ?
- 1
- 2
Questions & Answers ?
Our customer Service team is at the ready daily to answer your part and product questions.

Ask our Team
We have a dedicated staff with decades of collective experience in helping customers just like you purchase parts to repair their products.
Does this fit my product?Questions & Answers for V-belt
Customer Repair Instructions ?
All our customer repair instructions are solicited directly from other customers just like you who have purchased and replaced this exact part.
Broken Belt
Tool Type
Trimmer
Difficulty
Easy
Time
30-60 minutes
Tools Used
Socket set, Wrench Set
Parts Used
2- Remove screws at the front of chassis cover and remove it.
3- Remove the screws holding the debris shield.
4- Turn the machine on its side with the carburetor and fuel cap up.
5- Remove the screws form underneath the trimmer holding the debris shield and remove it.
6- Remove the belt from the pulley on the crankshaft, and from the trimmer head pulley.
7- Note the position of the control cable and the idler return spring, and remove the belt from the idler assembly by removing the bottom belt keeper and idler pulleys.
8- Install the new belt, idler pulleys and the belt keeper to the idler bracket.
9- Install all of the rest of the parts in reverse order. And you're done.
belt wore out,cable broke
Tool Type
Lawn Mower
Difficulty
Easy
Time
30-60 minutes
Tools Used
Screwdriver, Pliers, Socket set, Wrench Set
replaced cable
Drive belt stretched, too loose to deliver power
Tool Type
Trimmer
Difficulty
Easy
Time
30-60 minutes
Tools Used
Socket set, Wrench Set
Parts Used
Removed idler assembly
Removed idler assembly pulley
Removed and replaced old belt
Reinstalled idler assembly pulley, idler assembly, and housing.
belt replacement
Tool Type
Lawn Mower
Difficulty
Easy
Time
30-60 minutes
Tools Used
Wrench Set
Parts Used
Mow ball had broken, and wanted to do complete refit on trimmer as it's over 10 years old.
Tool Type
Trimmer
Difficulty
Medium
Time
30-60 minutes
Tools Used
Screwdriver, Socket set, Wrench Set, Nutdriver
2. Disassembled to pully tensioning system (take a pic before hand to get it back on correctly)
3. Broke down tensioning pulleys and changed to new belt.
4. Replaced tensioning spring (broken) and drive control hookups
5. Reinstalled tensioning pully system and spindle assembly.
6. Installed V belt on engine pulley.
7. Hooked up new drive control cable to handle and tested.
The v belt was broken
Tool Type
Trimmer
Difficulty
Easy
Time
15-30 minutes
Tools Used
, Screw drivers
Parts Used
V belt broke
Tool Type
Trimmer
Difficulty
Medium
Time
30-60 minutes
Tools Used
Socket set, Nutdriver, Adjustable Wrench
Parts Used
Removed shroud
Removed idler pulley
Threaded belt onto pulleys and through idler pulley
Replaced idler pulley
Replaced shroud
Replaced cover
drive control was sized and belt was worn
Tool Type
Trimmer
Difficulty
Medium
Time
15-30 minutes
Tools Used
Screwdriver, Socket set, Wrench Set
Belt wore out!!
Tool Type
Trimmer
Difficulty
Easy
Time
15-30 minutes
Tools Used
Socket set, Wrench Set
Parts Used
Through hard use I destroyed the front working mechanism and guards.
Tool Type
Trimmer
Difficulty
Medium
Time
30-60 minutes
Tools Used
Screwdriver, Pliers, Power Drill, Socket set, Wrench Set, Adjustable Wrench
OEM stands for Original Equipment Manufacturer and means the part you’re buying is sourced directly from the manufacturer who made your product. At eReplacementParts, we sell only genuine OEM parts, guaranteeing the part you’re purchasing is of better design and of higher quality than aftermarket parts.
Our product descriptions are a combination of data sourced directly from the manufacturers who made your product as well as content researched and curated by our content & customer service teams. This content is edited and reviewed internally before being made public to customers.
Our customer service team are at the ready daily to answer your part and product questions. We have a dedicated staff with decades of collective experience in helping customers just like you purchase parts to repair their products.
All our part reviews are solicited directly from other customers who have purchased this exact part. While we moderate these reviews for profanity, offensive language or personally identifiable information, these reviews are posted exactly as submitted and no alterations are made by our team.
All our customer repair instructions are solicited directly from other customers just like you who have purchased and replaced this exact part. While we moderate these reviews for profanity, offensive language or personally identifiable information, these reviews are posted exactly as submitted and no alterations are made by our team.
Based on data from past customer purchasing behaviors, these parts are most commonly purchased together along with the part you are viewing. These parts may be necessary or helpful to replace to complete your current repair.
All our installation videos are created and produced in collaboration with our in-house repair technician, Mark Sodja, who has helped millions of eReplacementParts customers over the last 13 years repair their products. Mark has years of experience in selling and repairing both commercial and residential products with a specialty in gas-powered equipment.
This data is collected from customers who submitted a repair instruction after replacing this exact part. Customers can rate how easy the repair was to complete and how long it took. We aggregate this data to provide a repair rating that allows customers to quickly determine the difficulty and time needed to perform their own repair.