


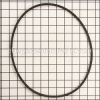
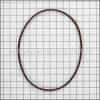
This is an authentic Ariens component which is supplied by the original equipment manufacturer for use with snowblowers. This is the belt that drives the unit. Unfortunately, over time belts tend to wear out, stretch and they may begin to crack eventually requiring a replacement. Check the owner's manual and the diagrams for your model to ensure the correct repair procedure. Keep in mind this high-quality v-belt is made of durable rubber and is sold as an individual item.
V-belt-4l - Raw Edge Laminated 07200623
OEM part for: Ariens
Part Number: 07200623
$40.19
In Stock
Jump To:
Frequently Purchased Together ?
Compatibility
This V-belt-4l - Raw Edge Laminated will fit the following 92 machines. Confirm this part works with your model, and view the detailed model diagrams and repair help we have to offer.
Displaying 20 of 92 matching models.
Ariens
Show More Compatible Models92 total model matches. Try the above search to narrow your results.
This is the official OEM part for the following brands:
- Ariens
This item works with the following types of products:
- Snowblower
This part replaces obsolete part #: 07200020
Questions & Answers ?
Our customer Service team is at the ready daily to answer your part and product questions.

Ask our Team
We have a dedicated staff with decades of collective experience in helping customers just like you purchase parts to repair their products.
Does this fit my product?Questions & Answers for V-belt-4l - Raw Edge Laminated
No questions have been asked yet
Customer Repair Instructions ?
All our customer repair instructions are solicited directly from other customers just like you who have purchased and replaced this exact part.
Belt shredded.
John - April 14, 2016
👍 7 of 11 people found this instruction helpful
Tool Type
Snowblower
Difficulty
Medium
Time
15-30 minutes
Tools Used
Socket set, Steel pipe to push deflector.
Parts Used
Take off protective cover.
Cut old belt and pull clear.
Below the belt there is a protective cover at the 6:00 position of the belt, which is mounted with a spring.
Take steel pipe and push the deflector down to allow belt to mount bottom wheel.
Once the bottom wheel has the belt aligned bring top of belt to the upper wheel.
Replace protective cover.
Good to go.
Did you find this story helpful?
Thanks for voting and helping fellow customers!
17 Year old heavily used snowblower "tune up."
Mitch - August 13, 2020
Tool Type
Snowblower
Difficulty
Easy
Time
1-2 hours
Tools Used
Screwdriver, Pliers, Socket set
Watched youtube on how to remove friction disc.
Put the snowblower in the repair position, removed wheels, and removed the bottom plate.
Removed 6 bolts (3 on each side) that hold shaft that holds friction disc in place.
Removed right hand cotter pin from shaft.
Removed shaft assembly with Friction disc.
Removed old disc and replaced with new friction disc.
Cleaned out area put light amount of grease on gears and reassembled.
Watching the youtubes was key. This was easier to do than I thought it would be. Ordering the parts from ereplacementparts.com was also very easy, and not confusing. Everything fit. I replaced the belts since I was at it.
Did you find this story helpful?
Thanks for voting and helping fellow customers!
belt frayed,disengaged from pulley
Michael - February 19, 2019
Tool Type
Snowblower
Difficulty
Easy
Time
15-30 minutes
Tools Used
Screwdriver, Socket set
Parts Used
took off belt cover and rear belt cover, my version, worked old belt out and worked new belt in, doesn't look like you can do it, but you can, without taking machine apart..Remember how you took belt out, you will have to twist it, but so easy,new belt goes in same way
Did you find this story helpful?
Thanks for voting and helping fellow customers!
Had to replace my worn out thrower belt.
Kevin - October 8, 2017
👍 0 of 1 people found this instruction helpful
Tool Type
Snowblower
Difficulty
Easy
Time
15-30 minutes
Tools Used
Screwdriver, Socket set, Wrench Set
Parts Used
Undid the engine housing using a screwdriver. Removed the old belt. Then, I replaced it with the new belt and closed up the housing.
Did you find this story helpful?
Thanks for voting and helping fellow customers!
OEM stands for Original Equipment Manufacturer and means the part you’re buying is sourced directly from the manufacturer who made your product. At eReplacementParts, we sell only genuine OEM parts, guaranteeing the part you’re purchasing is of better design and of higher quality than aftermarket parts.
Learn MoreOur product descriptions are a combination of data sourced directly from the manufacturers who made your product as well as content researched and curated by our content & customer service teams. This content is edited and reviewed internally before being made public to customers.
Our customer service team are at the ready daily to answer your part and product questions. We have a dedicated staff with decades of collective experience in helping customers just like you purchase parts to repair their products.
All our part reviews are solicited directly from other customers who have purchased this exact part. While we moderate these reviews for profanity, offensive language or personally identifiable information, these reviews are posted exactly as submitted and no alterations are made by our team.
All our customer repair instructions are solicited directly from other customers just like you who have purchased and replaced this exact part. While we moderate these reviews for profanity, offensive language or personally identifiable information, these reviews are posted exactly as submitted and no alterations are made by our team.
Based on data from past customer purchasing behaviors, these parts are most commonly purchased together along with the part you are viewing. These parts may be necessary or helpful to replace to complete your current repair.
All our installation videos are created and produced in collaboration with our in-house repair technician, Mark Sodja, who has helped millions of eReplacementParts customers over the last 13 years repair their products. Mark has years of experience in selling and repairing both commercial and residential products with a specialty in gas-powered equipment.
This data is collected from customers who submitted a repair instruction after replacing this exact part. Customers can rate how easy the repair was to complete and how long it took. We aggregate this data to provide a repair rating that allows customers to quickly determine the difficulty and time needed to perform their own repair.