


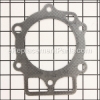
This is a genuine Generac replacement part that has been sourced from the original manufacturer and is intended to be used with small engines for portable generators. The gasket is used to seal the connection between the valve cover and the cylinder head. This item is available as an individual replacement part.
Valve Cover Gasket A0002791673
OEM part for: Generac
Part Number: A0002791673
$3.99
In Stock
Jump To:
Frequently Purchased Together ?

Compatibility
This Valve Cover Gasket will fit the following 725 machines. Confirm this part works with your model, and view the detailed model diagrams and repair help we have to offer.
Generac
Show More Compatible ModelsThis item works with the following types of products:
- Generator Parts
This part replaces obsolete part #: 0C2979
Customer Part Reviews ?
Average Rating (out of 5):
Click to filter by ratings:
5 stars
4
4 stars
0
3 stars
0
2 stars
0
1 stars
0
< PREV
- 1
Exact replacement
The parts were in stock and arrived exactly as promised. The gaskets were genuine Generac parts and fit perfectly.
Guest -
April 7, 2023
Verified Purchase
Form and function
Fits as correct part it is exact replacement part.
Guest -
November 19, 2021
Verified Purchase
Good service
good product
Guest -
September 3, 2020
Verified Purchase
Great part
New, quality OE Generac gaskets. Used for a routine valve lash check/adjustment on my 2018 22KW Generac whole house backup generator.
Guest -
July 17, 2019
Verified Purchase
Questions & Answers ?
Our customer Service team is at the ready daily to answer your part and product questions.

Ask our Team
We have a dedicated staff with decades of collective experience in helping customers just like you purchase parts to repair their products.
Does this fit my product?Questions & Answers for Valve Cover Gasket
No questions have been asked yet
Customer Repair Instructions ?
All our customer repair instructions are solicited directly from other customers just like you who have purchased and replaced this exact part.
Valve adjustment
Robert - July 2, 2016
👍 12 of 12 people found this instruction helpful
Tool Type
Generator
Difficulty
Medium
Time
1-2 hours
Tools Used
Wrench Set, 10MM bit, feeler gauge, 13mm wrench
Parts Used
Accessing the Valve covers was quite simple. Open top cover, lift off front panel and you are in.
Pulling the rear plug is easier if you remove the valve cover first. Pulled both spark plugs and both valve covers. VC gaskets were in excellent shape and I was actually able to reuse them at the end. Also removed the top front section of the muffler cover to access the fan. 6-7 10MM bolts were all it took to remove panel. The valves with 21 hours REALLY needed adjusted. The rears were too tight and the fronts too loose.Followed directions on finding TDC from internet forums and YouTube vids. The hardest part of this job is finding the "sweet" spot so that when you tighten the lock nut your adjustment is in spec. I was shooting for a .004 clearance so what I ended up doing was getting it to .003 and then when i snugged up the locknut I ended up at the .004 as this action increases the clearance slightly as the adjusting bolt will turn slightly as well. After this first time I am sure that I can cut my time in half next go around. Take your time, check and recheck gaps and only do this if you are confident in your wrenching skills. Fire it up, check for leaks around the valve covers and relax for another 400 hours or so.
Pulling the rear plug is easier if you remove the valve cover first. Pulled both spark plugs and both valve covers. VC gaskets were in excellent shape and I was actually able to reuse them at the end. Also removed the top front section of the muffler cover to access the fan. 6-7 10MM bolts were all it took to remove panel. The valves with 21 hours REALLY needed adjusted. The rears were too tight and the fronts too loose.Followed directions on finding TDC from internet forums and YouTube vids. The hardest part of this job is finding the "sweet" spot so that when you tighten the lock nut your adjustment is in spec. I was shooting for a .004 clearance so what I ended up doing was getting it to .003 and then when i snugged up the locknut I ended up at the .004 as this action increases the clearance slightly as the adjusting bolt will turn slightly as well. After this first time I am sure that I can cut my time in half next go around. Take your time, check and recheck gaps and only do this if you are confident in your wrenching skills. Fire it up, check for leaks around the valve covers and relax for another 400 hours or so.
Did you find this story helpful?
Thanks for voting and helping fellow customers!
Valves needed adjustment
FRANK - October 13, 2018
👍 2 of 2 people found this instruction helpful
Tool Type
Generator
Difficulty
Medium
Time
1-2 hours
Tools Used
Socket set, Wrench Set
Parts Used
Switched generator to OFF, turned circuit breaker on generator to off, removed 7.5 amp fuse. Disconnected battery, removed spark plugs, removed valve covers, adjusted valves, installed new valve cover gaskets with valve covers, installed new spark plugs, installed the 7.5 amp fuse. Reconnected battery, Turned switch to Manual Start and tested generator. Ran fine, put switch in Auto run position and waited for the next hurricane!
Did you find this story helpful?
Thanks for voting and helping fellow customers!
Required initial 25 hour adjustment of generator valves
Carlton - February 22, 2022
Tool Type
Generator
Difficulty
Easy
Time
1-2 hours
Tools Used
Socket set, Wrench Set, Feeler gauge
Parts Used
1. Disconnected standby generator from transfer switches.
2. Removed spark plugs
3. Removed valve covers
4. Rotated engine to top dead center for each piston’s valves w/35mm socket
5. Adjusted valves IAW specifications .002 to .004 inches
6. Reinstalled valve covers with new gasket and spark plugs
7. Ops checked generator and checked for valve cover oil leaks
8. Reconnected generator to transfer switches.
Did you find this story helpful?
Thanks for voting and helping fellow customers!
Tune up needed for valve lash adjustment.
Alan - April 19, 2021
Tool Type
Generator
Difficulty
Medium
Time
30-60 minutes
Tools Used
Socket set, Feeler gauge
Parts Used
1. Remove 4 bolts holding valve cover.
2. Remove spark plugs.
3. Disconnect battery.
4. Turn engine by hand, (bolt at generator shaft) to place either cylinder at top-dead-center.
5. Use feeler gauge to adjust valve lash per specs. Loosen jamb nut and turn valve rocker pivot nut to loosen or tighten clearance. Then tighten jamb nut. Repeat on other valve.
6. Turn engine by hand to place second cylinder at top-dead-center. (Repeat adjustment)
7. Reverse disassembly. Use new gaskets on cylinder head after cleaning all surfaces of head and cover.
8. Torque cover bolts.
Did you find this story helpful?
Thanks for voting and helping fellow customers!
Scheduled service
Paul - October 21, 2020
Tool Type
Generator
Difficulty
Easy
Time
15-30 minutes
Tools Used
Socket set, Wrench Set, Torque wrench
Parts Used
Checked and adjusted valve lifters as required
Did you find this story helpful?
Thanks for voting and helping fellow customers!
OEM stands for Original Equipment Manufacturer and means the part you’re buying is sourced directly from the manufacturer who made your product. At eReplacementParts, we sell only genuine OEM parts, guaranteeing the part you’re purchasing is of better design and of higher quality than aftermarket parts.
Our product descriptions are a combination of data sourced directly from the manufacturers who made your product as well as content researched and curated by our content & customer service teams. This content is edited and reviewed internally before being made public to customers.
Our customer service team are at the ready daily to answer your part and product questions. We have a dedicated staff with decades of collective experience in helping customers just like you purchase parts to repair their products.
All our part reviews are solicited directly from other customers who have purchased this exact part. While we moderate these reviews for profanity, offensive language or personally identifiable information, these reviews are posted exactly as submitted and no alterations are made by our team.
All our customer repair instructions are solicited directly from other customers just like you who have purchased and replaced this exact part. While we moderate these reviews for profanity, offensive language or personally identifiable information, these reviews are posted exactly as submitted and no alterations are made by our team.
Based on data from past customer purchasing behaviors, these parts are most commonly purchased together along with the part you are viewing. These parts may be necessary or helpful to replace to complete your current repair.
All our installation videos are created and produced in collaboration with our in-house repair technician, Mark Sodja, who has helped millions of eReplacementParts customers over the last 13 years repair their products. Mark has years of experience in selling and repairing both commercial and residential products with a specialty in gas-powered equipment.
This data is collected from customers who submitted a repair instruction after replacing this exact part. Customers can rate how easy the repair was to complete and how long it took. We aggregate this data to provide a repair rating that allows customers to quickly determine the difficulty and time needed to perform their own repair.