


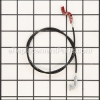
This trigger is an original part from Craftsman for snow blowers. This part allows the user to lead the snow blower left or right. You will need pliers to replace this trigger. This part is made of plastic and is sold individually.
Trigger 731-06113
OEM part for: Craftsman
Part Number: 731-06113
$4.88
In Stock
Jump To:
Frequently Purchased Together ?


Compatibility
This Trigger will fit the following 158 machines. Confirm this part works with your model, and view the detailed model diagrams and repair help we have to offer.
Craftsman
Show More Compatible ModelsThis item works with the following types of products:
- Snowblower Parts
Customer Part Reviews ?
Average Rating (out of 5):
Click to filter by ratings:
5 stars
4
4 stars
0
3 stars
0
2 stars
0
1 stars
0
< PREV
- 1
correct part - easy fix!
as above.
Guest -
December 12, 2021
Verified Purchase
Exact replacement part
Shipped quickly and was reasonably priced.
Guest -
November 29, 2021
Verified Purchase
Craftsman Snowblower Trigger
Trigger arrived on the date promised. The part was exactly what I needed. Thank you!
Richard -
December 18, 2019
Verified Purchase
correct part
The part came quickly and had my snowblower ready for winter in short order. Top notch service, quick and correct
Guest -
October 9, 2019
Verified Purchase
Questions & Answers ?
Our customer Service team is at the ready daily to answer your part and product questions.

Ask our Team
We have a dedicated staff with decades of collective experience in helping customers just like you purchase parts to repair their products.
Does this fit my product?Questions & Answers for Trigger
No questions have been asked yet
Customer Repair Instructions ?
All our customer repair instructions are solicited directly from other customers just like you who have purchased and replaced this exact part.
broken trigger
Richard - February 1, 2024
Tool Type
Snowblower
Difficulty
Easy
Time
Less than 15 minutes
Tools Used
Screwdriver, Pliers
Parts Used
remove clip and install trigger
Did you find this story helpful?
Thanks for voting and helping fellow customers!
I was repairing a snow blower that fell off the trailer and skidded down the road. the las time I borrow anything out again!
Joshua - December 27, 2022
Tool Type
Snowblower
Difficulty
Easy
Time
Less than 15 minutes
Tools Used
Pliers
Parts Used
I had everything repaired except the lamp socket and the left turn break handle.
I used a needle nose pliers to remove the E-clip from the pin that held the old handle in.
I removed the pin and the old handle.
I then attached the brake cable to the handle, put it back in place and inserted the pin and reinstalled the E-clip with the pliers.
For the lamp socket I installed the new lamp into the socket, being careful to use a rag to grab and install the bulb, I try not to get any oils from my fingers on the bulb. they tend to burn out faster in my experience.
I then installed the 2 wires onto the socket and then installed the socket into the light housing.
Did you find this story helpful?
Thanks for voting and helping fellow customers!
Broken turn trigger
Andrew - April 17, 2022
Tool Type
Snowblower
Difficulty
Medium
Time
30-60 minutes
Tools Used
Screwdriver, Socket set, Adjustable Wrench, Torx screwdriver
Parts Used
Removed broken trigger by releasing the tension cable.
Did you find this story helpful?
Thanks for voting and helping fellow customers!
I bumped and broke left side steering trigger
Richard - January 30, 2022
Tool Type
Snowblower
Difficulty
Easy
Time
Less than 15 minutes
Tools Used
Pliers
Parts Used
Very simple. Took longer to get my needle nose pliers out of the tool box than it did to replace the trigger.
Did you find this story helpful?
Thanks for voting and helping fellow customers!
Trigger broke
Dale - March 20, 2019
Tool Type
Snowblower
Difficulty
Easy
Time
Less than 15 minutes
Tools Used
Pliers
Parts Used
Removed pin
replaced trigger
installed pin
replaced trigger
installed pin
Did you find this story helpful?
Thanks for voting and helping fellow customers!
Trigger broke.
Thomas - January 1, 2019
Tool Type
Snowblower
Difficulty
Medium
Time
Less than 15 minutes
Tools Used
Socket set
Parts Used
I needed to remove the assembly for the power steering to get slack in the cable.I used a c clamp to relieve pressure on the cable.With the trigger installed I removed the clamp and reassembled with a few 10mm bolts.
Did you find this story helpful?
Thanks for voting and helping fellow customers!
Replace Snowblower Steering Controls
John - November 30, 2018
Tool Type
Snowblower
Difficulty
Easy
Time
15-30 minutes
Tools Used
Screwdriver, Pliers, Wrench Set
Parts Used
Between the video and the right parts from eReplacementParts.com this job was easy. Just took off the broken controls and replaced them with new ones and was done quickly.
Did you find this story helpful?
Thanks for voting and helping fellow customers!
Directional triggers were broke due to age.
Forrest - February 5, 2018
Tool Type
Snowblower
Difficulty
Easy
Time
Less than 15 minutes
Tools Used
Pliers
1. Use a needle nose pliers to remove the e-ring.
2. Pull the pin out of the trigger.
3. Pull the trigger towards the rear of the machine.
4. Hold the cable with the pliers.
5. While holding the cable with the pliers rotate the cable through the slot on the trigger.
6. Replace with the new trigger.
7. Slide the pin through the trigger.
8. Replace the e-ring.
Did you find this story helpful?
Thanks for voting and helping fellow customers!
Trigger broke needed replacement.
Gerald - January 12, 2017
Tool Type
Snowblower
Difficulty
Easy
Time
Less than 15 minutes
Tools Used
Pliers
Parts Used
Removed the e-ring and pin from the handle, which released the broken trigger
Removed the cable
Installed the cable into the new trigger
Mounted the trigger with the pin and e-ring
Removed the cable
Installed the cable into the new trigger
Mounted the trigger with the pin and e-ring
Did you find this story helpful?
Thanks for voting and helping fellow customers!
OEM stands for Original Equipment Manufacturer and means the part you’re buying is sourced directly from the manufacturer who made your product. At eReplacementParts, we sell only genuine OEM parts, guaranteeing the part you’re purchasing is of better design and of higher quality than aftermarket parts.
Our product descriptions are a combination of data sourced directly from the manufacturers who made your product as well as content researched and curated by our content & customer service teams. This content is edited and reviewed internally before being made public to customers.
Our customer service team are at the ready daily to answer your part and product questions. We have a dedicated staff with decades of collective experience in helping customers just like you purchase parts to repair their products.
All our part reviews are solicited directly from other customers who have purchased this exact part. While we moderate these reviews for profanity, offensive language or personally identifiable information, these reviews are posted exactly as submitted and no alterations are made by our team.
All our customer repair instructions are solicited directly from other customers just like you who have purchased and replaced this exact part. While we moderate these reviews for profanity, offensive language or personally identifiable information, these reviews are posted exactly as submitted and no alterations are made by our team.
Based on data from past customer purchasing behaviors, these parts are most commonly purchased together along with the part you are viewing. These parts may be necessary or helpful to replace to complete your current repair.
All our installation videos are created and produced in collaboration with our in-house repair technician, Mark Sodja, who has helped millions of eReplacementParts customers over the last 13 years repair their products. Mark has years of experience in selling and repairing both commercial and residential products with a specialty in gas-powered equipment.
This data is collected from customers who submitted a repair instruction after replacing this exact part. Customers can rate how easy the repair was to complete and how long it took. We aggregate this data to provide a repair rating that allows customers to quickly determine the difficulty and time needed to perform their own repair.