


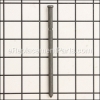
This is a genuine OEM sourced replacement part which is specially designed for use with Craftsman lawn mowers. It is a special spring for the clipping deflector, please make sure to refer to the appropriate diagrams of your model for the correct location and application of this hardware. Keep in mind this high-quality item is made of durable metal and is sold individually.
Spring, Hinge 532408585
OEM part for: Weed Eater
Part Number: 532408585
$18.68
In Stock
Jump To:
Frequently Purchased Together ?
Compatibility
This Spring, Hinge will fit the following 194 machines. Confirm this part works with your model, and view the detailed model diagrams and repair help we have to offer.
Weed Eater
Show More Compatible ModelsThis item works with the following types of products:
- Lawn Mower Parts
This part replaces obsolete part #: 408585, 160832, 193436
Questions & Answers ?
Our customer Service team is at the ready daily to answer your part and product questions.

Ask our Team
We have a dedicated staff with decades of collective experience in helping customers just like you purchase parts to repair their products.
Does this fit my product?Questions & Answers for Spring, Hinge
No questions have been asked yet
Customer Repair Instructions ?
All our customer repair instructions are solicited directly from other customers just like you who have purchased and replaced this exact part.
Was given 1998 Craftsman mower missing mulch plug and spring for grass discharge. Pivot pin was wired in place.
David - January 8, 2021
Tool Type
Lawn Mower
Difficulty
Easy
Time
Less than 15 minutes
Tools Used
Pliers
Removed pin, wire brushed and primer painted. Installed mulch, pin, spring and chute assembly. Decal was installed as safety warning, to replace damaged one, in case mower was borrowed.
Did you find this story helpful?
Thanks for voting and helping fellow customers!
Salvaged mower missing discharge chute and all hardware.
Aaron - November 28, 2020
Tool Type
Lawn Mower
Difficulty
Medium
Time
Less than 15 minutes
Tools Used
, hammer
*Not listed in parts is discharge chute. This is required*
1. Remove any existing hardware.
2. Insert spring in discharge chute. (use photo of craftsman/weed eater mower for reference if mower does not have existing hardware.
3. place chute w/spring over mower discharge area.
carefully insert pin. Gently tap with hammer if necessary.
4. Insert mulching plate if desired.
Did you find this story helpful?
Thanks for voting and helping fellow customers!
Worn blade, missing mulcher plate and spring hinge
Michael - September 25, 2020
Tool Type
Lawn Mower
Difficulty
Easy
Time
15-30 minutes
Tools Used
Pliers, Socket set
Made sure the blade was the correct replacement for the mower. It was a perfect fit! Touched up the new blade to sharpen the edge with a hand file. Removed the old blade with a socket wrench and replaced with the new one.
Pulled the hinge pin out with a pliers. Positioned the hinge spring and mulch plate prior to insertion of the hinge pin. Pushed the hinge pin in.
Job done!
eReplacements always sends the right parts for the job at hand. Thanks.
Pulled the hinge pin out with a pliers. Positioned the hinge spring and mulch plate prior to insertion of the hinge pin. Pushed the hinge pin in.
Job done!
eReplacements always sends the right parts for the job at hand. Thanks.
Did you find this story helpful?
Thanks for voting and helping fellow customers!
The chute came off lost spring
Michelle - September 25, 2017
Tool Type
Lawn Mower
Difficulty
Easy
Time
Less than 15 minutes
Tools Used
Parts Used
Put chute on feed screw thru eyelets and spring fixed
Did you find this story helpful?
Thanks for voting and helping fellow customers!
Discharge,rod & spring missing
Sammy - October 7, 2018
👍 0 of 1 people found this instruction helpful
Tool Type
Lawn Mower
Difficulty
Easy
Time
Less than 15 minutes
Tools Used
Pliers
A set of instructions on how to set the spring would have been nice, but with some trial and error I worked it out.
Did you find this story helpful?
Thanks for voting and helping fellow customers!
Lawn mower discharge guard broke and lost parts
Patty - September 6, 2018
👍 0 of 1 people found this instruction helpful
Tool Type
Lawn Mower
Difficulty
Medium
Time
Less than 15 minutes
Tools Used
, None
1. Put spring with discharge guard.
2. Line up discharge guard and spring with holes on side of lawn mower.
3. Slide pin through the holes on discharge guard as well as lawn mower in order to attach it.
4. Be sure that the spring is positioned to allow discharge guard to lay close to lawn mower and have tension when lifting it up. (It should not be easily lifted.)
5. Attach cotter hairpin clip to secure all the pieces. (I did not purchase this item.)
This was fairly easy to put together. Knowing how to line up the spring was slightly difficult but everything else was easy.
Did you find this story helpful?
Thanks for voting and helping fellow customers!
Hinge rod was lost and the discharge guard was detached from the mower
Chris - July 20, 2018
👍 0 of 1 people found this instruction helpful
Tool Type
Lawn Mower
Difficulty
Easy
Time
Less than 15 minutes
Tools Used
, Hands only
Inserted hinge rod through the eyelets on the mower and the guard eyelet the depressed the spring hinge which holds the guard in place and allows the shoot to open for dislodging debris or clumped grass. There were no instructions provided on how to assemble but it was not hard to figure out
Did you find this story helpful?
Thanks for voting and helping fellow customers!
Pin and spring came off and got lost while mowing the undergrowth.
James - June 18, 2018
👍 0 of 1 people found this instruction helpful
Tool Type
Lawn Mower
Difficulty
Easy
Time
Less than 15 minutes
Tools Used
, No tools needed
Parts Used
Easy repair, took the spring and aligned it with the out shoot cover. Then placed the out shoot cover back in place making sure the spring was aligned and cleared of the mower aligning holes. Lastly slide the pin through until it's locked in place.
Did you find this story helpful?
Thanks for voting and helping fellow customers!
Discharge plate and muncher plate cracked and broke off of lawnmower
Leslie - May 7, 2018
👍 0 of 1 people found this instruction helpful
Tool Type
Lawn Mower
Difficulty
Easy
Time
15-30 minutes
Tools Used
, No tools needed
1. Placed closeout clip into slot
2. Put spring on hinge rod
3 Threaded rod through holes on lawnmower housing
4. Snapped discharge guard and mulched plate on rod.
5. Adjusted hinge spring
2. Put spring on hinge rod
3 Threaded rod through holes on lawnmower housing
4. Snapped discharge guard and mulched plate on rod.
5. Adjusted hinge spring
Did you find this story helpful?
Thanks for voting and helping fellow customers!
Hinge rod dropped off and spring hinge was lost. Could not find mulcher plate. Rear skirt was worn.
Robert - November 23, 2017
👍 0 of 1 people found this instruction helpful
Tool Type
Lawn Mower
Difficulty
Easy
Time
Less than 15 minutes
Tools Used
Socket set
Replaced spring hinge and hinge rod. Installed mulcher plate. Replaced worn rear skirt by loosening metal holders and installing new skirt and re-clamping the metal holders.
Did you find this story helpful?
Thanks for voting and helping fellow customers!
OEM stands for Original Equipment Manufacturer and means the part you’re buying is sourced directly from the manufacturer who made your product. At eReplacementParts, we sell only genuine OEM parts, guaranteeing the part you’re purchasing is of better design and of higher quality than aftermarket parts.
Our product descriptions are a combination of data sourced directly from the manufacturers who made your product as well as content researched and curated by our content & customer service teams. This content is edited and reviewed internally before being made public to customers.
Our customer service team are at the ready daily to answer your part and product questions. We have a dedicated staff with decades of collective experience in helping customers just like you purchase parts to repair their products.
All our part reviews are solicited directly from other customers who have purchased this exact part. While we moderate these reviews for profanity, offensive language or personally identifiable information, these reviews are posted exactly as submitted and no alterations are made by our team.
All our customer repair instructions are solicited directly from other customers just like you who have purchased and replaced this exact part. While we moderate these reviews for profanity, offensive language or personally identifiable information, these reviews are posted exactly as submitted and no alterations are made by our team.
Based on data from past customer purchasing behaviors, these parts are most commonly purchased together along with the part you are viewing. These parts may be necessary or helpful to replace to complete your current repair.
All our installation videos are created and produced in collaboration with our in-house repair technician, Mark Sodja, who has helped millions of eReplacementParts customers over the last 13 years repair their products. Mark has years of experience in selling and repairing both commercial and residential products with a specialty in gas-powered equipment.
This data is collected from customers who submitted a repair instruction after replacing this exact part. Customers can rate how easy the repair was to complete and how long it took. We aggregate this data to provide a repair rating that allows customers to quickly determine the difficulty and time needed to perform their own repair.