

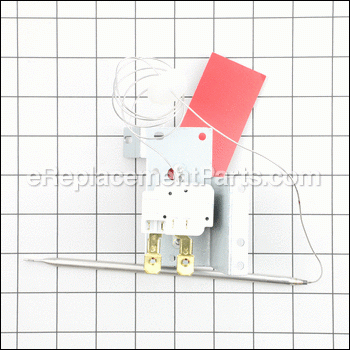

Kit, Thermo-rshaw 202f Tnd 28319.0000
OEM part for: BUNN
Part Number: 28319.0000
$91.42
Usually ships in 7 - 12 business days
7 - 12 business days
Jump To:
Frequently Purchased Together ?

Compatibility
This Kit, Thermo-rshaw 202f Tnd will fit the following 19 machines. Confirm this part works with your model, and view the detailed model diagrams and repair help we have to offer.
This item works with the following types of products:
- Coffee Maker Parts
Questions & Answers ?
Our customer Service team is at the ready daily to answer your part and product questions.

Ask our Team
We have a dedicated staff with decades of collective experience in helping customers just like you purchase parts to repair their products.
Does this fit my product?Questions & Answers for Kit, Thermo-rshaw 202f Tnd
My thermostat part number on my old one is 04227-0001. Will this new one work?
Charles
asked on 2022-10-11
Hello Charles, thank you for contacting us. In order for us to locate the correct parts and repair information we will require the model number of the appliance. Once you have located the model number please feel free to resubmit the question and we will be happy to help you. We are looking forward to hearing from you!
eReplacementParts Team October 11, 2022
Customer Repair Instructions ?
All our customer repair instructions are solicited directly from other customers just like you who have purchased and replaced this exact part.
Old thermostat was failed open
Wayne - December 5, 2018
👍 4 of 4 people found this instruction helpful
Tool Type
Coffee Maker
Difficulty
Easy
Time
15-30 minutes
Tools Used
Screwdriver, Wrench Set
1. Unplug coffee maker from power source.
2. Remove front cover.
3. Remove top cover, unplug warmer connectiion and set top aside.
4. Remove tank inlet tray to provide access to top of water tank.
5. Pull thermostat bulb and silicone seal from the top of the water tank.
6. Behind front cover, disconnect two electrical leads from the thermostat.
7. Remove two mounting screws from thermostat mounting bracket.
8. Guide old thermostat bulb through case and remove old thermostat.
9. Feed new thermostat bulb through case and submerse into the water tank, put silicone seal in place.
10. Mount new thermostat and secure screws.
11. Reconnect electrical leads to the thermostat.
12. Replace tank inlet gasket and reinstall the tank inlet tray.
13. Reconnect the top warmer connections and reinstall top,
14. Replace front cover.
15. Plug it in and try it out. (I did the try it out before I put it all back together just in case there was another problem. I was also able to see there was no leak between the inlet tray and the tank.)
Did you find this story helpful?
Thanks for voting and helping fellow customers!
Over heating water
David - February 9, 2018
👍 2 of 2 people found this instruction helpful
Tool Type
Coffee Maker
Difficulty
Easy
Time
15-30 minutes
Tools Used
Screwdriver, Wrench Set, Adjustable Wrench
1 Removed upper cover/ warming plate.
2 Removed water pan
3 Unplugged switch wires to thermostat
4 Unscrewed two thermostat retaining screws
5 Replaced thermostat with new one in a reverse manner from above.
6 Removed two wires from limit switch, and carefully removed switch and replaced with new one. Re-hooked new one
7 Replaced water pan and upper cover
8 Tested unit
Did you find this story helpful?
Thanks for voting and helping fellow customers!
tank inlet gasket & thermostat replacement
James - December 28, 2018
👍 1 of 1 people found this instruction helpful
Tool Type
Coffee Maker
Difficulty
Easy
Time
30-60 minutes
Tools Used
Screwdriver
Remove old parts and inserted new parts
Did you find this story helpful?
Thanks for voting and helping fellow customers!
Coffee maker heats too much. Boils out the top of the reservoir.
Charles - February 21, 2023
Tool Type
Coffee Maker
Difficulty
Medium
Time
30-60 minutes
Tools Used
Screwdriver, Pliers
1. unplug unit from power source.
2. remove the top. Unscrew to small screws at either end.
3. remove the water pan by unscrewing the drain nut in the center of the pan.
4. with pliers, remove the two wires from the thermal limit switch on top of the water canister.
5. remove the thermal limit switch by lifting up on the spring clip that holds it in place.
6. connect wires to new thermal limit switch and put in place under spring clip.
7. pull off the knob of the thermostat switch; remove from the bracket by unscrewing two screws.
8. with pliers remove the wire lugs from the thermostat switch; pull the thermocouple out of the water canister.
9. connect wire lugs to new thermostat switch; attach to the bracket; press on the knob; feed thermocouple into the water canister, suspending it with the new silicone seal; adjust thermostat setting with knob.
10. replace water pan and top cover; fill water canister until it comes out of the spout before plugging in to test.
Did you find this story helpful?
Thanks for voting and helping fellow customers!
OEM stands for Original Equipment Manufacturer and means the part you’re buying is sourced directly from the manufacturer who made your product. At eReplacementParts, we sell only genuine OEM parts, guaranteeing the part you’re purchasing is of better design and of higher quality than aftermarket parts.
Our product descriptions are a combination of data sourced directly from the manufacturers who made your product as well as content researched and curated by our content & customer service teams. This content is edited and reviewed internally before being made public to customers.
Our customer service team are at the ready daily to answer your part and product questions. We have a dedicated staff with decades of collective experience in helping customers just like you purchase parts to repair their products.
All our part reviews are solicited directly from other customers who have purchased this exact part. While we moderate these reviews for profanity, offensive language or personally identifiable information, these reviews are posted exactly as submitted and no alterations are made by our team.
All our customer repair instructions are solicited directly from other customers just like you who have purchased and replaced this exact part. While we moderate these reviews for profanity, offensive language or personally identifiable information, these reviews are posted exactly as submitted and no alterations are made by our team.
Based on data from past customer purchasing behaviors, these parts are most commonly purchased together along with the part you are viewing. These parts may be necessary or helpful to replace to complete your current repair.
All our installation videos are created and produced in collaboration with our in-house repair technician, Mark Sodja, who has helped millions of eReplacementParts customers over the last 13 years repair their products. Mark has years of experience in selling and repairing both commercial and residential products with a specialty in gas-powered equipment.
This data is collected from customers who submitted a repair instruction after replacing this exact part. Customers can rate how easy the repair was to complete and how long it took. We aggregate this data to provide a repair rating that allows customers to quickly determine the difficulty and time needed to perform their own repair.