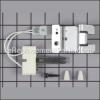
This is an authentic OEM part for use with Whirlpool Dryers. The Thermal fuse shuts off the heating element when the dryer overheats. The two most common reasons for replacing the thermal fuse are when the dryer doesn't heat or won’t start. This part is sold individually. The tools that you will need to replace the thermal fuse are a hex socket, flat head screwdriver, Phillips head screwdriver and a putty knife. We recommend checking to make sure all of the vents are clear when you perform this repair.
Dryer Thermal Fuse WP3392519
OEM part for: Whirlpool
Part Number: WP3392519
Jump To:
Frequently Purchased Together ?
Compatibility
This Dryer Thermal Fuse will fit the following 4535 machines. Confirm this part works with your model, and view the detailed model diagrams and repair help we have to offer.
Whirlpool
Show More Compatible ModelsThis item works with the following types of products:
- Dryer Parts
This part replaces obsolete part #: 694511, 3392519
Repair Videos ?
Questions & Answers ?
Our customer Service team is at the ready daily to answer your part and product questions.

Ask our Team
We have a dedicated staff with decades of collective experience in helping customers just like you purchase parts to repair their products.
Does this fit my product?Questions & Answers for Dryer Thermal Fuse
Customer Repair Instructions ?
All our customer repair instructions are solicited directly from other customers just like you who have purchased and replaced this exact part.
Would not come on at all.
Tool Type
Dryer
Difficulty
Easy
Time
15-30 minutes
Tools Used
Screwdriver, Nutdriver
Parts Used
2. Removed rear panel of dryer.
3. Located and removed the original thermal fuse.
4. Installed the new fuse.
5. Unplugged the two wires on original fuse and plugged them onto the new fuse.
6. Being very careful, reconnected power cord to test only.
7. Turned dryer on, worked perfectly.
8. Unplugged power, reinstalled rear cover.
9. Reconnected power, positioned dryer. Job Completed!
Dryer would not heat up
Tool Type
Dryer
Difficulty
Easy
Time
Less than 15 minutes
Tools Used
Screwdriver
Parts Used
Thermal fuse, therms cut off, thermostat
Tool Type
Dryer
Difficulty
Medium
Time
1-2 hours
Tools Used
Socket set, Wrench Set, Nutdriver
Parts Used
Dryer would not run
Tool Type
Dryer
Difficulty
Easy
Time
Less than 15 minutes
Tools Used
Socket set
Parts Used
The thermal fuse ceased to function and prevented the dryer from heating.
Tool Type
Dryer
Difficulty
Easy
Time
Less than 15 minutes
Tools Used
Screwdriver, multimeter
Parts Used
2.disconnected the dryer vent and pulled the dryer out far enough to change the fuse.
3. Replaced the back panel and the vent hose and moved the dryer back to its position against the wall.
4.turned it on and voila! Easy repair.
Dryer would not heat
Tool Type
Washer
Difficulty
Easy
Time
15-30 minutes
Tools Used
Screwdriver, Nutdriver
Parts Used
2. Removed the lower front panel of the dryer
3. Located the thermal fuse and replaced it.
Not Heating
Tool Type
Dryer
Difficulty
Easy
Time
Less than 15 minutes
Tools Used
Nutdriver, Multimeter
Parts Used
OEM stands for Original Equipment Manufacturer and means the part you’re buying is sourced directly from the manufacturer who made your product. At eReplacementParts, we sell only genuine OEM parts, guaranteeing the part you’re purchasing is of better design and of higher quality than aftermarket parts.
Our product descriptions are a combination of data sourced directly from the manufacturers who made your product as well as content researched and curated by our content & customer service teams. This content is edited and reviewed internally before being made public to customers.
Our customer service team are at the ready daily to answer your part and product questions. We have a dedicated staff with decades of collective experience in helping customers just like you purchase parts to repair their products.
All our part reviews are solicited directly from other customers who have purchased this exact part. While we moderate these reviews for profanity, offensive language or personally identifiable information, these reviews are posted exactly as submitted and no alterations are made by our team.
All our customer repair instructions are solicited directly from other customers just like you who have purchased and replaced this exact part. While we moderate these reviews for profanity, offensive language or personally identifiable information, these reviews are posted exactly as submitted and no alterations are made by our team.
Based on data from past customer purchasing behaviors, these parts are most commonly purchased together along with the part you are viewing. These parts may be necessary or helpful to replace to complete your current repair.
All our installation videos are created and produced in collaboration with our in-house repair technician, Mark Sodja, who has helped millions of eReplacementParts customers over the last 13 years repair their products. Mark has years of experience in selling and repairing both commercial and residential products with a specialty in gas-powered equipment.
This data is collected from customers who submitted a repair instruction after replacing this exact part. Customers can rate how easy the repair was to complete and how long it took. We aggregate this data to provide a repair rating that allows customers to quickly determine the difficulty and time needed to perform their own repair.


