


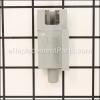
This is an authentic OEM part for use with Craftsman Lawn Tractors. The interlock switch disables the ignition system if it detects the lawn tractor is started or running in unsafe operating conditions. This part is sold individually. The most common reasons for replacing the clutch interlock switch are when the mower won’t start or starts when the brake is not depressed. The tool needed to replace the seat switch plunger is a ½ inch socket.
Switch, Snapmount, Nc 532421062
OEM part for: Husqvarna, Poulan
Part Number: 532421062
$11.20
Usually ships in 7 - 12 business days
7 - 12 business days
Jump To:
Frequently Purchased Together ?


Compatibility
This Switch, Snapmount, Nc will fit the following 2689 machines. Confirm this part works with your model, and view the detailed model diagrams and repair help we have to offer.
Poulan
Show More Compatible ModelsThis item works with the following types of products:
- Lawn Tractor Parts
This part replaces obsolete part #: 5391197-41, 539119741, 532121305, 121305X
Customer Part Reviews ?
Average Rating (out of 5):
Click to filter by ratings:
5 stars
2
4 stars
0
3 stars
0
2 stars
0
1 stars
0
< PREV
- 1
worked great
this is easy to install just lift up the mower seat and 5 min later you're done.
Eckbert -
March 19, 2022
Verified Purchase
Fixed in minutes
After having my riding mower for more than a decade the seat safety switch went bad I quickly received my new seat switch installed it in no time and was back to the business of mowing
Guest -
October 15, 2021
Verified Purchase
Questions & Answers ?
Our customer Service team is at the ready daily to answer your part and product questions.

Ask our Team
We have a dedicated staff with decades of collective experience in helping customers just like you purchase parts to repair their products.
Does this fit my product?Questions & Answers for Switch, Snapmount, Nc
No questions have been asked yet
Customer Repair Instructions ?
All our customer repair instructions are solicited directly from other customers just like you who have purchased and replaced this exact part.
Lawn mower would not start; blades were inoperative, mower deck in bad shape
george - February 14, 2021
👍 2 of 3 people found this instruction helpful
Tool Type
Lawn Tractor
Difficulty
Hard
Time
More than 2 hours
Tools Used
Screwdriver, Pliers, Socket set, Wrench Set, Adjustable Wrench, Welding machine, sand blaster
Parts Used
1. Replaced both coils and charged up battery.
2. Belts dry rotted; replace belts
3. Safety switches inoperative; bypassed to start machine
4. Deck in bad shape; needs sand blasting and welding, painting afterward
5. Replaced all blades, most were bent, pulleys all rusted, sand papered.
6. Reassembled all parts and tested lawn mower.
7. The deck was difficult to reassemble and remount on bottom of mower, no special tools required.
Did you find this story helpful?
Thanks for voting and helping fellow customers!
Want. Start
buford - September 26, 2020
👍 1 of 1 people found this instruction helpful
Tool Type
Lawn Tractor
Difficulty
Easy
Time
30-60 minutes
Tools Used
Wrench Set
Parts Used
Took the old one off . Put the new one on
Did you find this story helpful?
Thanks for voting and helping fellow customers!
Engine would not shut off after replacing magnetos/coils and diode engine kill device
Rocky - August 19, 2020
Tool Type
Lawn Tractor
Difficulty
Easy
Time
Less than 15 minutes
Tools Used
Pliers, Socket set, Wrench Set
To be really safe, disconnect the negative side of the battery from the black wire.
1. For ignition switch remove the battery if it makes it easier to grab the harness plugged into the switch.
2. Remove the wire harness plug from the old switch. Be careful not to break the retaining parts of the wire harness while releasing it from the ignition switch.
2. Squeeze the retaining clips on the switch so you can remove it out of the dash board. Use pump pliers if it helps to squeeae the retainers.
3. If the wires will reach, bring them through the hole in the dash and plug the harness back in to the new switch before you push the it back into the hole on the dash. Otherwise, just plus in the harness after installing the new switch in the dash.
Seat safety switch.
1. Lift up the seat.
2. Disconnect the plugged in wires from the plunger switch. Be careful not to break off the retaining parts of the wire plug.
3. Remove nuts an bolts that are retaining the switch mounting plate under the seat. Pay attention to how the seat springs are installed so you can put them back in right. You may not have to take them all out to get enough access to remove the switch.
4. Squeeze the retaining clips on opposite sides of the switch. Pump pliers can help here if you need more power to let the switch pass through the plate it is mounted in.
5. Remove the switch and install the new one.
6. Remount the plate under the seat with the new switch installed.
7. Plug in the wire harness.
Note: This did not fix the problem, just gave me two new switches. To fix the problem I had to install a simple toggle switch to ground the wire from the engine kill diode to the engine. I never could see how the diode actually killed the engine under the old orginal wiring. I installed the diode and the coils exactly like the old one had been. It is still a mystery to me but the engine runs great and now I can shut it off. I just switch the ground off to start and run the engine. Another problem may have been a poorly reinstalled safety switch under the PTO clutch after I took it off to check it for continuity.
Did you find this story helpful?
Thanks for voting and helping fellow customers!
Would not turn over, damaged mower deck
Anthony - June 19, 2020
Tool Type
Lawn Tractor
Difficulty
Medium
Time
More than 2 hours
Tools Used
Screwdriver, Pliers, Power Drill, Socket set, Wrench Set, Nutdriver, Multimeter, pop riveter, drill press
1. Removed battery and disassembled tray.
2. Placed battery on footrest and reconnected.
3. Diagnosed starter system (see Sears video with Wayne).
4. Removed mower deck.
4. Removed brake interlock switch.
5. Ordered parts.
6. Fabricated patch and reattached mounting point on mower deck.
7. Installed interlock switch, and addition parts to overhaul.
8. Reinstalled mower deck, battery tray and battery.
Did you find this story helpful?
Thanks for voting and helping fellow customers!
Interlocking switch shorted and so did the seat switch
Al - April 9, 2020
Tool Type
Lawn Tractor
Difficulty
Easy
Time
30-60 minutes
Tools Used
Wrench Set
Pulled the interlocking switch and the seat switch and replaced it. Works great
Did you find this story helpful?
Thanks for voting and helping fellow customers!
Wore out
Mark - May 15, 2019
Tool Type
Lawn Tractor
Difficulty
Easy
Time
15-30 minutes
Tools Used
Socket set, Wrench Set
Parts Used
Plug in
Did you find this story helpful?
Thanks for voting and helping fellow customers!
OEM stands for Original Equipment Manufacturer and means the part you’re buying is sourced directly from the manufacturer who made your product. At eReplacementParts, we sell only genuine OEM parts, guaranteeing the part you’re purchasing is of better design and of higher quality than aftermarket parts.
Our product descriptions are a combination of data sourced directly from the manufacturers who made your product as well as content researched and curated by our content & customer service teams. This content is edited and reviewed internally before being made public to customers.
Our customer service team are at the ready daily to answer your part and product questions. We have a dedicated staff with decades of collective experience in helping customers just like you purchase parts to repair their products.
All our part reviews are solicited directly from other customers who have purchased this exact part. While we moderate these reviews for profanity, offensive language or personally identifiable information, these reviews are posted exactly as submitted and no alterations are made by our team.
All our customer repair instructions are solicited directly from other customers just like you who have purchased and replaced this exact part. While we moderate these reviews for profanity, offensive language or personally identifiable information, these reviews are posted exactly as submitted and no alterations are made by our team.
Based on data from past customer purchasing behaviors, these parts are most commonly purchased together along with the part you are viewing. These parts may be necessary or helpful to replace to complete your current repair.
All our installation videos are created and produced in collaboration with our in-house repair technician, Mark Sodja, who has helped millions of eReplacementParts customers over the last 13 years repair their products. Mark has years of experience in selling and repairing both commercial and residential products with a specialty in gas-powered equipment.
This data is collected from customers who submitted a repair instruction after replacing this exact part. Customers can rate how easy the repair was to complete and how long it took. We aggregate this data to provide a repair rating that allows customers to quickly determine the difficulty and time needed to perform their own repair.