


This switch and contact plate assembly, also known as a wiring harness, is sourced from the original manufacturer for use in blowers. The switch controls the flow of electricity to either start or stop the blower, and the contact plate allows for electrical connection. The assembly can fail due to short circuits, faulty wiring, damage, or normal aging. A faulty switch and contact plate will result in difficulties starting the blower, lack of speed control, and fluctuating power output. Begin the repair by disconnecting the blower from the power source. Remove the blower housing and switch cover to access the assembly. Take note/image of the wire connections for the installation later. Disconnect the wire connectors and carefully pull the faulty assembly out of the blower. Position the new switch and contact plate assembly in the equipment and reconnect the wire connectors to the appropriate terminals using your notes/image from earlier. Reassemble the equipment parts in reverse order.
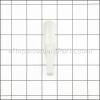
Switch & Contact Plate Assembl 291632001
OEM part for: Ryobi
Part Number: 291632001
Jump To:
Frequently Purchased Together ?


Compatibility
This Switch & Contact Plate Assembl will fit the following 4 machines. Confirm this part works with your model, and view the detailed model diagrams and repair help we have to offer.
Ryobi
This item works with the following types of products:
Customer Part Reviews ?
- 1
- 2
- 3
Questions & Answers ?
Our customer Service team is at the ready daily to answer your part and product questions.

Ask our Team
We have a dedicated staff with decades of collective experience in helping customers just like you purchase parts to repair their products.
Does this fit my product?Questions & Answers for Switch & Contact Plate Assembl
Customer Repair Instructions ?
All our customer repair instructions are solicited directly from other customers just like you who have purchased and replaced this exact part.
Switch did not function on my Ryobi blower cancel
Tool Type
Blower
Difficulty
Medium
Time
30-60 minutes
Tools Used
Pliers, Power Drill, Nutdriver, Spline drivers
Parts Used
Intermittent wouldn’t work, and no more speed adjustment
Tool Type
Blower
Difficulty
Easy
Time
15-30 minutes
Tools Used
Screwdriver, #15 torx driver
Parts Used
2. Removed side panel.
3. Took a picture of the routing of the wiring
4. Disconnected the wires at the motor connection, by simply pulling on the connector
5. Removed old switch and wiring
6. Place new switch in place.
7. Route wiring for motor connection
8. Connected motor to wiring using wire connectors (not provided)
9. Route wiring for battery connection
10. Reinstall side cover and screws
11. Test switch
Switch burned out on my ryobi leaf blower
Tool Type
Blower
Difficulty
Medium
Time
30-60 minutes
Tools Used
Screwdriver, Torqs driver
Parts Used
Disconnected wiring to motor
Removed old switch
Replaced with new switch and wiring
Reassembled
Blower motor and switch not work
Tool Type
Blower
Difficulty
Medium
Time
30-60 minutes
Tools Used
Screwdriver, Wrench Set
Blower stop working
Tool Type
Blower
Difficulty
Medium
Time
15-30 minutes
Tools Used
Power Drill, Wrench Set
Parts Used
Replace defective blower switch assembly
Tool Type
Blower
Difficulty
Medium
Time
15-30 minutes
Tools Used
Screwdriver, Wire strippers and wire nuts
Parts Used
2) Laid the blower on its left side and removed all the screws in the handle
3) Lifted the handle off straight up with a gentle pry on the discharge end of the handle where the upper handle section has a guide that inserts in the lower section.
4) Took a picture of the existing bad switch in place with wiring routing and battery terminal insert position.
5) Cut wires at crimps to motor leads and removed switch assembly and wiring
6) Stripped 1/2" off the motor leads,watched wire colors and installed small wire nuts
7) pushed wiring into guide locations and set switch in place as well as battery terminal contacts (be sure to get it in the correct polarity orientation, refer to your picture from above). Also be sure trigger is installed over pivot pin.
8) Re-assembled handle and guard
9) Test run blower
On switch needed replacement
Tool Type
Blower
Difficulty
Easy
Time
15-30 minutes
Tools Used
, T15 driver
Parts Used
Blower trigger worked intermittently
Tool Type
Blower
Difficulty
Medium
Time
30-60 minutes
Tools Used
Screwdriver, Soldering iron
Parts Used
Gently pried apart at split and removed housing half.
Took photos of wiring routing and switch.
Removed two crimped connectors and removed old switch.
Installed new switch following wire routing per photos.
Soldered wire ends together where crimped connectors were used. (Can use crimps instead)
Reinstalled housing half being careful not to pinch wires and reinstalled screws.
Switch was burned up.
Tool Type
Blower
Difficulty
Medium
Time
15-30 minutes
Tools Used
Screwdriver
Parts Used
Switch failure and replacement
Tool Type
Blower
Difficulty
Medium
Time
30-60 minutes
Tools Used
Screwdriver, Pliers, Wire Nuts
Parts Used
2. Removed old switch and wires.
3. Used small (yellow) wire nuts to connect wires where crimp connectors were used.
Replacement switch assembly is exactly the same as original, fits perfectly.
New switch works great.
OEM stands for Original Equipment Manufacturer and means the part you’re buying is sourced directly from the manufacturer who made your product. At eReplacementParts, we sell only genuine OEM parts, guaranteeing the part you’re purchasing is of better design and of higher quality than aftermarket parts.
Our product descriptions are a combination of data sourced directly from the manufacturers who made your product as well as content researched and curated by our content & customer service teams. This content is edited and reviewed internally before being made public to customers.
Our customer service team are at the ready daily to answer your part and product questions. We have a dedicated staff with decades of collective experience in helping customers just like you purchase parts to repair their products.
All our part reviews are solicited directly from other customers who have purchased this exact part. While we moderate these reviews for profanity, offensive language or personally identifiable information, these reviews are posted exactly as submitted and no alterations are made by our team.
All our customer repair instructions are solicited directly from other customers just like you who have purchased and replaced this exact part. While we moderate these reviews for profanity, offensive language or personally identifiable information, these reviews are posted exactly as submitted and no alterations are made by our team.
Based on data from past customer purchasing behaviors, these parts are most commonly purchased together along with the part you are viewing. These parts may be necessary or helpful to replace to complete your current repair.
All our installation videos are created and produced in collaboration with our in-house repair technician, Mark Sodja, who has helped millions of eReplacementParts customers over the last 13 years repair their products. Mark has years of experience in selling and repairing both commercial and residential products with a specialty in gas-powered equipment.
This data is collected from customers who submitted a repair instruction after replacing this exact part. Customers can rate how easy the repair was to complete and how long it took. We aggregate this data to provide a repair rating that allows customers to quickly determine the difficulty and time needed to perform their own repair.