


It is a genuine item that is supplied directly from the original equipment manufacturer for Husqvarna lawn mowers. This is a high-quality replacement for a missing or damaged tension spring that was installed on a new unit. Please make sure to check the appropriate diagrams of your model for the correct location and application of this hardware. Keep in mind this tension spring is made of durable metal and is sold individually.
Spring Tension 581351301
OEM part for: Husqvarna, Jonsered
Part Number: 581351301
$6.27
In Stock
Jump To:
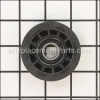
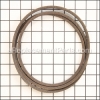
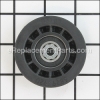
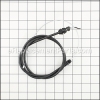
Frequently Purchased Together ?


Compatibility
This Spring Tension will fit the following 118 machines. Confirm this part works with your model, and view the detailed model diagrams and repair help we have to offer.
This item works with the following types of products:
- Lawn Mower Parts
Customer Part Reviews ?
Average Rating (out of 5):
Click to filter by ratings:
5 stars
5
4 stars
0
3 stars
0
2 stars
0
1 stars
0
< PREV
- 1
very easy repair , correct part
arrived on time
Guest -
January 3, 2023
Verified Purchase
Quick repair
Worked great! Thanks
Guest -
April 10, 2021
Verified Purchase
Easy Repair
Fast shipping , Lawn mower work's great again.
Guest -
May 18, 2020
Verified Purchase
Part was OEM quality.
Parts ordered @ a fair price, exact fit. Wish the belts for mower were carried. I've used e replacement parts for several machines around the house. Fair prices, exact fit & arrive on time.
Guest -
May 4, 2020
Verified Purchase
Working with eReplaccementParts has been great
Fantastic customer service and great products that fit the originals
Guest -
September 24, 2019
Verified Purchase
Questions & Answers ?
Our customer Service team is at the ready daily to answer your part and product questions.

Ask our Team
We have a dedicated staff with decades of collective experience in helping customers just like you purchase parts to repair their products.
Does this fit my product?Questions & Answers for Spring Tension
No questions have been asked yet
Customer Repair Instructions ?
All our customer repair instructions are solicited directly from other customers just like you who have purchased and replaced this exact part.
Drive control Cable, belt and tension spring replacement
Paul - August 21, 2017
👍 4 of 6 people found this instruction helpful
Tool Type
Lawn Mower
Difficulty
Easy
Time
1-2 hours
Tools Used
Screwdriver, Pliers, Socket set, Wrench Set, Nutdriver, Springhook, putty knife, torque wrench
Parts Used
NOTE: I include changing the drive cable and belt, cleaning the mower deck and changing engine oil in the process. Printing out the parts diagrams, and taking pictures when disassembling will help you if you forget how stuff goes together.
Supplies: Owners manual for reference, oil, fuel, shop rags, wood block for blade removal, lithium grease for anchor points of tension spring and cable ends. I greased the whole spring to ward off corrosion.
1) Remove spark plug.
2) Drain fuel and oil from engine. See owners manual
3) Tilt mower on its side, remove mower blade and parts that come off with it..
4) Remove belt cover, rear baffle. The two side screws for the baffle can be removed and replaced easier if the rear wheels are removed.
5) Clean under mower deck, rear baffle and belt cover as needed. Replace belt if worn or frayed.
6) Remove screws from control, remove upper end of drive control cable.
7) Remove lower end of drive control cable from mower housing using pliers to squeeze retainers under the housing, simultaneously pulling up.on the cable with pliers.
8) Install cable end in control, reassemble control onto handle.
9) Install cable end on transmission under mower housing.
10) Replace belt housing and rear baffle.
11) Use spring hook to install tension spring on transmission and baffle.
12) Replace blade and parts, torque bolt to specs.(35-40 ft.lbs, See owners manual).
12) Replace rear wheels.
13) ADD FRESH OIL TO THE ENGINE BEFORE STARTING!(see owners manual for specs)
14) Add fuel.
15 Replace spark plug wire.
16) Start mower, adjust drive cable per owners manual.
17) Happy mowing.
Did you find this story helpful?
Thanks for voting and helping fellow customers!
Would not self-propel
Dan - March 18, 2024
Tool Type
Lawn Mower
Difficulty
Medium
Time
1-2 hours
Tools Used
Screwdriver, Pliers, Socket set, Wrench Set, Large Screw driver and a leaf blower
Parts Used
1. Followed the instructions and repair hints from previous customers. Very useful.
2. Used a large screw driver and leaf blower to remove accumulated grass particles.
3. The belt part xxx609 fit perfectly.
4. I decided that the idler wheel needed replacement. Ordered it and a new tension spring. on a separate order. All orders arrived quickly.
5. Fun project for kids and grandkids to help.
Did you find this story helpful?
Thanks for voting and helping fellow customers!
The tension spring on the rear drive gear box needed replacing.
Edward - March 1, 2023
Tool Type
Lawn Mower
Difficulty
Medium
Time
15-30 minutes
Tools Used
Pliers
Parts Used
1. Removed the old stretched out spring.
2. Used needle nose pliers to install one end of new tension spring into slot hole on drive gear box.
3. Used needle nose pliers to install other end of new tension spring into spring hole slot on rear plastic shroud under deck of mower.
4. Checked the new spring for how well it functioned.
5 The new spring seemed to disengage the rear drive gear box properly.
Did you find this story helpful?
Thanks for voting and helping fellow customers!
Would not move ams it is all wheel drive.
James - July 28, 2021
Tool Type
Lawn Mower
Difficulty
Medium
Time
1-2 hours
Tools Used
Screwdriver, Socket set, Wrench Set
Replaced all idler pulleys, drive belt, drive cable and return spring. Found that it didn’t fix the problem. Ultimately it turned out to be a mfg defect; the drive cable was too long. Tied a knot in the cable near the engagement lever and now it works well.
Did you find this story helpful?
Thanks for voting and helping fellow customers!
Drive belt worn out, trans cable worn and clutch cable worn.
Pedro - November 12, 2020
Tool Type
Lawn Mower
Difficulty
Hard
Time
More than 2 hours
Tools Used
Pliers, Socket set, Wrench Set
Removed cover, blade, center pulley, rear tires, dropped transmission to remove clutch belt, removed screws on rear pulley guard to be able to remove belt. Removed and replaced clutch and throttle springs.
Did you find this story helpful?
Thanks for voting and helping fellow customers!
Belt stretch bad as well as worn pulley
Charles - June 5, 2023
👍 0 of 1 people found this instruction helpful
Tool Type
Lawn Mower
Difficulty
Hard
Time
1-2 hours
Tools Used
Pliers, Socket set, Wrench Set
Had to custom make wrench to remove front belt cover. Had to custom adjust pulley cable to tighten belt properly.
Did you find this story helpful?
Thanks for voting and helping fellow customers!
Needed a tuneup and better traction
PAUL - April 26, 2021
👍 0 of 1 people found this instruction helpful
Tool Type
Lawn Mower
Difficulty
Easy
Time
30-60 minutes
Tools Used
Screwdriver, Socket set, Wrench Set
Replaced wheels
Replaced belt
Replaced spring
Replaced blade
Replaced belt
Replaced spring
Replaced blade
Did you find this story helpful?
Thanks for voting and helping fellow customers!
OEM stands for Original Equipment Manufacturer and means the part you’re buying is sourced directly from the manufacturer who made your product. At eReplacementParts, we sell only genuine OEM parts, guaranteeing the part you’re purchasing is of better design and of higher quality than aftermarket parts.
Our product descriptions are a combination of data sourced directly from the manufacturers who made your product as well as content researched and curated by our content & customer service teams. This content is edited and reviewed internally before being made public to customers.
Our customer service team are at the ready daily to answer your part and product questions. We have a dedicated staff with decades of collective experience in helping customers just like you purchase parts to repair their products.
All our part reviews are solicited directly from other customers who have purchased this exact part. While we moderate these reviews for profanity, offensive language or personally identifiable information, these reviews are posted exactly as submitted and no alterations are made by our team.
All our customer repair instructions are solicited directly from other customers just like you who have purchased and replaced this exact part. While we moderate these reviews for profanity, offensive language or personally identifiable information, these reviews are posted exactly as submitted and no alterations are made by our team.
Based on data from past customer purchasing behaviors, these parts are most commonly purchased together along with the part you are viewing. These parts may be necessary or helpful to replace to complete your current repair.
All our installation videos are created and produced in collaboration with our in-house repair technician, Mark Sodja, who has helped millions of eReplacementParts customers over the last 13 years repair their products. Mark has years of experience in selling and repairing both commercial and residential products with a specialty in gas-powered equipment.
This data is collected from customers who submitted a repair instruction after replacing this exact part. Customers can rate how easy the repair was to complete and how long it took. We aggregate this data to provide a repair rating that allows customers to quickly determine the difficulty and time needed to perform their own repair.