


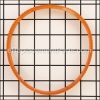
The metal spring connects to the idler shaft and is a genuine item that is supplied directly from the original manufacturer for use with planers made by DeWALT. This part is priced as an individual replacement part. It may become broken and will need to be replaced. A set of pliers and a wrench may be necessary during the replacement of this spring.
Spring 5140011-04
OEM part for: DeWALT
Part Number: 5140011-04
$5.19
In Stock
Jump To:
Frequently Purchased Together ?


Compatibility
This Spring will fit the following 6 machines. Confirm this part works with your model, and view the detailed model diagrams and repair help we have to offer.
DeWALT
This item works with the following types of products:
- Planer Parts
Customer Part Reviews ?
Average Rating (out of 5):
Click to filter by ratings:
5 stars
1
4 stars
1
3 stars
0
2 stars
0
1 stars
0
< PREV
- 1
had the parts I needed
good price for proprietary replacement parts and they shipped it out quickly
Guest -
June 1, 2021
Verified Purchase
Did not get parts on time
I was not at home when the part’s came in
Jerry -
July 11, 2022
Verified Purchase
Questions & Answers ?
Our customer Service team is at the ready daily to answer your part and product questions.

Ask our Team
We have a dedicated staff with decades of collective experience in helping customers just like you purchase parts to repair their products.
Does this fit my product?Questions & Answers for Spring
No questions have been asked yet
Customer Repair Instructions ?
All our customer repair instructions are solicited directly from other customers just like you who have purchased and replaced this exact part.
Rear roller shaft on planet broke
Brian - March 15, 2022
Tool Type
Planer
Difficulty
Medium
Time
30-60 minutes
Tools Used
Screwdriver, Pliers, Snap ring plyers
Parts Used
There were 2 retainer brackets that held the roller in place. I removed these brackets snd the the shaft was able to be removed. Very easy repair.
Did you find this story helpful?
Thanks for voting and helping fellow customers!
Planer blades not spinning
John - January 26, 2020
Tool Type
Planer
Difficulty
Medium
Time
30-60 minutes
Tools Used
Screwdriver, Allen wrench
Parts Used
Took off side covers, removed shredded belt, took off drive chain and chain tensioner, remove driven, the left one, pulley. The hard part was getting the belt onto the pulleys. Put the belt on both pulleys, the left one still off of its shaft. Put a #2 philips thru the center hole of the pulley, insert it’s tip into the hole at the end of the shaft that the pulley slips onto, and pry to stretch the belt. Youtube has several other methods, but this is the one that worked for me.
Did you find this story helpful?
Thanks for voting and helping fellow customers!
Spring was stretched
William - May 26, 2018
Tool Type
Planer
Difficulty
Easy
Time
Less than 15 minutes
Tools Used
Screwdriver, Pliers
Parts Used
Removed cover an replaced the spring
Did you find this story helpful?
Thanks for voting and helping fellow customers!
Feed rollers not feeding - broken sprocket and springs
Sarah - April 26, 2018
Tool Type
Planer
Difficulty
Easy
Time
30-60 minutes
Tools Used
Screwdriver, Pliers, Planer key, snap ring pliers, phillips screwdriver
DW735 planer not feeding
Parts used:
one new feed roller sprocket (5140010-81),
one new retaining ring (5140010-80), (order two in case one pops off the snap ring plier)
two new springs (5140011-04).
Suggestion: to know how many parts to order, remove both black side covers to determine if one or more broken sprockets are causing your rollers not to feed. If all is intact, then you have a different cause for the rollers not feeding.
1. Unscrew and remove both black side covers and the yellow top cover that gives access to the dust shroud and blades. Remove the height adjustment wheel to reach the screws securing that side cover. Behind each side cover are two feed roller sprockets, a short chain running between the sprockets, a lever with a wheel on one end that has the purpose of pressing against the chain to keep the chain tracking properly, and a spring on the other end of the lever. In one side compartment, the spring is attached to a horizontal post, and in the other compartment the spring fits into a slot in the metal plate above.
2. On each side, one sprocket is held on the feed roller shaft with a screw and washer, but the other sprocket is held on the shaft with a retaining ring. This retaining ring is round with two tiny holes at each end - it is NOT the 'E" ring retainer! Remove the retaining rings with a snap ring plyer that has nubs small enough to fit into these tiny holes.
3. After I opened both sides of the planer, of the four sprockets, two on each side, one sprocket was broken into three pieces. The others were not damaged nor particularly worn. I also found in each side one broken spring and one sprung spring.
4. I removed the retaining ring and the broken sprocket, then slid a new sprocket onto the shaft, followed by a new retaining ring. Be sure to seat the ring firmly into the groove on the shaft.
5. I replaced the broken springs on each side. NOTE: before replacing the springs, seat the lever wheel on the chains as follows: on the side with the height adjustment wheel, the lever wheel should track along the TOP of the chain; on the other side, the wheel should track BENEATH the chain.
6. Replace side covers. change or flip blades to a sharper side, if necessary; wax the feed table so lumber will be drawn across the table more easily with less friction, thereby reducing stress on the roller parts.
7. Get a test board, grab your ear bobs, flip the switch on, then enjoy watching your newly repaired planer suck in the board then spit a thinner version out the other end. DONE! And so gratifying to repair it myself.
Did you find this story helpful?
Thanks for voting and helping fellow customers!
Drive sprocket exploded
David - September 28, 2016
Tool Type
Planer
Difficulty
Easy
Time
15-30 minutes
Tools Used
Pliers, Planer wrench
Remove cover. Remove retainer ring with snap-ring pliers. Replace drive sprocket. Replace snap-ring. Install chain onto drive sprocket. Install tension spring on tensioner arm. Reinstall cover. Power up planer to see drive rollers work.
Did you find this story helpful?
Thanks for voting and helping fellow customers!
OEM stands for Original Equipment Manufacturer and means the part you’re buying is sourced directly from the manufacturer who made your product. At eReplacementParts, we sell only genuine OEM parts, guaranteeing the part you’re purchasing is of better design and of higher quality than aftermarket parts.
Our product descriptions are a combination of data sourced directly from the manufacturers who made your product as well as content researched and curated by our content & customer service teams. This content is edited and reviewed internally before being made public to customers.
Our customer service team are at the ready daily to answer your part and product questions. We have a dedicated staff with decades of collective experience in helping customers just like you purchase parts to repair their products.
All our part reviews are solicited directly from other customers who have purchased this exact part. While we moderate these reviews for profanity, offensive language or personally identifiable information, these reviews are posted exactly as submitted and no alterations are made by our team.
All our customer repair instructions are solicited directly from other customers just like you who have purchased and replaced this exact part. While we moderate these reviews for profanity, offensive language or personally identifiable information, these reviews are posted exactly as submitted and no alterations are made by our team.
Based on data from past customer purchasing behaviors, these parts are most commonly purchased together along with the part you are viewing. These parts may be necessary or helpful to replace to complete your current repair.
All our installation videos are created and produced in collaboration with our in-house repair technician, Mark Sodja, who has helped millions of eReplacementParts customers over the last 13 years repair their products. Mark has years of experience in selling and repairing both commercial and residential products with a specialty in gas-powered equipment.
This data is collected from customers who submitted a repair instruction after replacing this exact part. Customers can rate how easy the repair was to complete and how long it took. We aggregate this data to provide a repair rating that allows customers to quickly determine the difficulty and time needed to perform their own repair.