


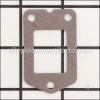
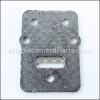
This is a genuine replacement part sourced from original manufacturer for use with handheld gas trimmers and blowers. Spark arrester fits inside of the muffler and it helps to prevent the emission of flammable debris from the engine. It is made out of metal and it is sold individually.
Spark Arrester Screen 14586240630
OEM part for: Echo, Shindaiwa
Part Number: 14586240630
$5.19
In Stock
Jump To:
Frequently Purchased Together ?


Compatibility
This Spark Arrester Screen will fit the following 1597 machines. Confirm this part works with your model, and view the detailed model diagrams and repair help we have to offer.
This item works with the following types of products:
- Hedge Trimmer Parts
- Trimmer Parts
- Blower Parts
Repair Videos ?
Watch the Repair Video for
Spark Arrester Screen

Articles:
|
Step-by-step guide for replacing the spark arrestor screen on an Echo SRM-225 trimmer....
May 19, 2015
|

|
Filthy Filters? This article will show you how to install a filter kit on an Echo SRM-225 trimmer....
May 27, 2015
|

Customer Part Reviews ?
Average Rating (out of 5):
Click to filter by ratings:
5 stars
6
4 stars
0
3 stars
0
2 stars
0
1 stars
0
< PREV
- 1
Repeat customer!
Just what I needed. About every two years, my weed eater was hard to start. Easy to change and now the Echo starts on the first pull.
John -
July 31, 2023
Verified Purchase
Echo string trimmer parts
All parts delivered quickly and were exactly as described
Guest -
July 24, 2023
Verified Purchase
Spot on
The part was an exact replacement. Shipped quickly. Price was right
Guest -
September 28, 2021
Verified Purchase
Easy to install, works great
Everything was as expected
Dean -
June 26, 2021
Verified Purchase
Easy repair
THE PART WAS EASY TO REPLACE MY WEEDWACKER IS WORKING AGAIN .
JOHN -
August 27, 2019
Verified Purchase
very satisfied
thanks
Guest -
August 4, 2019
Verified Purchase
Questions & Answers ?
Our customer Service team is at the ready daily to answer your part and product questions.

Ask our Team
We have a dedicated staff with decades of collective experience in helping customers just like you purchase parts to repair their products.
Does this fit my product?Questions & Answers for Spark Arrester Screen
No questions have been asked yet
Customer Repair Instructions ?
All our customer repair instructions are solicited directly from other customers just like you who have purchased and replaced this exact part.
Drop in power, clogged muffler
Juan - June 30, 2016
👍 2 of 2 people found this instruction helpful
Tool Type
Trimmer
Difficulty
Easy
Time
Less than 15 minutes
Tools Used
Screwdriver, Torx T-27
Remove the exhaust guide. Remove the screws holding the old muffler. Remove the muffler, the exhaust gasket assembly and the spark arrester. Install the new parts in reverse order as you removed them and tighten up the screws.
Did you find this story helpful?
Thanks for voting and helping fellow customers!
The trimmer had been used for three summers and was in need of a new head and tune up
James - August 18, 2017
👍 1 of 1 people found this instruction helpful
Tool Type
Trimmer
Difficulty
Medium
Time
1-2 hours
Tools Used
Screwdriver, Socket set, Star bits for screw drive to fit screw heads
I first disassembled the trimmer taking the outer plastic case off to access the muffler, tank, and other areas. I next took off the muffler and opened the gas tank to access the in tank filter. Once I had all of the parts off I then put them into a parts cleaner tank to remove the dirt, grease, oil, and grime from the parts. Once they had soaked for about 30-45 minutes I pulled them out, dried them off and completed the cleaning process. Then using the parts that I purchased I replace the in tank filter, the spark arrester screen, the air filter, gapped and reinstalled the spark plug and replaced the bulb. Lastly, I lubricated the cables to ensure smooth operation and reinstalled the plastic cover. Once this was done I filled the gas tank and started the trimmer letting it idle for about 2-3 minutes to ensure everything worked as desired. The trimmer is now ready for many more seasons of work.
Did you find this story helpful?
Thanks for voting and helping fellow customers!
Engine would not run at full rpm
Thomas - May 25, 2017
👍 2 of 3 people found this instruction helpful
Tool Type
Blower
Difficulty
Medium
Time
1-2 hours
Tools Used
Screwdriver, small tweezers
1. Removed spark plug and side cover.
2 Removed air cleaner and carburetor including fuel lines and throttle link.
3. Disassembled carburetor on a clean cloth and laid parts out in sequence.
4. Completely washed carburetor body and all parts with carburetor cleaner and compressed air.
5. Installed small needle and spring with tweezers.
6. Installed new diaphragm, purge bulb, and remaining carb kit parts.
7. Installed new spark arrester screen in the muffler.
8. Re-installed carb on the engine with new gasket / installed the new air filter.
9. Re-installed side cover and spark plug.
10. Started engine and adjusted high-speed jet for full rpm.
Did you find this story helpful?
Thanks for voting and helping fellow customers!
Muffler parts needed replacing
Richard - August 16, 2021
Tool Type
Trimmer
Difficulty
Easy
Time
15-30 minutes
Tools Used
Wrench Set
Removed and replaced worn items.
Did you find this story helpful?
Thanks for voting and helping fellow customers!
Spark arrester was some what plugged causing poor engine performance
Gary - June 30, 2021
Tool Type
Trimmer
Difficulty
Medium
Time
30-60 minutes
Tools Used
Screwdriver, Wrench Set
removed some engine covers then the parts. Replaced with the new parts and reassembled.
I will likely order more parts as needed from your company.
I will likely order more parts as needed from your company.
Did you find this story helpful?
Thanks for voting and helping fellow customers!
Loss of power
Jay - December 30, 2020
Tool Type
Trimmer
Difficulty
Easy
Time
15-30 minutes
Tools Used
Screwdriver, Nutdriver
Parts Used
Removed outer plastic cover.
Removed 3 screws on the exhaust.
Replaced the spark arrestor screen.
Replaced 3 screws and outer cover.
Runs like.a new weed eater.
Removed 3 screws on the exhaust.
Replaced the spark arrestor screen.
Replaced 3 screws and outer cover.
Runs like.a new weed eater.
Did you find this story helpful?
Thanks for voting and helping fellow customers!
Just time for a tune-up
Richard - July 26, 2020
Tool Type
Trimmer
Difficulty
Easy
Time
15-30 minutes
Tools Used
Screwdriver, T15
Gap and replaced spark plug.
Replaced fuel filter.
Replaced air filter.
Removed screws to replace spark arrester screen and installed new muffler gasket
Replaced fuel filter.
Replaced air filter.
Removed screws to replace spark arrester screen and installed new muffler gasket
Did you find this story helpful?
Thanks for voting and helping fellow customers!
Unit would start and then quit. subsequently it would not start at all.
Larry - May 19, 2020
Tool Type
Trimmer
Difficulty
Medium
Time
1-2 hours
Tools Used
Screwdriver, Power Drill, Socket set, Nutdriver, Allen wrenches
R & R the carburetor rubber diaphragms and adjust low idle.
Did you find this story helpful?
Thanks for voting and helping fellow customers!
Stalls at acceleration
Wojciech - December 21, 2017
Tool Type
Trimmer
Difficulty
Easy
Time
15-30 minutes
Tools Used
Screwdriver, Socket set
1. Remove engine cover.
2. Remove exhaust part of muffler.
3. Remove screen, be careful, it may drop into muffler.
4. Install new gasket.
5. Install screen.
6. Install exhaust part of muffler and engine cover.
.
2. Remove exhaust part of muffler.
3. Remove screen, be careful, it may drop into muffler.
4. Install new gasket.
5. Install screen.
6. Install exhaust part of muffler and engine cover.
.
Did you find this story helpful?
Thanks for voting and helping fellow customers!
Rough running engine.
Thomas - June 1, 2017
Tool Type
Cultivator
Difficulty
Easy
Time
15-30 minutes
Tools Used
Screwdriver, Pliers
Removed the old components and replaced them with the new ones.
Did you find this story helpful?
Thanks for voting and helping fellow customers!
Load More Install Stories
OEM stands for Original Equipment Manufacturer and means the part you’re buying is sourced directly from the manufacturer who made your product. At eReplacementParts, we sell only genuine OEM parts, guaranteeing the part you’re purchasing is of better design and of higher quality than aftermarket parts.
Our product descriptions are a combination of data sourced directly from the manufacturers who made your product as well as content researched and curated by our content & customer service teams. This content is edited and reviewed internally before being made public to customers.
Our customer service team are at the ready daily to answer your part and product questions. We have a dedicated staff with decades of collective experience in helping customers just like you purchase parts to repair their products.
All our part reviews are solicited directly from other customers who have purchased this exact part. While we moderate these reviews for profanity, offensive language or personally identifiable information, these reviews are posted exactly as submitted and no alterations are made by our team.
All our customer repair instructions are solicited directly from other customers just like you who have purchased and replaced this exact part. While we moderate these reviews for profanity, offensive language or personally identifiable information, these reviews are posted exactly as submitted and no alterations are made by our team.
Based on data from past customer purchasing behaviors, these parts are most commonly purchased together along with the part you are viewing. These parts may be necessary or helpful to replace to complete your current repair.
All our installation videos are created and produced in collaboration with our in-house repair technician, Mark Sodja, who has helped millions of eReplacementParts customers over the last 13 years repair their products. Mark has years of experience in selling and repairing both commercial and residential products with a specialty in gas-powered equipment.
This data is collected from customers who submitted a repair instruction after replacing this exact part. Customers can rate how easy the repair was to complete and how long it took. We aggregate this data to provide a repair rating that allows customers to quickly determine the difficulty and time needed to perform their own repair.