


Genuine OEM replacement part, this item is sold individually.
The 791-181459 Spring is installed in the 753-04257 slider.
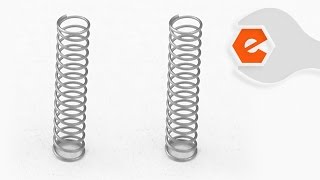
When not activated this part will keep the cutting line from coming out of the spool.
When the Bump Head Knob Assembly is hit on the ground the springs and slider will be forced up into the spool housing releasing the correct amount of cutting line.
Most of the trimmers will use two of these springs.
Small Speed Spool Spring 791-181459
OEM part for: Ryobi
Part Number: 791-181459
$4.99
In Stock
Product Description ?
- Classification: Part
- Weight: 0.01 lbs.
- Shipping: Ships Worldwide
Compatibility
This Small Speed Spool Spring will fit the following 217 machines. Confirm this part works with your model, and view the detailed model diagrams and repair help we have to offer.
This item works with the following types of products:
- Trimmer Parts
This part replaces obsolete part #: 181459
Repair Videos ?
Watch the Repair Video for
Small Speed Spool Spring
Articles:
|
Spring Sprung? Replace the slider springs on a Ryobi string trimmer. Simple instructions show you how....
September 02, 2015
|

Customer Part Reviews ?
Average Rating (out of 5):
Click to filter by ratings:
5 stars
6
4 stars
0
3 stars
0
2 stars
0
1 stars
0
< PREV
- 1
easy replacement
arrived fast
Albert -
December 18, 2020
Verified Purchase
Great service would buy from them again
Parts were new easy to install arrived quickly and my edge trimmer is working again .
Guest -
June 5, 2020
Verified Purchase
Correct part, worked as expected
Easy to find the correct part. Worked as expected for a quick fix.
Guest -
June 2, 2020
Verified Purchase
Always the little parts.
The little parts are what goes bad and with the rest of the related parts my weed eater is up and running like new. Should be a notice in the owners manual about these parts go bad or wear out after a while and need to be replaced.
I asked for help from your site on a contact email and got nowhere but figured it out my self by some of the mail other customers sent in from doing a wider search. All I wanted was suggested probable parts needed. All parts were great and quality and fast service for this time of year. Friendly customer service.
Guest -
October 11, 2019
Verified Purchase
The spring worked great
The spring arrived on time and worked great
Guest -
August 10, 2019
Verified Purchase
Easy to shop and alway promt friendly service!
Exact replacement
iGlobal -
August 9, 2019
Verified Purchase
Questions & Answers ?
Our customer Service team is at the ready daily to answer your part and product questions.

Ask our Team
We have a dedicated staff with decades of collective experience in helping customers just like you purchase parts to repair their products.
Does this fit my product?Questions & Answers for Small Speed Spool Spring
No questions have been asked yet
Customer Repair Instructions ?
All our customer repair instructions are solicited directly from other customers just like you who have purchased and replaced this exact part.
Line was coming out at an extremely fast rate and would tangle around the shaft.
Scott - September 14, 2016
👍 2 of 2 people found this instruction helpful
Tool Type
Trimmer
Difficulty
Easy
Time
Less than 15 minutes
Tools Used
Pliers
1. Removed bump head and spool.
2. Remove clip and plastic thrust lever.
3. Replace broken metal spool clutch and missing spring, making sure clutch tabs are engaged properly with springs.
4. Reassemble remaining parts in reverse order.
2. Remove clip and plastic thrust lever.
3. Replace broken metal spool clutch and missing spring, making sure clutch tabs are engaged properly with springs.
4. Reassemble remaining parts in reverse order.
Did you find this story helpful?
Thanks for voting and helping fellow customers!
Broken 'slider', missing springs.
Michael - March 14, 2016
👍 2 of 2 people found this instruction helpful
Tool Type
Trimmer
Difficulty
Easy
Time
Less than 15 minutes
Tools Used
Pliers, Snap Ring pliers
Follow instructions on 'eReplacement' Repair Video on 'You Tube'.
My Ryobi 135r Elec. Trimmer is approx. 15yrs old. I have had very few problems with it.
Repair was easy as eatin' an entire 'Chocolate Cream Pie', and just as quick.
My Ryobi 135r Elec. Trimmer is approx. 15yrs old. I have had very few problems with it.
Repair was easy as eatin' an entire 'Chocolate Cream Pie', and just as quick.
Did you find this story helpful?
Thanks for voting and helping fellow customers!
Slider broke in spool head, would not advance line.
Herbert - September 7, 2016
👍 1 of 1 people found this instruction helpful
Tool Type
Trimmer
Difficulty
Medium
Time
30-60 minutes
Tools Used
Screwdriver, Pliers, Ring clamp pliers
1. Take string head apart.
2. Remove all old parts. Including the 2 snap rings on shaft.
3. Clean everything that is to be reused.
4. Put 2 small springs in slots in the bottom of head.
5. Install slider.
6. Put bottom snap ring on shaft.
7. Install spring then plunger.
8. Put top snap ring on shaft.
9. Replace line spool and bump knob.
Did you find this story helpful?
Thanks for voting and helping fellow customers!
Bent slider, missing spring.
Gerard - August 21, 2016
👍 1 of 1 people found this instruction helpful
Tool Type
Trimmer
Difficulty
Easy
Time
15-30 minutes
Tools Used
Pliers
When I took the head of the string trimmer apart, I realized the slider was bent and a small spring was missing. I had to destroy the e-clip to get it off and out of the way for the slider, so I just made sure I bought one with the order. Once I got the e-clip off, everything went into place just as the diagram shows. String trimmer runs like new. I am stoked that I was able to find these part for replacement.
Did you find this story helpful?
Thanks for voting and helping fellow customers!
Had to replace the slider and springs
Peter - May 29, 2016
👍 1 of 1 people found this instruction helpful
Tool Type
Trimmer
Difficulty
Medium
Time
15-30 minutes
Tools Used
Screwdriver, Pliers, No other tools
Not to bad ,but the lower retaining lock washer give me a bit of trouble getting it off. Would be a ten minute job if you have the right tool to remove it. Thanks for the video on how to install it. Pete
A few others have put the video on their repair stories. So look at those and it will help you with this repair.
A few others have put the video on their repair stories. So look at those and it will help you with this repair.
Did you find this story helpful?
Thanks for voting and helping fellow customers!
String would come out constantly
Chris - May 26, 2016
👍 1 of 1 people found this instruction helpful
Tool Type
Trimmer
Difficulty
Easy
Time
Less than 15 minutes
Tools Used
ereplacementparts has a excellent video on how to do this repair. It was a great help. Here is the link to the video for anybody doing this repair.
https://www.youtube.com/watch?v=ZOsyqwNhUZc
https://www.youtube.com/watch?v=ZOsyqwNhUZc
Did you find this story helpful?
Thanks for voting and helping fellow customers!
Bump feed on string head
Mike - July 9, 2023
Tool Type
Trimmer
Difficulty
Medium
Time
15-30 minutes
Tools Used
Screwdriver, Pliers, Dry lube
Remove bump knob, removed string spool, remove E clip on shaft, remove plunger & spring.
Then remove C clip, pull out slider & 2 slider springs below it. Thoroughly clean the body of the trimmer head.
after thoroughly cleaning, spray a little dry lube on the spring & slider grooves inside the head, Install slider springs, install slider (Making sure the spring tabs on slider are over the top of the slider springs), while holding slider & springs in, attach the C clip to shaft that holds the slider in place, but lets it freely slide. Then install plunger spring & plunger. Hold plunger down while attaching the E clip onto the shaft. push plunger & watch slider move to one side, then back when plunger comes back up. Basically, verify operation. If all is good, Install spool & bump knob. Then install trimmer line as normal... Enjoy your newly repaired bump feed head that only takes a slight "bump" to feed more line! :)
Did you find this story helpful?
Thanks for voting and helping fellow customers!
String feed
James - July 9, 2023
Tool Type
Trimmer
Difficulty
Easy
Time
Less than 15 minutes
Tools Used
Screwdriver, Snap ring pliers
Using a parts drawing, new parts were installed .
Very easy.
Very easy.
Did you find this story helpful?
Thanks for voting and helping fellow customers!
Slider and.outer spool broke
Sam - March 5, 2023
Tool Type
Trimmer
Difficulty
Easy
Time
30-60 minutes
Tools Used
Screwdriver, Pliers, Power Drill, Hack saw
Had to cut outer spool to get under retainer ring off. Other that that it was easy
Did you find this story helpful?
Thanks for voting and helping fellow customers!
Slider claws broke off which caused it not to advance the line out.
Todd - November 26, 2022
Tool Type
Trimmer
Difficulty
Easy
Time
15-30 minutes
Tools Used
Screwdriver, Pliers
Removed line spool
Removed spring clips.
Replaced slider.
Removed spring clips.
Replaced slider.
Did you find this story helpful?
Thanks for voting and helping fellow customers!
Load More Install Stories
OEM stands for Original Equipment Manufacturer and means the part you’re buying is sourced directly from the manufacturer who made your product. At eReplacementParts, we sell only genuine OEM parts, guaranteeing the part you’re purchasing is of better design and of higher quality than aftermarket parts.
Our product descriptions are a combination of data sourced directly from the manufacturers who made your product as well as content researched and curated by our content & customer service teams. This content is edited and reviewed internally before being made public to customers.
Our customer service team are at the ready daily to answer your part and product questions. We have a dedicated staff with decades of collective experience in helping customers just like you purchase parts to repair their products.
All our part reviews are solicited directly from other customers who have purchased this exact part. While we moderate these reviews for profanity, offensive language or personally identifiable information, these reviews are posted exactly as submitted and no alterations are made by our team.
All our customer repair instructions are solicited directly from other customers just like you who have purchased and replaced this exact part. While we moderate these reviews for profanity, offensive language or personally identifiable information, these reviews are posted exactly as submitted and no alterations are made by our team.
Based on data from past customer purchasing behaviors, these parts are most commonly purchased together along with the part you are viewing. These parts may be necessary or helpful to replace to complete your current repair.
All our installation videos are created and produced in collaboration with our in-house repair technician, Mark Sodja, who has helped millions of eReplacementParts customers over the last 13 years repair their products. Mark has years of experience in selling and repairing both commercial and residential products with a specialty in gas-powered equipment.
This data is collected from customers who submitted a repair instruction after replacing this exact part. Customers can rate how easy the repair was to complete and how long it took. We aggregate this data to provide a repair rating that allows customers to quickly determine the difficulty and time needed to perform their own repair.