


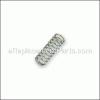
This part comes directly from Dyson. This Tool Catch is used in multiple models of Dyson vacuum cleaners. The Tool Catch locks the tools and attachments onto the vacuum. This part is made of plastic. The Tool Catch should be replaced when it no longer holds the tools securely or if it has become damaged in any way. To replace the Catch you will need to use a couple of screwdrivers to gently pry the old part out of the tabs. The new Catch is simply installed by pushing it into the recess until it clips into place.
Silver Tool Catch DY-91152303
OEM part for: Dyson
Part Number: DY-91152303
$5.87
In Stock
Jump To:
Frequently Purchased Together ?
Compatibility
This Silver Tool Catch will fit the following 19 machines. Confirm this part works with your model, and view the detailed model diagrams and repair help we have to offer.
This item works with the following types of products:
- Vacuum Parts
This part replaces obsolete part #: DY-91152304, 911523-04, 911523-03
Customer Part Reviews ?
Average Rating (out of 5):
Click to filter by ratings:
5 stars
7
4 stars
0
3 stars
0
2 stars
0
1 stars
0
< PREV
- 1
Easy Repair
Fast delivery
Guest -
March 12, 2024
Verified Purchase
Fitted perfectly, vacuum is as good as new
I had to watch a short YouTube video on how to snap the part into place, but it fitted perfectly. The wand works perfectly now. Quick delivery - great site to find parts for your devices.
Guest -
October 23, 2023
Verified Purchase
Easy repair
Worked as expected. Lost the spring from old part, but was able to use one from one of the attachments.
Guest -
October 13, 2021
Verified Purchase
easy to install - worked
quick delivery, did the job
Guest -
September 30, 2020
Verified Purchase
Exactly what we needed
We quickly found the replacement part for our vacuum on the website, which saved us time and money going to the store. The best part is that it arrived in just a few days. Would definitely use this website again. Thank you.
Guest -
April 9, 2020
Verified Purchase
Easily installed and working well
The part was the perfect fit. Can now use the Dyson Hand-held with attachments.
Guest -
December 23, 2019
Verified Purchase
Great replacement
Fit my Dyson vacuum perfectly
Guest -
May 3, 2019
Verified Purchase
Questions & Answers ?
Our customer Service team is at the ready daily to answer your part and product questions.

Ask our Team
We have a dedicated staff with decades of collective experience in helping customers just like you purchase parts to repair their products.
Does this fit my product?Questions & Answers for Silver Tool Catch
No questions have been asked yet
Customer Repair Instructions ?
All our customer repair instructions are solicited directly from other customers just like you who have purchased and replaced this exact part.
The most difficult thing was keeping the vacuum hose up in place while I put the new part in.
Winnie - January 31, 2016
👍 13 of 16 people found this instruction helpful
Tool Type
Vacuum
Difficulty
Medium
Time
Less than 15 minutes
Tools Used
Screwdriver
Parts Used
I positioned the vacuum cleaner so the power head was higher than the handle. This way I needed to use less pressure to hold the hose in place while I put the tool catch in. There was a small spring that had to fasten to the tool catch. When it wouldn't stay attached to the little nub on the tool catch, I took a small piece of double sided poster tape and stuck it to the nub. This allowed the spring to stay attached to the nub while I inserted one side of the tool catch into a slot. I then used a tiny flat end screwdriver to push the other side of the plastic in so the protrusion slipped into the other slot.
Did you find this story helpful?
Thanks for voting and helping fellow customers!
Catch button broke.
Dan - March 8, 2018
👍 2 of 2 people found this instruction helpful
Tool Type
Vacuum
Difficulty
Easy
Time
Less than 15 minutes
Tools Used
Screwdriver
Inserted the spring onto the catch button. Put the catch button back with the help of a small screwdriver.
Did you find this story helpful?
Thanks for voting and helping fellow customers!
Broken latch and end cap assembly.
Adam - April 16, 2018
👍 2 of 3 people found this instruction helpful
Tool Type
Vacuum
Difficulty
Easy
Time
Less than 15 minutes
Tools Used
Screwdriver
Placed the spring on the tool catch and gently forced into place. The end cap comes off with a flat head screwdriver and a twist on the end cap.
Did you find this story helpful?
Thanks for voting and helping fellow customers!
Hose attachment broke
Robert - March 11, 2018
👍 1 of 1 people found this instruction helpful
Tool Type
Vacuum
Difficulty
Easy
Time
Less than 15 minutes
Tools Used
Screwdriver
Parts Used
Easy fix. Need to use a little force to place into position.
Did you find this story helpful?
Thanks for voting and helping fellow customers!
Vacuum cleaner hose tool connector catch button broke and spring was lost
Dave - March 1, 2022
Tool Type
Vacuum
Difficulty
Easy
Time
Less than 15 minutes
Tools Used
Screwdriver, Pliers
1.Positioned spring between new tool catch button and hose coupler
2. Inserted one ear of the catch button in its hole in the coupler, making sure spring stayed in place
3. Used small flat screwdriver to slightly pry between new button and the couple, to allow the other ear on the button to pop into place
It may be helpful to have another person apply the screwdriver while you keep the catch button in place and insert the final ear in its hole.
Did you find this story helpful?
Thanks for voting and helping fellow customers!
plastic toggle switch broke
John - October 8, 2021
Tool Type
Vacuum
Difficulty
Easy
Time
Less than 15 minutes
Tools Used
Parts Used
Put the new part in place and slid in until the 2 pins snapped into the receiver holes.
Did you find this story helpful?
Thanks for voting and helping fellow customers!
Broken latch
Michael - September 2, 2021
Tool Type
Vacuum
Difficulty
Easy
Time
Less than 15 minutes
Tools Used
, None
Parts Used
Snapped latch into place
Did you find this story helpful?
Thanks for voting and helping fellow customers!
The wand latch button was missing
Robert - July 21, 2021
Tool Type
Vacuum
Difficulty
Easy
Time
Less than 15 minutes
Tools Used
, No tools needed
1. Followed the procedure provided in a review posted to ereplacement parts website.
2 Attached hose and vacuum wand after button and spring installation
2 Attached hose and vacuum wand after button and spring installation
Did you find this story helpful?
Thanks for voting and helping fellow customers!
Small mounting tab had broken off
WILLARD - June 18, 2021
Tool Type
Vacuum
Difficulty
Easy
Time
Less than 15 minutes
Tools Used
Screwdriver
Parts Used
Looked on line and picked up tips about using screwdriver to spread mounting hole - went together very easily - thanks to others for this tip
Did you find this story helpful?
Thanks for voting and helping fellow customers!
The silver catch had broken and the spring was lost.
Thomas - April 24, 2021
Tool Type
Vacuum
Difficulty
Easy
Time
Less than 15 minutes
Tools Used
, Hands
Placed the spring into place and just snapped the new catch into place.
Did you find this story helpful?
Thanks for voting and helping fellow customers!
Load More Install Stories
OEM stands for Original Equipment Manufacturer and means the part you’re buying is sourced directly from the manufacturer who made your product. At eReplacementParts, we sell only genuine OEM parts, guaranteeing the part you’re purchasing is of better design and of higher quality than aftermarket parts.
Our product descriptions are a combination of data sourced directly from the manufacturers who made your product as well as content researched and curated by our content & customer service teams. This content is edited and reviewed internally before being made public to customers.
Our customer service team are at the ready daily to answer your part and product questions. We have a dedicated staff with decades of collective experience in helping customers just like you purchase parts to repair their products.
All our part reviews are solicited directly from other customers who have purchased this exact part. While we moderate these reviews for profanity, offensive language or personally identifiable information, these reviews are posted exactly as submitted and no alterations are made by our team.
All our customer repair instructions are solicited directly from other customers just like you who have purchased and replaced this exact part. While we moderate these reviews for profanity, offensive language or personally identifiable information, these reviews are posted exactly as submitted and no alterations are made by our team.
Based on data from past customer purchasing behaviors, these parts are most commonly purchased together along with the part you are viewing. These parts may be necessary or helpful to replace to complete your current repair.
All our installation videos are created and produced in collaboration with our in-house repair technician, Mark Sodja, who has helped millions of eReplacementParts customers over the last 13 years repair their products. Mark has years of experience in selling and repairing both commercial and residential products with a specialty in gas-powered equipment.
This data is collected from customers who submitted a repair instruction after replacing this exact part. Customers can rate how easy the repair was to complete and how long it took. We aggregate this data to provide a repair rating that allows customers to quickly determine the difficulty and time needed to perform their own repair.