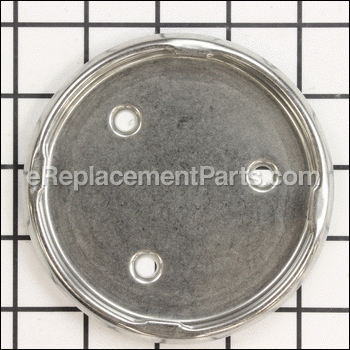
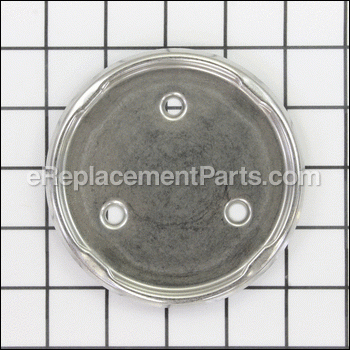
This part is used in all tilt head mixers to secure the bowl in place. An OEM part made from metal. Installed by using the three screws from the previous plate. Replace this part when the bowl will no longer stay in place very well.
Cap-screw WPW10191926
OEM part for: KitchenAid
Part Number: WPW10191926
Compatibility
This Cap-screw will fit the following 463 machines. Confirm this part works with your model, and view the detailed model diagrams and repair help we have to offer.
Displaying 20 of 463 matching models.
KitchenAid
Show More Compatible Models463 total model matches. Try the above search to narrow your results.
This is the official OEM part for the following brands:
- KitchenAid
- Whirlpool
This item works with the following types of products:
- Mixer
This part replaces obsolete part #: 4161129, 4161158, 4161159, 4161160, 4169840, 4169841, 4169842, 4169906, 4169919, 4169920, 4169945, 4169918, 4169946, 4169947, 4161128, W10191926, 4163032, 4161127, 4161126, 4162529
Customer Part Reviews ?
- 1
Questions & Answers ?
Our customer Service team is at the ready daily to answer your part and product questions.

Ask our Team
We have a dedicated staff with decades of collective experience in helping customers just like you purchase parts to repair their products.
Does this fit my product?Questions & Answers for Cap-screw
Customer Repair Instructions ?
All our customer repair instructions are solicited directly from other customers just like you who have purchased and replaced this exact part.
Bowl would not stay secured while mixing.
Tool Type
Mixer
Difficulty
Easy
Time
Less than 15 minutes
Tools Used
Screwdriver
Parts Used
Grooves in old base were too smooth
Tool Type
Mixer
Difficulty
Easy
Time
Less than 15 minutes
Tools Used
Screwdriver
Parts Used
Kitchen Aid mixer base plate no longer held the bowl in place (after 30+yrs of use)
Tool Type
Mixer
Difficulty
Easy
Time
15-30 minutes
Tools Used
Screwdriver, Pliers, Toothpick and sponge
Parts Used
2. Removed base plate. Cleaned residue from edge of base plate with toothpick and sponge. It was a very tight fit, so loosened base plate by applying leverage to sides with screwdriver, then gripped the edge with pliers to lift out.
3. Screwed new base plate in place, using original screws. Because it, too, was a tight fit but a slightly different design (the edge is rounded instead of sticking straight up), I tightened each screw a little at a time so it would fit properly in place.
Screw cap was worn
Tool Type
Mixer
Difficulty
Easy
Time
Less than 15 minutes
Tools Used
Screwdriver
Parts Used
Old Screw cap was worn.
Tool Type
Mixer
Difficulty
Easy
Time
Less than 15 minutes
Tools Used
Screwdriver
Parts Used
Bent screw cap.
Tool Type
Mixer
Difficulty
Easy
Time
Less than 15 minutes
Tools Used
Screwdriver
Parts Used
Bowl wouldn't stay in place
Tool Type
Mixer
Difficulty
Easy
Time
Less than 15 minutes
Tools Used
Screwdriver, Hammer
Parts Used
2. Though a snug fit I used the hammer to tap around the ring to secure it into the correct place. *Screw holes must line up in place before doing this.*
3. Used the screw driver to replace the old screws.
4. Works like a charm. :)
Screw cap was worn from too much bread making
Tool Type
Mixer
Difficulty
Easy
Time
Less than 15 minutes
Tools Used
Screwdriver
Parts Used
The bowl would not stay in place on the mixer, it had worn down after years of use. I thought I had lost the mixer.
Tool Type
Mixer
Difficulty
Easy
Time
Less than 15 minutes
Tools Used
Screwdriver, None needed
Parts Used
The mixer metal plate was not holding the bowl in place.
Tool Type
Mixer
Difficulty
Easy
Time
Less than 15 minutes
Tools Used
Screwdriver
Parts Used
OEM stands for Original Equipment Manufacturer and means the part you’re buying is sourced directly from the manufacturer who made your product. At eReplacementParts, we sell only genuine OEM parts, guaranteeing the part you’re purchasing is of better design and of higher quality than aftermarket parts.
Learn MoreOur product descriptions are a combination of data sourced directly from the manufacturers who made your product as well as content researched and curated by our content & customer service teams. This content is edited and reviewed internally before being made public to customers.
Our customer service team are at the ready daily to answer your part and product questions. We have a dedicated staff with decades of collective experience in helping customers just like you purchase parts to repair their products.
All our part reviews are solicited directly from other customers who have purchased this exact part. While we moderate these reviews for profanity, offensive language or personally identifiable information, these reviews are posted exactly as submitted and no alterations are made by our team.
All our customer repair instructions are solicited directly from other customers just like you who have purchased and replaced this exact part. While we moderate these reviews for profanity, offensive language or personally identifiable information, these reviews are posted exactly as submitted and no alterations are made by our team.
Based on data from past customer purchasing behaviors, these parts are most commonly purchased together along with the part you are viewing. These parts may be necessary or helpful to replace to complete your current repair.
All our installation videos are created and produced in collaboration with our in-house repair technician, Mark Sodja, who has helped millions of eReplacementParts customers over the last 13 years repair their products. Mark has years of experience in selling and repairing both commercial and residential products with a specialty in gas-powered equipment.
This data is collected from customers who submitted a repair instruction after replacing this exact part. Customers can rate how easy the repair was to complete and how long it took. We aggregate this data to provide a repair rating that allows customers to quickly determine the difficulty and time needed to perform their own repair.


