


Video

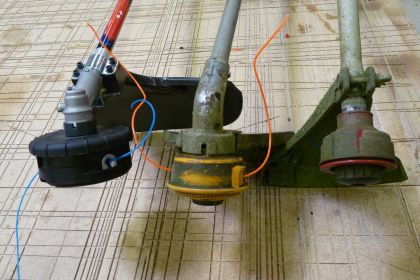
Even though replacing trimmer line is often the most time-consuming part of yard trimming, using the right techniques to load your trimmer line can significantly reduce the time you spend. This article and its video demonstration show the steps for reloading trimmer line in three different trimmer head styles: a single line trimmer head, a double line trimmer head, and a special, Shindaiwa speed-feed trimmer head.
 Put all that frustration behind you with these professional trimmer line replacement tips, and visit out Trimmer Line accessories page to stock up on quality replacement line.
Single Line Replacement
Put all that frustration behind you with these professional trimmer line replacement tips, and visit out Trimmer Line accessories page to stock up on quality replacement line.
Single Line Replacement
The steps for replacing line in a single line trimmer head are virtually the same for many trimmer head types, like double line trimmer heads.
 1. Remove the Trimmer Head Spool
Removing the spool is the first step in replacing trimmer line in any conventional trimmer head, but trimmer head spools can disassemble in different ways.
The trimmer head pictured above and below disassembles by simply unscrewing the knob around its arbor bolt.
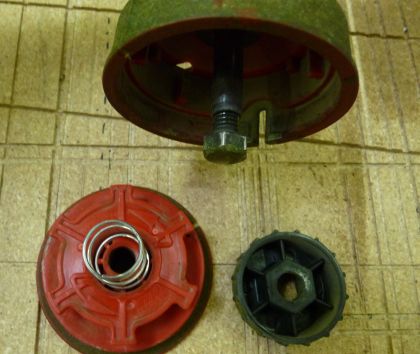
Other trimmer heads can use press tab and other twisting styles for disassembly.
[Back to top]
2. Insert Trimmer Line and Wind the Line
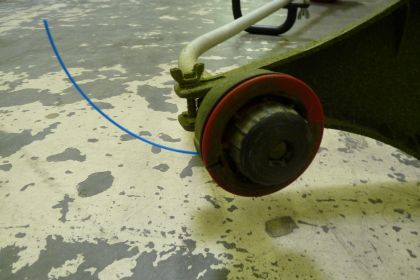
Single line trimmer heads have just one channel in their spools for winding line. The channel will have a hole in it somewhere that keeps the line in place as it is wound around the spool. Insert one end of the trimmer line in the hole.
Depending on the trimmer head, it might be helpful to bend a small portion of the cutting line at an angle before inserting it in the starter hole. Also, cutting the line at an angle can help this first step on some trimmer heads.
Of course, it is also important to make sure that the replacement line matches the diameter specification of the trimmer head before beginning.

Once the line is started correctly in the channel hole, you're ready to wind. Most trimmer heads will indicated the correct winding direction right on the spool somewhere.
It's also important to wind the line carefully, keeping it in neat rows as much as possible. The line will have a much higher chance to feed incorrectly during trimmer use if it suffers from sloppy winding. [Back to top] 3. Snap the Line into its Retaining Notch
A conventional trimmer head will have a retainer on its spool. Snap the end of the trimmer line into the retainer after it is wound around the spool. The retainer will hold the line in place as the spool is replaced in the trimmer head assembly.
Make sure to leave enough line length past the retainer so that it can be fed through the trimmer head eyelets when it's time to replace the spool. [Back to top] 4. Replace the Trimmer Head Spool
With the cutting line held in place, the spool is ready to be replaced in the trimmer head assembly.
First feed the extra trimmer line through the trimmer head eyelet. Make sure to release the line from the retainer before completely securing the spool into position.
Replace any knobs, bolts, or other trimmer head pieces removed during disassembly. Your single line trimmer line is now reloaded, and your trimmer should be ready to get back to work. Although there are many steps to reloading line the conventional way, a little practice and familiarity with your trimmer will speed the process up a great deal. Once you're up to speed, reloading trimmer line this way can take less than five minutes. [Back to top] Double Line Replacement The steps for replacing line in a conventional double line trimmer head are virtually the same as the steps for single line trimmer heads explained above. The only difference lies in that some of the steps are repeated for the second line.
 Only steps specific to double line trimmer heads will be explained in detail below. The other steps listed are the same as for single line trimmer heads as described in the previous section of this article.
1. Remove the Trimmer Head Spool
2. Insert Trimmer Line and Wind the Line
Only steps specific to double line trimmer heads will be explained in detail below. The other steps listed are the same as for single line trimmer heads as described in the previous section of this article.
1. Remove the Trimmer Head Spool
2. Insert Trimmer Line and Wind the Line
Double line trimmer heads will have two channels for winding line. Each channel will also have its own starter hole.
Because there are two lines, this step will have to be performed for each line. Both lines will wind the same way as indicated on the trimmer head spool. [Back to top] 3. Snap the Lines into Their Retaining Notches
Again, this step happens twice for double line trimmer heads; however, there is one small difference.
It is best that the lines are snapped into positions 180º apart if possible, so that they correspond to the positions of the trimmer head eyelets.
If the retaining notches are not positioned 180º apart, then snap them in wherever possible. When it's time to reassemble the trimmer head and spool, you can hold the lines in position as shown above.
[Back to top]
4. Replace the Trimmer Head Spool
The only difference here is that trimmer line must be fed through two eyelets instead of one.
Make sure to release the line from the retainer before completely securing the spool into position.
Replace any knobs, bolts, or other trimmer head pieces removed during disassembly.
Your double line trimmer line is now reloaded, and you're ready to get back in the yard.
Even with the second line to wind, reloading a conventional double string trimmer only takes about five minutes with a little practice.
[Back to top]
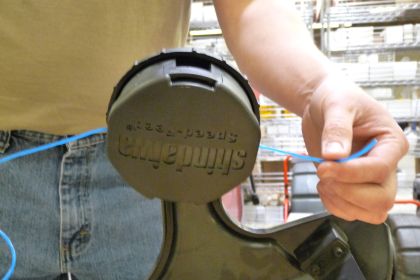
Shindaiwa Speed-Feed Line Replacement
Shindaiwa has introduced an innovative new style of trimmer head that does not require any trimmer head disassembly to reload cutting line. These trimmer heads are called Speed-Feed trimmer heads, and they are compatible with many kinds of trimmers.
There are a few steps involved in reloading a Speed-Feed trimmer head, but a Speed-Feed reload only takes about 30 seconds!
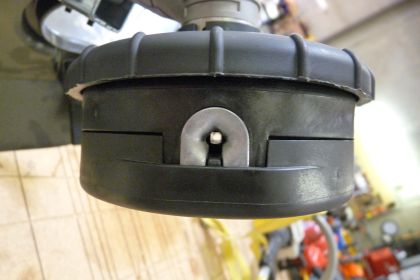
1. Line Up the Trimmer Head Arrows with the Eyelets
Shindaiwa Speed-Feed trimmer heads have two arrows on the top of their heads set at 180º.
The first step to reload the line is to line up the arrows with the trimmer head eyelets as shown in the picture above. Light will be visible on the other side if you look through the holes.
 [Back to top]
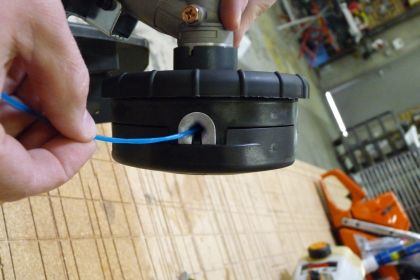
2. Load Line Through One Side of the Trimmer Head
[Back to top]
2. Load Line Through One Side of the Trimmer Head
Guide a very long length (check trimmer head instructions) of line through one of the eyelets out to the other side.
 [Back to top]
3. Even Out Line Lengths
[Back to top]
3. Even Out Line Lengths
Extend both ends of the line all they way out until their lengths match. You will have to step several feet away from the trimmer to do this.
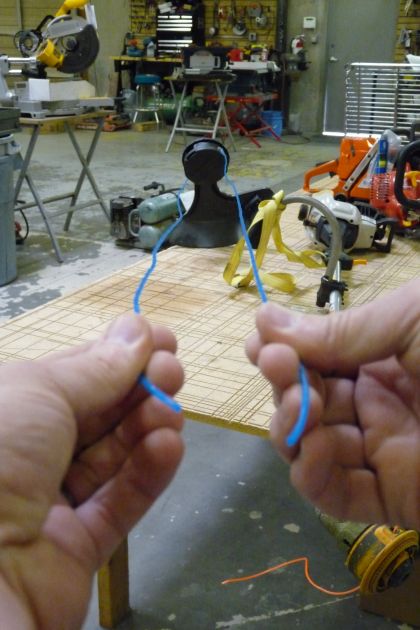
Walk back toward the trimmer and release the lines. [Back to top] 4. Load the Line by Twisting the Trimmer Head
Twist the top of the trimmer head in the indicated direction.

The cutting line will automatically load in both ends of the trimmer as you twist the head! Loading trimmer line with a Shindaiwa Speed-Feed trimmer head takes under 30 seconds. Click the links below to see eReplacementParts.com's selection of Shindaiwa Speed-Feed trimmer heads:
- Shindaiwa 450 Speed-Feed Trimmer Head
- Shindaiwa 375 Speed-Feed Trimmer Head
- Shindaiwa 375 Speed-Feed Trimmer Head
Reloading your grass trimmer's cutting line should be a breeze now with these steps and guidelines. Browse our lawn and garden accessory pages here at eReplacementParts.com to Trimmer Line, Trimmer Heads, and other Power Tool Accessories you need. [Back to top] What we're about.
