Tools & Materials
- chuck removal tool
- a regular hammer
- a piece of hardwood
- acetone
- a rag
- a wooden or rubber mallet
The shafts of drill press chucks are specially tapered to fit very tightly into the identically-tapered spindles of drill presses. The kind of taper used in drill presses and their chucks is called a Morse taper.
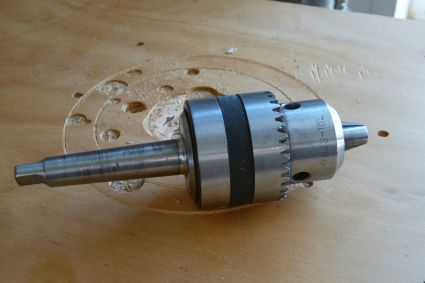
Drill press chucks need to be removed if their shafts become bent or if they otherwise become defective. A dirty chuck shaft or improper installation can also cause a drill press chuck to fall out.
Read the fast and easy drill press chuck removal, cleaning, and installation steps below to ensure that your drill press chuck holds in your drill.
Drill Press Chuck Removal Methods
There's more than one way to get a drill press chuck out of a drill press, and luckily, each method is easy and only takes a few seconds.
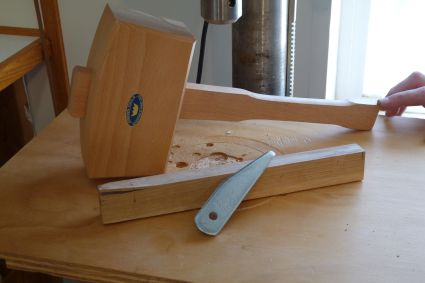
Drill Chuck Removal Tool Drill presses come with a special tool for removing their chucks called a chuck removal tool. This is the easiest way to remove a chuck from a drill press. The chuck removal tool is shaped to fit inside a special access window on the spindle of the drill press.
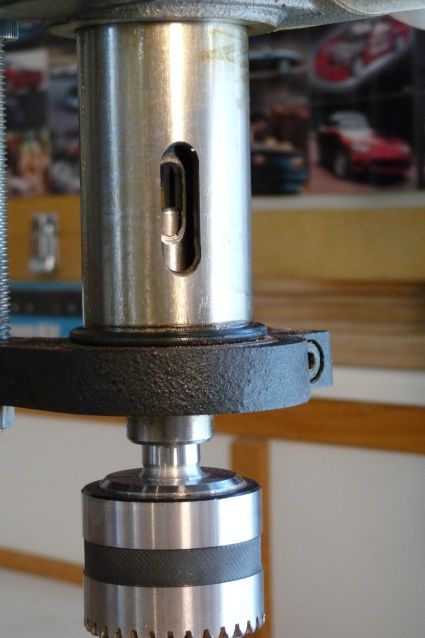 Hammering the chuck removal tool into the spindle window pushes the top of the chuck spindle down until its taper fit loosens and the chuck falls out of the press.
Steps:
1. Insert the chuck removal tool into the press's spindle window.
2. Lightly hammer the chuck removal tool farther into the window until the chuck falls out of the press.
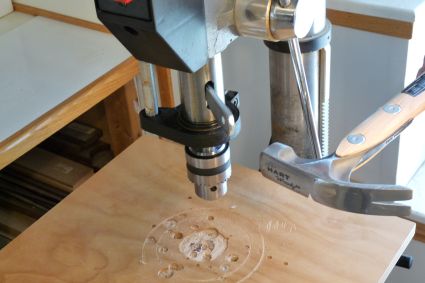 Make sure that the drilling table of the press is raised up enough that the chuck is not damaged from its fall.
Chuck removal tools can be found for separate sale for most drill presses.
[Back to top]
Hardwood and Hammer
If a chuck removal tool isn't available and a drill press chuck needs to come off anyway, no sweat.
Although a little more crude, using a hammer and a piece of hardwood to remove the drill press chuck is a great backup method. As long as it is done properly, you won't risk damaging your drill chuck or the drill press.
Steps:
1. First, get a hammer and a strong, usefully-sized piece of hardwood.
2. Position the hardwood above the chuck at an angle.
3. Using the hammer, give the hardwood a good whack or two, and the chuck should fall right out.
Just make sure the the force of the hammer strike is angled as downward as possible, so as not to risk bending the chuck shaft or drill spindle.
[Back to top]
Cleaning and Reinstalling the Chuck
Any drill press chuck should be cleaned before installation or reinstallation back into the drill press.
Because of their tight, "Morse taper" fit, any oil, dirt, or debris on the chuck shaft or in the drill spindle will compromise the hold of the chuck in the press.
Steps:
1. Clean the spindle of the chuck with a rag and a degreasing agent. Acetone works especially well because it evaporates quickly. Also, use a rag and some acetone to clean inside the spindle of the drill press.
2. Once the shaft and spindle are clean, insert the drill chuck into the press firmly enough for it to stay in on its own for a moment.
3. Retract the jaws of the drill press chuck to prevent damaging them.
4. Lower the press table to open up some hammer-swinging space.
5. Using a wooden or rubber mallet, strike the bottom of the chuck quickly and forcefully two or three times.
 Don't be fooled by the simplicity of the Morse taper design. If done properly, this easy installation will ensure that that chuck stays firmly engaged in the spindle until it's meant to come out.
[Back to top]
Conclusion
Quality replacement parts and knowledgeable maintenance give power tools and equipment their lasting value.
Get started on your drill press chuck repair by visiting our Drill Press Parts page here at eRepalcementParts.com. Our online service puts parts and information into the hands of tool owners who settle for nothing but the best.
[Back to top]
What we're about.


