


Why Read This Article?
Finish Nailer Repair - Replacing the Driver Guide (Ridgid Part # 79004001022)
Article Breakdown
Finish Nailer Repair - Replacing the Driver Guide (Ridgid Part # 79004001022)
Video
Tools & Materials
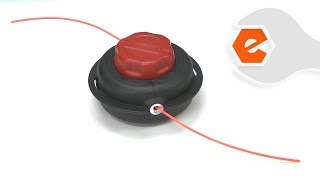
The cutting head assembly consists of the outer housing (with mounting bolts), the spool, the eyelets, the bump knob, the spring; and comes pre-loaded with trimmer line. All trimmer heads will eventually wear out. The bump knob wears from rubbing against the ground. The outer housing can be cracked, and the eyelets can be lost.
Let's get started.
REMOVING THE CUTTING HEAD 1. Remove the cutting head.
a. Disconnect the trimmer attachment from the power unit.
b. Rotate the cutting head until the opening on the flange aligns with the notch in the gear head.
c. Insert a small hex wrench into the opening to prevent the spindle from rotating.
d. Unscrew and remove the cutting head from the spindle. (The spindle is reverse-threaded.)
INSTALLING THE NEW CUTTING HEAD
2. Install the cutting head.
a. Thread the new cutting head onto the spindle.
b. Lock the spindle in place (using a hex wrench).
c. Tighten the new cutting head (hand-tight).
REASSEMBLING THE UNIT 3. Reinstall the trimmer attachment.
a. Connect and secure the trimmer attachment to the power unit.
