


Video
Tools & Materials

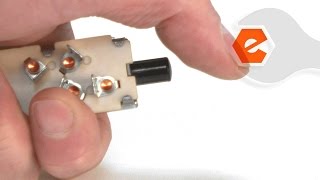
Does your lawnmower not turn on? You could have a faulty push-button switch. The push-button switch is located inside the plastic control housing on your lawnmower. The push-button switch is actuated by the switch lever. After hundreds or even thousands of cycles, the switch can wear out, causing it to no longer send electricity to the motor when the lever is pulled. The switch can be easily tested using a multimeter.
Let's get started.
REMOVING THE SWITCH 1. Remove the switch.
a. Use a screwdriver to remove the screws that secure the housing to the handle.
b. Use a screwdriver to remove the screws that secure the two halves of the housing together.
c. When separating the housing halves, be careful not to lose the spring that applies tension to the lever.
d. Separate the two halves of the housing.
e. Remove the lever and the spring.
f. Note the location of each wire before disconnecting the old switch.
g. Use pliers to remove the wires from the old switch.
h. Pull the old switch away from the housing.
INSTALLING THE NEW SWITCH
2. Install the switch.
a. Refer to your notes to determine the correct location of each wire.
b. Connect the wires to the new switch.
c. Install the new switch into the housing.
REASSEMBLING THE UNIT
3. Reinstall the switch housing.
a. Make sure to tuck away wires to prevent pinching.
b. Align the hole on the housing with the hole on the handle.
c. Align the switch lever with the pin on the housing.
d. Install the spring behind the edge of the housing.
e. Connect the second half of the housing.
f. Use a screwdriver to secure the screws that hold the two housing halves together.
g. Use a screwdriver to secure the screws that hold the housing to the handle.
