


Video
Tools & Materials
- Screwdriver
- Fuel Clamps
- Pick
- Plastic Container
- Carburetor Cleaner
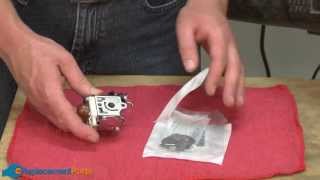
- Repair Kit

Find the repair kit used in this article and other carburetor parts here.
1. Remove the air filter and cover
Unscrew the wing nut and remove the air filter cover and the air filter.

2. Remove the air filter base
Remove the two screws holding the air filter base to the carburetor.
3. Pull away the fuel lines
Use fuel line clamps to pinch the fuel lines. Then pull them off of the carburetor.
4. Detach the throttle linkage
Simply unhook these from the carburetor. Needle nose pliers may be useful for this step.
5. Remove the carburetor
With everything removed, you can simply pull the carburetor away from the blower.
1. Remove the diaphragm cover
Use a screwdriver to remove the two screws holding the diaphragm cover to the carburetor. Then set the diaphragm gaskets and components to the side.
2. Remove the metering needle assembly
Remove the single screw while holding your finger over the spring to prevent it from flying off. Then remove the needle assembly and set it aside.

3. Remove the primer plate and bulb
Unscrew the four screws that secure this to the carburetor.
5. Remove the primer base
There's one screw holding this base to the carb, remove this and set the primer base and reed valves aside.
6. Remove the filter screen
A small pick may be useful to pry this out of the carburetor.
7. Remove the throttle body
This will be removed by unscrewing the two screws that secure it to the carburetor. Then set the throttle body and the roller that supports it to the side.
Using Carburetor Cleaner
1. Grab a container to catch excess cleaner drippings
A large bowl or plastic container should do fine.
2. Clean the carburetor
Spray the outside and every opening of your carburetor with carburetor cleaner.
3. Clean the components
Then take each part you removed from the carburetor in the earlier section and clean them with the carburetor cleaner.
Using Ultrasonic Cleaner
1. Heat up the machine
You may need to preheat the machine for about 30 minutes. Check the owner's manual for exact instructions.
2. Place the carburetor and the components into the cleaner
Once the machine is heated, simply drop the carburetor and its components into the water/soap mixture.
3. Set the timer and let it clean
Typically, this only takes about 10 minutes.
4. Dry the parts
Make sure to have each part completely dry. Use a air compressor to blow off any liquid.
1. Replace the old parts and gaskets
If you purchased a repair kit for your carburetor, now's the time you'll want to open it and switch out the old parts and gaskets with the new parts from the kit.

2. Install the roller
This will be placed inside the carburetor, below the throttle body.
3. Install the throttle body
Place this back into position and secure it with its screws.

4. Install the small filter
A small marker may be useful to push this back into position.
5. Place the reed valve gasket on primer base
Make sure to place this gasket on the base before the reed valves.
6. Install the reed valves
With the gasket in place on the primer base, you can set the reed valves back into position.
7. Install the completed primer base
With the primer assembly reassembled, you'll want to reinstall it onto the carburetor using the screw that was removed earlier.
8. Replace the primer bulb and plate
Place the primer bulb onto the primer base and secure it with the primer plate and four screws.
9. Install the metering needle onto the lever
Carefully place the metering needle onto the end of the lever.
10. Insert the hinge pin
Then insert the hinge pin into the metering needle assembly.
11. Place the spring into the carburetor
Before you can reinstall the assembly, you'll need to place the spring back into position.
12. Install metering needle assembly
Carefully lay the metering needle assembly back onto position while holding the spring down. Once you secure the assembly with the screw, you can let the spring go.

13. Replace the diaphragm gasket
Lay this down into its original position.
14. Replace the diaphragm
Place this over the diaphragm gasket.
15. Secure the diaphragm with its cap and screws
Now just replace the diaphragm cap and tighten the screws to complete the carburetor reassembly.
1. Reattach the throttle linkage to the carburetor
Use your fingers or pliers to hook these back up to your carburetor.
2. Replace the fuel lines
Push the fuel lines back onto the carburetor. Then remove the fuel clamps.
3. Reinstall the air filter base
This will screw right back into your carburetor.

4. Finalize the repair by installing the air filter and air filter cover.
Simply place these back into position and fasten with the wing nut.

[Back to Top]
Conclusion
We hope that by using this article (and testing the limits of your patience), you've repaired the carburetor in your blower. This process should be performed at leased once per year to ensure that you're carburetor and blower keep working like new. Show your new repair skills off to your friends and family, you don't even have to tell them you got it from us. Now go out and tackle that leaf project your broken blower has prevented you from finishing.
Need parts for any of your other blower models? We've got those too.
[Back to Top]
What We're About
