


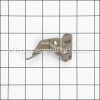
This is a genuine manufacturer-sourced component which has been designed for use with a variety of small engines. The camshaft pulley is constructed of metal and plastic parts, and is fitted onto the cam-pulley shaft. This item assists the engine camshaft\'s rotation timing. A screwdriver and an adjustable wrench are helpful in the replacement. This part is sold individually. Please refer to specific manual for repair instructions.
Pulley Comp., Camshaft 14320-Z8D-000
OEM part for: Honda
Part Number: 14320-Z8D-000
$18.65
In Stock
Jump To:
Frequently Purchased Together ?
Compatibility
This Pulley Comp., Camshaft will fit the following 144 machines. Confirm this part works with your model, and view the detailed model diagrams and repair help we have to offer.
Displaying 20 of 144 matching models.
144 total model matches. Try the above search to narrow your results.
This is the official OEM part for the following brands:
- Honda
This item works with the following types of products:
- Engine
- Lawn Mower
This part replaces obsolete part #: 14320-Z0Y-000 (Serial# (1000001-9999999)), 14320-Z0Y-000
Customer Part Reviews ?
Average Rating (out of 5):
Click to filter by ratings:
5 stars
1
4 stars
0
3 stars
0
2 stars
0
1 stars
0
< PREV
- 1
e
worked as described
gary -
September 24, 2024
Verified Purchase
Questions & Answers ?
Our customer Service team is at the ready daily to answer your part and product questions.

Ask our Team
We have a dedicated staff with decades of collective experience in helping customers just like you purchase parts to repair their products.
Does this fit my product?Questions & Answers for Pulley Comp., Camshaft
No questions have been asked yet
Customer Repair Instructions ?
All our customer repair instructions are solicited directly from other customers just like you who have purchased and replaced this exact part.
High compression
David - April 14, 2016
👍 9 of 10 people found this instruction helpful
Tool Type
Engine
Difficulty
Easy
Time
15-30 minutes
Tools Used
Socket set
Parts Used
Replaced cam with compression release ,the rope was to hard to pull because of the compression release was broke. Removed the valve cover on the Honda engine and slid the shaft back and pulled out the cam and installed the new cam and slid the shaft back through then installed the valve cover . Pulled rope engine turned easy and it fired up
Job done
Job done
Did you find this story helpful?
Thanks for voting and helping fellow customers!
Overhead cam gear was broken on GC190 Honda motor on power washer
Bryan - March 10, 2017
👍 3 of 4 people found this instruction helpful
Tool Type
Engine
Difficulty
Medium
Time
30-60 minutes
Tools Used
Pliers, Socket set, Wrench Set
Removed valve cover and split crankcase clamshell to remove broken gear parts. Cleaned All gaaket surfaces replaced cam gear and timing belt....re assembled. Motor started and ran perfectly.
Did you find this story helpful?
Thanks for voting and helping fellow customers!
Pull cord would not turn engine over and it would rip your grip off the handle. It hurts!
John - September 22, 2016
👍 3 of 4 people found this instruction helpful
Tool Type
Engine
Difficulty
Easy
Time
15-30 minutes
Tools Used
Socket set
Parts Used
The timing wheel has a feature which when pulling the cord to start engine it will hold valve open to release compression. This allows one to pull the start cord and turn the engine over for starting and the feature retracts at time of engine ignition thus allowing valve to close and the engine to keep compression. The ereplacement part was a Honda part and with free delivery for about $5.00 dollars. It is as easy as sneezing to remove old part and to replace with the new part!
Did you find this story helpful?
Thanks for voting and helping fellow customers!
NOT RELEASING COMPRESSION WHEN STARTING
CHRIS - October 5, 2021
Tool Type
Engine
Difficulty
Easy
Time
Less than 15 minutes
Tools Used
Pliers, Socket set, PAINT MARKER
Parts Used
REMOVED VALVE COVER MADE SURE IT WAS @T.D.C. MARKED BELT, PULL PIN THAT GOES THROUGH CAM GEAR, INSTALLED NEW CAM GEAR, INSTALL VALVE COVER.
Did you find this story helpful?
Thanks for voting and helping fellow customers!
Exhaust valve bent
Charles - December 16, 2020
Tool Type
Engine
Difficulty
Easy
Time
1-2 hours
Tools Used
Screwdriver, Power Drill, Socket set, Wrench Set
Disassembled engine by splitting case. Removed rod cap, removed crankshaft and removed piston and rod. Removed and replaced bent exhaust valve. Replaced cam gear and belt and reassembled engine.
Did you find this story helpful?
Thanks for voting and helping fellow customers!
Bent crankshaft due to hitting very hard object
Angel - October 23, 2020
Tool Type
Lawn Mower
Difficulty
Hard
Time
More than 2 hours
Tools Used
Screwdriver, Pliers, Socket set, Wrench Set, 2 and 3 jaw pullers, low and high range torque wrenches
Parts Used
- Valve Rocker Arm - 14431-Z0J-000
- Valve Rocker Arm - 14441-Z0J-000
- O-ring - 6.8x1.9 - Arai - 91301-ZM0-V31
- Seal- Valve Stem - 12209-ZM0-003
- Spring- Valve - 14751-ZL8-000
- Valve, In. - 14711-ZL8-000
- Pulley Comp., Camshaft - 14320-Z8D-000
- Belt, Timing (84hu6 G-200) - 14400-Z8B-003
- Valve, Ex. (c8e) - 14721-ZL8-000
- Cover, Head - 12311-Z8B-000
1. Took off broken blades, blade holder and drive belt pulley. This required a two jaw puller due to bend in shaft.
2. Open up crankcase. Many steps involved. Followed youtube videos. Detailed videos exist.
3. Take out piston. Found lots of black soot on piston, crankcase and valve seats. Apparently due to mistiming from running engine with bent crankshaft since this is a pretty new engine always running smooth before accident.
4. Use carburetor cleaner and lots of work to clean piston and case. Put in new valves and use grinding compound to clean valve seats and "break in" valves.
5. Install new crankshaft (also from ereplacement) and all new parts related to timing. The old ones looked fine but did not want to have to open up again in case there was some damage not visible.
6. Assemble everything. Again lots of steps. Take pictures when disassembling, label parts and use youtube videos. A mechanic friend lent me a puller and a torque wrench.
7. New blade holder and blades.
8. Pull starter cord. Starts right off. Runs very smooth. Cuts very well. Success but it is a major project for amateurs. I am retired thus have the time and love this Honda lawnmower. Kind of expensive because of all the new parts but still cheaper than a new Honda and I have only had it a couple of years. Now it's practically new.
Did you find this story helpful?
Thanks for voting and helping fellow customers!
Pressure washer cam pulley
Ralph - June 3, 2020
Tool Type
Engine
Difficulty
Medium
Time
15-30 minutes
Tools Used
Screwdriver, Pliers, Socket set
Parts Used
Removed spark plugs
Removed valve cover
Marked position of belt on cam pulley
Removed lock pin and removed cam pulley
Inserted new pulley and buttoned it up
Removed valve cover
Marked position of belt on cam pulley
Removed lock pin and removed cam pulley
Inserted new pulley and buttoned it up
Did you find this story helpful?
Thanks for voting and helping fellow customers!
Pressure washer would not start
David - February 24, 2017
Tool Type
Pressure Washer
Difficulty
Medium
Time
1-2 hours
Tools Used
Screwdriver, Socket set, Wrench Set
I replaced the timing belt, the upper cam gear and the 2 seals, one on the engine and one on the pump. One trick I learned was to install the timing belt on the crank gear and cam gear before I put the 2 halves on the engine back together. It will make the job easier because the belt is very tight when new and installing it on the cam gear was impossible. hope this helps
Did you find this story helpful?
Thanks for voting and helping fellow customers!
Engine would back fire when trying to start
Stephen - February 23, 2017
Tool Type
Engine
Difficulty
Medium
Time
30-60 minutes
Tools Used
Screwdriver, Socket set
The motor had sticky valves so I had to replace them.
1) Split the motor in half and removed the valve cover
2) Removed the crankshaft and piston
3) Replaced the intake valve
4) Cleaned the shaft of the exhaust valve (should have bought a new one)
5) Installed the piston checking that the ring gaps were staggered
6) Installed the crank shaft adding the new timing belt
7) Installed the new cam shaft and adjusted the timing
8) Used gasket maker and bolted the two motor halves together.
9) Installed the valve cover
Did you find this story helpful?
Thanks for voting and helping fellow customers!
The valve timing pulley broke
Ross - October 3, 2016
Tool Type
Engine
Difficulty
Easy
Time
15-30 minutes
Tools Used
Screwdriver, Socket set, Wrench Set, Nutdriver, Adjustable Wrench
Parts Used
1) Remove the cover (has OHV stamped on it) from the valves and timing belt
2) Replace the pulley and reattach the belt.
3) Since the pulley on my engine shattered into small pieces and fell into the engine's oil well. I disassembled most of the engine to clean out the plastic desbris and wipe out any bad oil. (This was by far the most time consuming part of the repair.)
2) Replace the pulley and reattach the belt.
3) Since the pulley on my engine shattered into small pieces and fell into the engine's oil well. I disassembled most of the engine to clean out the plastic desbris and wipe out any bad oil. (This was by far the most time consuming part of the repair.)
Did you find this story helpful?
Thanks for voting and helping fellow customers!
OEM stands for Original Equipment Manufacturer and means the part you’re buying is sourced directly from the manufacturer who made your product. At eReplacementParts, we sell only genuine OEM parts, guaranteeing the part you’re purchasing is of better design and of higher quality than aftermarket parts.
Learn MoreOur product descriptions are a combination of data sourced directly from the manufacturers who made your product as well as content researched and curated by our content & customer service teams. This content is edited and reviewed internally before being made public to customers.
Our customer service team are at the ready daily to answer your part and product questions. We have a dedicated staff with decades of collective experience in helping customers just like you purchase parts to repair their products.
All our part reviews are solicited directly from other customers who have purchased this exact part. While we moderate these reviews for profanity, offensive language or personally identifiable information, these reviews are posted exactly as submitted and no alterations are made by our team.
All our customer repair instructions are solicited directly from other customers just like you who have purchased and replaced this exact part. While we moderate these reviews for profanity, offensive language or personally identifiable information, these reviews are posted exactly as submitted and no alterations are made by our team.
Based on data from past customer purchasing behaviors, these parts are most commonly purchased together along with the part you are viewing. These parts may be necessary or helpful to replace to complete your current repair.
All our installation videos are created and produced in collaboration with our in-house repair technician, Mark Sodja, who has helped millions of eReplacementParts customers over the last 13 years repair their products. Mark has years of experience in selling and repairing both commercial and residential products with a specialty in gas-powered equipment.
This data is collected from customers who submitted a repair instruction after replacing this exact part. Customers can rate how easy the repair was to complete and how long it took. We aggregate this data to provide a repair rating that allows customers to quickly determine the difficulty and time needed to perform their own repair.