


Genuine OEM replacement primer bulb for engines with a pulsa prime carburetor. This part is sold individually. It includes the Rubber Bulb and the Plastic Collar to attach it. A primer sends gas into the carburetor so it can create a fuel and air mixture that is ready to go right into the cylinder and keep the engine running. Over time a primer bulb can dry out and crack. If the bulb is damaged it will not create suction and will not function as needed, therefore it will need to be replaced.
Primer-carburetor 694394
OEM part for: Briggs & Stratton, Briggs & Stratton Engines
Part Number: 694394
$4.99
In Stock
Jump To:
Frequently Purchased Together ?


Compatibility
This Primer-carburetor will fit the following 2851 machines. Confirm this part works with your model, and view the detailed model diagrams and repair help we have to offer.
Briggs & Stratton Engines
Show More Compatible ModelsThis item works with the following types of products:
- Engine Parts
This part replaces obsolete part #: 691347, 494408
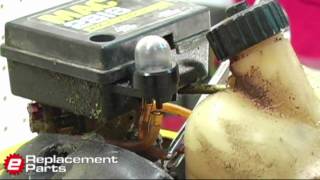
Repair Videos ?
Articles:
|
Replacing primer bulbs in small engines is one of the most common types of tool repairs, and this article explains profe...
June 25, 2010
|

Customer Part Reviews ?
Average Rating (out of 5):
Click to filter by ratings:
5 stars
6
4 stars
1
3 stars
0
2 stars
0
1 stars
0
< PREV
- 1
primer bulb
we got the correct part. the delivery time was ok. price was also ok
Guest -
May 30, 2023
Verified Purchase
Exact fit
Good product fast shipping exact fit works like a charm
Raymond -
November 13, 2021
Verified Purchase
Perfect fit.
Perfect fit. The old very old push mower runs like a top. All parts that I have ordered have fit perfectly on my zero turn Toro and also my snapper tiller.
Guest -
October 9, 2021
Verified Purchase
great part worked as expected, solved the problem.
direct fit fast delivery mower works like new again. the original bulb was detereated.
Guest -
August 8, 2020
Verified Purchase
Easy repair
Part was package neatly and worked as expected
Guest -
March 24, 2020
Verified Purchase
Primer bulb replacement
The buld arrived in good condition, and within 3 days of my order. Unfortunately, it seemed hard to put back and I damaged the rubber (a small tear in the rubber, the tool slipped) and it would not develop pressure as needed. I removed the new bulb and replaced it with the old one. Mower works.
Larry -
May 9, 2019
Verified Purchase
Primer Bulb
Quick shipment and very easy to install
lawrence -
September 19, 2020
Verified Purchase
Questions & Answers ?
Our customer Service team is at the ready daily to answer your part and product questions.

Ask our Team
We have a dedicated staff with decades of collective experience in helping customers just like you purchase parts to repair their products.
Does this fit my product?Questions & Answers for Primer-carburetor
No questions have been asked yet
Customer Repair Instructions ?
All our customer repair instructions are solicited directly from other customers just like you who have purchased and replaced this exact part.
Dirty air filter and worn out Primer Bulb
Peter - March 14, 2016
👍 18 of 20 people found this instruction helpful
Tool Type
Lawn Mower
Difficulty
Hard
Time
15-30 minutes
Tools Used
Screwdriver, Pliers, Pliers that have tips bent in
For air filter unscrew lid of housing and remove old filter. Put in new filter and replace lid. replace screw and tighten.
To remove old primer bulb use pliers that have tips bent in. Put bent in tips in bulb housing cuts (vertical) that show white on the housing closer to the carburetor and squeeze in with gentle pulling pressure. The bulb and retainer (white nylon) should be able to be worked out of the housing. Put the new retainer on the new bulb and push into the housing using a flat screwdriver making sure the flaps on the retainer line up with the cuts in the housing. Rotate the screwdriver around the retainer gently pushing each time until the retainer flaps engage the housing cuts.
To remove old primer bulb use pliers that have tips bent in. Put bent in tips in bulb housing cuts (vertical) that show white on the housing closer to the carburetor and squeeze in with gentle pulling pressure. The bulb and retainer (white nylon) should be able to be worked out of the housing. Put the new retainer on the new bulb and push into the housing using a flat screwdriver making sure the flaps on the retainer line up with the cuts in the housing. Rotate the screwdriver around the retainer gently pushing each time until the retainer flaps engage the housing cuts.
Did you find this story helpful?
Thanks for voting and helping fellow customers!
Black smoke, broken primer bulb.
Herbert - February 3, 2016
👍 6 of 7 people found this instruction helpful
Tool Type
Lawn Mower
Difficulty
Easy
Time
Less than 15 minutes
Tools Used
Screwdriver, Pliers, Socket set, Adjustable Wrench, WD40
Add WD40 to all screws to be removed. Unscrew old muffler, clean area and screw the new muffler in. Clean filter case, add new filter. Remove old primer bulb, clean area with rag and WD40 and you will be able too see the old retainer. Remove old retainer by using a flat head screw driver in the outside holes. Insert towards the back of the hole and pry old retainer out. Insert new bulb and new retainer.
Did you find this story helpful?
Thanks for voting and helping fellow customers!
primer bulb had melted during prolonged storage
Thomas - July 4, 2016
👍 4 of 5 people found this instruction helpful
Tool Type
Engine
Difficulty
Medium
Time
15-30 minutes
Tools Used
Screwdriver, Pliers
Parts Used
1. Removed old primer bulb
2. Retainer clip/ring impossible to remove from engine without destroying it
3. Replaced new primer bulb
4. New clip/ring very difficult to insert
5. Several tries with screwdriver which could have easily punctured primer bulb
6. Finally clicked into place
7. Primer works well & engine starts
2. Retainer clip/ring impossible to remove from engine without destroying it
3. Replaced new primer bulb
4. New clip/ring very difficult to insert
5. Several tries with screwdriver which could have easily punctured primer bulb
6. Finally clicked into place
7. Primer works well & engine starts
Did you find this story helpful?
Thanks for voting and helping fellow customers!
Had a hole in it
GARY - September 14, 2017
👍 1 of 1 people found this instruction helpful
Tool Type
Lawn Mower
Difficulty
Easy
Time
Less than 15 minutes
Tools Used
Pliers, Socket set
Parts Used
Squeezed the clips holding it In remove it, replaced it with a new one
Did you find this story helpful?
Thanks for voting and helping fellow customers!
Primer
Richard - September 8, 2016
👍 1 of 1 people found this instruction helpful
Tool Type
Engine
Difficulty
Easy
Time
Less than 15 minutes
Tools Used
Screwdriver, small screwdriver
Parts Used
Took off old... put on new....
Did you find this story helpful?
Thanks for voting and helping fellow customers!
Primer bulb on carburetor splut after 20 years
Jerry - October 26, 2023
Tool Type
Lawn Mower
Difficulty
Easy
Time
15-30 minutes
Tools Used
Screwdriver
Parts Used
Removed old bulb
Cleaned out area of corrosion and dirt
Installed new bulb
Cleaned air filter
Primed carb
Pulled starter cord
Motor started like always
Mowed lawn
Cleaned out area of corrosion and dirt
Installed new bulb
Cleaned air filter
Primed carb
Pulled starter cord
Motor started like always
Mowed lawn
Did you find this story helpful?
Thanks for voting and helping fellow customers!
Abandoned mower, missing a wheel, sitting at the curb waiting to go to the junk yard
Lee - May 22, 2022
Tool Type
Lawn Mower
Difficulty
Medium
Time
1-2 hours
Tools Used
Screwdriver, Pliers, Socket set, Wrench Set
I wanted a project. The previous owner said i could have it and it may need a starter? It's a pull start.
Step 1 Power wash and engine degreaser.
Step 2 Inspect for oil - it was almost dry. Checked for spark - good. Air filter has never been changed. Primer bulb shot. Got it to start eventually - stable enough.
Step 3 Tore down the engine cover and carburetor enough to figure only that the only service this thing has seen is gasoline. Ordered the above parts.
Step 4 Cleaned out the carburetor and the top end of the engine. Sharpened the blade and made sure the whole mower was structurally sound.
Step 5 Replaced the parts that were ordered including the missing wheel assembly. Changed the oil, fresh gas, Three primes of the primer bulb. the machine came to life on the 1st pull.
I have mowed my grass three times so far, runs great. Selling it to a friend who needs a cheap mower
Did you find this story helpful?
Thanks for voting and helping fellow customers!
Primer bulb had a hole in it
Raymond - November 14, 2021
Tool Type
Engine
Difficulty
Easy
Time
Less than 15 minutes
Tools Used
Screwdriver, Pliers, Adjustable Wrench, None
Parts Used
Removed old primer bulb and replaced with the new one
Did you find this story helpful?
Thanks for voting and helping fellow customers!
primer bulb
Tommy - October 11, 2021
Tool Type
Engine
Difficulty
Easy
Time
Less than 15 minutes
Tools Used
Screwdriver, small hammer
Parts Used
aligned plastic ring snaps that holds it in to the engine holes and tapped gently into place until it snapped in the holes on the engine with a screw driver and a small hammer.
Did you find this story helpful?
Thanks for voting and helping fellow customers!
Governor spring broke
David - August 20, 2020
Tool Type
Lawn Mower
Difficulty
Easy
Time
30-60 minutes
Tools Used
Screwdriver, Pliers, Nutdriver
Removed old spring replaced with new one
Did you find this story helpful?
Thanks for voting and helping fellow customers!
Load More Install Stories
OEM stands for Original Equipment Manufacturer and means the part you’re buying is sourced directly from the manufacturer who made your product. At eReplacementParts, we sell only genuine OEM parts, guaranteeing the part you’re purchasing is of better design and of higher quality than aftermarket parts.
Our product descriptions are a combination of data sourced directly from the manufacturers who made your product as well as content researched and curated by our content & customer service teams. This content is edited and reviewed internally before being made public to customers.
Our customer service team are at the ready daily to answer your part and product questions. We have a dedicated staff with decades of collective experience in helping customers just like you purchase parts to repair their products.
All our part reviews are solicited directly from other customers who have purchased this exact part. While we moderate these reviews for profanity, offensive language or personally identifiable information, these reviews are posted exactly as submitted and no alterations are made by our team.
All our customer repair instructions are solicited directly from other customers just like you who have purchased and replaced this exact part. While we moderate these reviews for profanity, offensive language or personally identifiable information, these reviews are posted exactly as submitted and no alterations are made by our team.
Based on data from past customer purchasing behaviors, these parts are most commonly purchased together along with the part you are viewing. These parts may be necessary or helpful to replace to complete your current repair.
All our installation videos are created and produced in collaboration with our in-house repair technician, Mark Sodja, who has helped millions of eReplacementParts customers over the last 13 years repair their products. Mark has years of experience in selling and repairing both commercial and residential products with a specialty in gas-powered equipment.
This data is collected from customers who submitted a repair instruction after replacing this exact part. Customers can rate how easy the repair was to complete and how long it took. We aggregate this data to provide a repair rating that allows customers to quickly determine the difficulty and time needed to perform their own repair.