


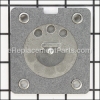
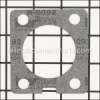
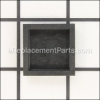
This metal air compressor exhaust tube is used in compressors. It is used to vent gases away from the engine. Keep in mind this part is priced individually. It goes between the hose clamp and the tube seal and is an original manufacturer part. If it becomes broken a screwdriver and pliers may be needed during replacement.
Outlet Tube N134023
OEM part for: Porter Cable, DeWALT
Part Number: N134023
$8.94
In Stock
Jump To:
Frequently Purchased Together ?


Compatibility
This Outlet Tube will fit the following 195 machines. Confirm this part works with your model, and view the detailed model diagrams and repair help we have to offer.
Displaying 20 of 195 matching models.
195 total model matches. Try the above search to narrow your results.
This is the official OEM part for the following brands:
- Black and Decker
- Craftsman
- DeVilbiss
- DeWALT
- Porter Cable
- Stanley
This item works with the following types of products:
- Compressor
This part replaces obsolete part #: A12368, CAC-1194-1
Repair Videos ?
Watch the Repair Video for
Outlet Tube

Articles:
|
Step-by-step instructions show you how to remove and install the outlet tube seal on an air compressor....
November 19, 2014
|

Questions & Answers ?
Our customer Service team is at the ready daily to answer your part and product questions.

Ask our Team
We have a dedicated staff with decades of collective experience in helping customers just like you purchase parts to repair their products.
Does this fit my product?Questions & Answers for Outlet Tube
No questions have been asked yet
Customer Repair Instructions ?
All our customer repair instructions are solicited directly from other customers just like you who have purchased and replaced this exact part.
Compressor leaking air after it initially built up pressure and automatically turned off
Kenneth - March 8, 2017
👍 3 of 3 people found this instruction helpful
Tool Type
Compressor
Difficulty
Easy
Time
30-60 minutes
Tools Used
Screwdriver, Adjustable Wrench, torq driver, side cutter
There was an air leak after the compressor came to pressure and automatically shut off. This caused the compressor to cycle on and off even though no air was being used by the tool. The leak appeared to be coming from near the compressor head near the aluminum cooling tube and seal. I replaced both the tube and seal, but the leak was still there. It turns out, there is a small hole in the compressor head that is part of the compressor design. The leak turned out to be caused by a faulty check valve. The check valve is located at the end of rubber tube that connects between the aluminum cooling tube and the air tank. The check valve is only supposed to allow air flow into the tank and mine was allowing airflow back into the compressor. I replaced the check valve and hose clamp and that fixed the problem. I also applied teflon tape to the treads of the new check valve to insure the threads sealed when tightening the check valve into the tank.
Did you find this story helpful?
Thanks for voting and helping fellow customers!
air leak
Mark - December 29, 2018
👍 1 of 1 people found this instruction helpful
Tool Type
Compressor
Difficulty
Easy
Time
30-60 minutes
Tools Used
Screwdriver, Pliers, hose clamp crimper
removed compressor from tank replaced outlet tube and cleaned everything and reassembled,
Did you find this story helpful?
Thanks for voting and helping fellow customers!
Compressor leaked air slowly.
Robert - October 25, 2017
👍 1 of 1 people found this instruction helpful
Tool Type
Compressor
Difficulty
Medium
Time
30-60 minutes
Tools Used
Screwdriver, Nutdriver
1. Disassembled the outer cover.
2. Removed the head and the outlet tube.
3. Cleaned the gasket from the head.
4. Replaced the tube seal.
5. Reassembled the head and the outlet tube.
6. Reassembled the compressor.
2. Removed the head and the outlet tube.
3. Cleaned the gasket from the head.
4. Replaced the tube seal.
5. Reassembled the head and the outlet tube.
6. Reassembled the compressor.
Did you find this story helpful?
Thanks for voting and helping fellow customers!
Air leak on outlet side of compressor
Edward - August 17, 2016
Tool Type
Compressor
Difficulty
Easy
Time
30-60 minutes
Tools Used
Screwdriver, Pliers
Parts Used
R&R outlet hose and seal. A bit challenging to determine how to get access but straightforward after that. Leak fixed holds pressure for weeks now.
First remove gauge housing, 2 screws. Trick for access is to remove 2 small screws locking compressor housing to tank and sliding it sideways to remove it. Then 4 Torx head screws and the plastic housing splits allowing access.
First remove gauge housing, 2 screws. Trick for access is to remove 2 small screws locking compressor housing to tank and sliding it sideways to remove it. Then 4 Torx head screws and the plastic housing splits allowing access.
Did you find this story helpful?
Thanks for voting and helping fellow customers!
OEM stands for Original Equipment Manufacturer and means the part you’re buying is sourced directly from the manufacturer who made your product. At eReplacementParts, we sell only genuine OEM parts, guaranteeing the part you’re purchasing is of better design and of higher quality than aftermarket parts.
Learn MoreOur product descriptions are a combination of data sourced directly from the manufacturers who made your product as well as content researched and curated by our content & customer service teams. This content is edited and reviewed internally before being made public to customers.
Our customer service team are at the ready daily to answer your part and product questions. We have a dedicated staff with decades of collective experience in helping customers just like you purchase parts to repair their products.
All our part reviews are solicited directly from other customers who have purchased this exact part. While we moderate these reviews for profanity, offensive language or personally identifiable information, these reviews are posted exactly as submitted and no alterations are made by our team.
All our customer repair instructions are solicited directly from other customers just like you who have purchased and replaced this exact part. While we moderate these reviews for profanity, offensive language or personally identifiable information, these reviews are posted exactly as submitted and no alterations are made by our team.
Based on data from past customer purchasing behaviors, these parts are most commonly purchased together along with the part you are viewing. These parts may be necessary or helpful to replace to complete your current repair.
All our installation videos are created and produced in collaboration with our in-house repair technician, Mark Sodja, who has helped millions of eReplacementParts customers over the last 13 years repair their products. Mark has years of experience in selling and repairing both commercial and residential products with a specialty in gas-powered equipment.
This data is collected from customers who submitted a repair instruction after replacing this exact part. Customers can rate how easy the repair was to complete and how long it took. We aggregate this data to provide a repair rating that allows customers to quickly determine the difficulty and time needed to perform their own repair.