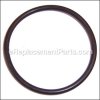
This item is an authentic OEM part. It is used in various models of Toro tractors and Briggs & Stratton engines. An o-ring is used to seal and protect in between rigid connected pieces. Proper seal is needed for machine functioning. Please ensure that correct size/shape o-ring is being used, as many machines use multiple types throughout. Sold individually.
Seal-o Ring 691917
OEM part for: Briggs & Stratton Engines, Toro
Part Number: 691917
$4.99
In Stock
Jump To:
Frequently Purchased Together ?


Compatibility
This Seal-o Ring will fit the following 14814 machines. Confirm this part works with your model, and view the detailed model diagrams and repair help we have to offer.
Displaying 20 of 14814 matching models.
14814 total model matches. Try the above search to narrow your results.
This is the official OEM part for the following brands:
- Briggs & Stratton Engines
- Lawn Boy
- Murray
- Toro
This item works with the following types of products:
- Engine
- Lawn Mower
- Lawn Tractor
This part replaces obsolete part #: 697891, 281106
Customer Part Reviews ?
Average Rating (out of 5):
Click to filter by ratings:
5 stars
4
4 stars
1
3 stars
1
2 stars
1
1 stars
0
< PREV
- 1
Great valve
easy repair, great fit, great value
Guest -
August 1, 2023
Verified Purchase
Works as it should
Good service. Easy install.
Guest -
June 27, 2023
Verified Purchase
Great Service
It was easy to find the right part on your website and it arrived quickly. Thank you.
Guest -
January 1, 2022
Verified Purchase
Work as expected
Lawnmower working like new again
Alexander -
June 11, 2019
Verified Purchase
Easy repair, and easy to find on the site.
The parts arrived on time and undamaged
Justin -
July 31, 2021
Verified Purchase
Arrived on time, perfect fit
Worked just fine
Guest -
June 12, 2019
Verified Purchase
Not correct gasket didn't fit
Wrong gasket to small didn't work.shipping was ok no damage to product.
Guest -
August 3, 2023
Verified Purchase
Questions & Answers ?
Our customer Service team is at the ready daily to answer your part and product questions.

Ask our Team
We have a dedicated staff with decades of collective experience in helping customers just like you purchase parts to repair their products.
Does this fit my product?Questions & Answers for Seal-o Ring
No questions have been asked yet
Customer Repair Instructions ?
All our customer repair instructions are solicited directly from other customers just like you who have purchased and replaced this exact part.
Had a few bad gaskets
Roger - July 21, 2016
👍 2 of 2 people found this instruction helpful
Tool Type
Lawn Tractor
Difficulty
Easy
Time
Less than 15 minutes
Tools Used
Socket set
Removed the carburetor and removed the seal on the intake gasket, then replaced the intake gasket. Also replace the o-ring seal.
Did you find this story helpful?
Thanks for voting and helping fellow customers!
Lawn Mower Not Running Correctly, Idle Up, And Down Incorrectly.
Billy - March 3, 2023
Tool Type
Lawn Mower
Difficulty
Easy
Time
Less than 15 minutes
Tools Used
Socket set
Parts Used
Removed The Air Filter Contraption, Installed New O-Ring. Lawn Mower Runs And Idles Perfect.. Thank You eReplacement Parts...
Did you find this story helpful?
Thanks for voting and helping fellow customers!
Erratic starting/running Briggs engine on a riding mower
Dane - June 22, 2022
Tool Type
Lawn Mower
Difficulty
Easy
Time
15-30 minutes
Tools Used
Socket set, Wrench Set, Nutdriver
I just replaced the parts i ordered on the carb. All parts fit as intended. However, the engine will start and run but quickly starts sputtering/missing. I also replaced the spark plug. Not sure what else is wrong but I think I can get the yard mowed with it. Just not running right.
Did you find this story helpful?
Thanks for voting and helping fellow customers!
Engine surging
Gordon - May 20, 2022
Tool Type
Lawn Mower
Difficulty
Easy
Time
1-2 hours
Tools Used
Socket set, Wrench Set, Nutdriver
Parts Used
Replaced o-rings on two carburetor jets. Also replaced intake manifold gaskets.
Did you find this story helpful?
Thanks for voting and helping fellow customers!
bent push rods due to valve guide moved
Ron - September 5, 2021
Tool Type
Lawn Tractor
Difficulty
Medium
Time
1-2 hours
Tools Used
Screwdriver, Pliers, Socket set, Wrench Set
removed cylinder head, pressed valve guide back in place, peened valve guide, lapped valves, reassembled head , reassembled engine.
Did you find this story helpful?
Thanks for voting and helping fellow customers!
intake manifold had crack, causing extremely rough running engine
douglas - January 14, 2019
Tool Type
Lawn Tractor
Difficulty
Medium
Time
30-60 minutes
Tools Used
Screwdriver, Socket set, scraper
removed air cleaner housing, unbolted carb, cleaned and inspected carb and mating surfaces, installed new gasket/O-ring and reinstalled.
Did you find this story helpful?
Thanks for voting and helping fellow customers!
Cranks won't start. Found there was no intake draw pressure
Randy - November 4, 2017
Tool Type
Lawn Mower
Difficulty
Medium
Time
1-2 hours
Tools Used
Screwdriver, Pliers, Socket set, Wrench Set
Parts Used
1. Removed the hood and the side panels around the engine.
2. Removed top cover from engine.
3. Removed intake air filter housing.
4. Removed fuel line from carburetor and plugged.
5. Removed the intake with the carburetor to clean only.
6. Removed the rocker arm cover. Found the intake push rod bent.
7. Loosen the rocker arm on both the intake and the exhaust to replace the push rods.
8. Install the new gasket on the rocker arm cover and the bolt back up.
9. Install the new gaskets on the intake and the bolt back up.
10. Unplug the fuel line and place back on the carburetor.
11. Test fired to ensure it worked.
12. Install the air filter housing.
13. Install the top engine cover.
14. Install the sides and the hood.
Did you find this story helpful?
Thanks for voting and helping fellow customers!
OEM stands for Original Equipment Manufacturer and means the part you’re buying is sourced directly from the manufacturer who made your product. At eReplacementParts, we sell only genuine OEM parts, guaranteeing the part you’re purchasing is of better design and of higher quality than aftermarket parts.
Learn MoreOur product descriptions are a combination of data sourced directly from the manufacturers who made your product as well as content researched and curated by our content & customer service teams. This content is edited and reviewed internally before being made public to customers.
Our customer service team are at the ready daily to answer your part and product questions. We have a dedicated staff with decades of collective experience in helping customers just like you purchase parts to repair their products.
All our part reviews are solicited directly from other customers who have purchased this exact part. While we moderate these reviews for profanity, offensive language or personally identifiable information, these reviews are posted exactly as submitted and no alterations are made by our team.
All our customer repair instructions are solicited directly from other customers just like you who have purchased and replaced this exact part. While we moderate these reviews for profanity, offensive language or personally identifiable information, these reviews are posted exactly as submitted and no alterations are made by our team.
Based on data from past customer purchasing behaviors, these parts are most commonly purchased together along with the part you are viewing. These parts may be necessary or helpful to replace to complete your current repair.
All our installation videos are created and produced in collaboration with our in-house repair technician, Mark Sodja, who has helped millions of eReplacementParts customers over the last 13 years repair their products. Mark has years of experience in selling and repairing both commercial and residential products with a specialty in gas-powered equipment.
This data is collected from customers who submitted a repair instruction after replacing this exact part. Customers can rate how easy the repair was to complete and how long it took. We aggregate this data to provide a repair rating that allows customers to quickly determine the difficulty and time needed to perform their own repair.