


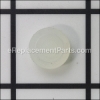
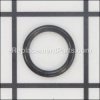
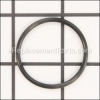
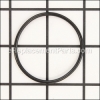
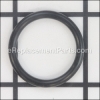
This is a genuine manufacturer approved replacement o-ring used on Porter Cable nailers/staplers. O-rings are designed to withstand high pressure by creating a seal between two connected parts. Over time o-rings will damage and should be inspected periodically. If parts are showing signs of wear they should be replaced. This is a rubber o-ring and it is sold individually.
O-ring 5140027-36
OEM part for: Porter Cable
Part Number: 5140027-36
$5.19
In Stock
Jump To:
Frequently Purchased Together ?
Compatibility
This O-ring will fit the following 12 machines. Confirm this part works with your model, and view the detailed model diagrams and repair help we have to offer.
Porter Cable
Show More Compatible ModelsThis item works with the following types of products:
- Nailer Parts
- Stapler Parts
This part replaces obsolete part #: 883834
Customer Part Reviews ?
Average Rating (out of 5):
Click to filter by ratings:
5 stars
6
4 stars
0
3 stars
1
2 stars
0
1 stars
0
< PREV
- 1
Thanks
I was able to find the right part (with updated part number) to fix my air stapler. The part was exactly what i needed and im good to go. Thanks
Guest -
March 14, 2023
Verified Purchase
just what I needed !
This O-ring was perfect, it fir in the nail gun and it works perfectly.
Guest -
February 12, 2021
Verified Purchase
Worked as expectec.
Fit perfecly.
Guest -
September 9, 2020
Verified Purchase
Fix my nail gun with this part .
Very easy to order and came short time fit perfict.
William -
October 18, 2019
Verified Purchase
Exact fit and easy to install, this o-ring stopped the air leak on my P/C stapler. Parts are going to age and wear and it’s good to be able to get replacements.
Came well packaged in the mail with no issues.
Guest -
August 11, 2019
Verified Purchase
It was easy and correct
O
Guest -
April 22, 2019
Verified Purchase
Repair easy fixed one problem but another problem occurred get to costly to order parts one at a time
Part received arrived on time and in great condition
Guest -
April 22, 2020
Verified Purchase
Questions & Answers ?
Our customer Service team is at the ready daily to answer your part and product questions.

Ask our Team
We have a dedicated staff with decades of collective experience in helping customers just like you purchase parts to repair their products.
Does this fit my product?Questions & Answers for O-ring
No questions have been asked yet
Customer Repair Instructions ?
All our customer repair instructions are solicited directly from other customers just like you who have purchased and replaced this exact part.
Air leak from air nailer
Tom - December 3, 2016
👍 3 of 3 people found this instruction helpful
Tool Type
Stapler
Difficulty
Easy
Time
Less than 15 minutes
Tools Used
, Allen wrench
Parts Used
Opened the back casing with the Allen wrench, removed the defective O ring and replaced it with the new one using only my fingers.
Did you find this story helpful?
Thanks for voting and helping fellow customers!
Leaking air
Doug - September 1, 2017
👍 2 of 2 people found this instruction helpful
Tool Type
Nailer
Difficulty
Easy
Time
15-30 minutes
Tools Used
, Allen wrench
Parts Used
Remove the four screws holding the cap on and remove the cap
Remove the worn o-ring and replace it with the new one
Clean out the internal parts of the gun and oil it
Install the cap with the four screws
Remove the worn o-ring and replace it with the new one
Clean out the internal parts of the gun and oil it
Install the cap with the four screws
Did you find this story helpful?
Thanks for voting and helping fellow customers!
Blowing air from top of gun...
Jon - April 4, 2017
👍 1 of 1 people found this instruction helpful
Tool Type
Nailer
Difficulty
Easy
Time
15-30 minutes
Tools Used
Screwdriver, Allen wrench
Parts Used
Removed head of gun, replaced seal, o-ring, put back together.
Love e-replacement! Jon
Love e-replacement! Jon
Did you find this story helpful?
Thanks for voting and helping fellow customers!
P-C brad nailer (BN200 Type 1) would not reset the plunger,
Richard - January 26, 2017
👍 1 of 1 people found this instruction helpful
Tool Type
Nailer
Difficulty
Medium
Time
More than 2 hours
Tools Used
, Supplied Allen/hex key
Parts Used
P-C brad nailer (BN200 Type 1) would not reset the nail plunger, the o-ring was part of the problem.
1. Removed the black top of nail gun using supplied Allen/hex tool.
2. Removed valve disk with damaged clear/white o-ring. It is either on the nail plunger or in the black top.
3. Valve spring was clogged with debris from failed o-ring, cleaned and re-seated.
4. This did not solve problem, disassembled unit again, cleaned exit air vent (on the black nailer top, with a toothpick and compressed air also cleaned the air path under valve disk. Seemed the exit air vent had debris and dust/gum build up from using pneumatic oil.
5. Reassembled and did limited testing. More testing to follow. So far so good.
6. While it took 2 hours, if I did the full cleaning the first time - the entire repair would have been less than 30 minutes.
Did you find this story helpful?
Thanks for voting and helping fellow customers!
Quit firing
Eric - September 29, 2016
👍 1 of 1 people found this instruction helpful
Tool Type
Nailer
Difficulty
Easy
Time
Less than 15 minutes
Tools Used
, One 4mm allen wrench
Parts Used
Pulled the cylinder head off, replaced the o ring and the bumper seal, then put the head back on. Very very simple and easy
Did you find this story helpful?
Thanks for voting and helping fellow customers!
Air leak at nose
Rich - December 28, 2015
👍 1 of 1 people found this instruction helpful
Tool Type
Nailer
Difficulty
Easy
Time
15-30 minutes
Tools Used
Screwdriver, Nutdriver, Allen wrench
I broke nailer down completely and reinstalled all new parts..You make it very easy for repair..All your parts are clearly marked for ease of replacement..Thanks for all you do..Rich Lincoln Ca
Did you find this story helpful?
Thanks for voting and helping fellow customers!
O-ring failed
Chuck - June 29, 2023
Tool Type
Stapler
Difficulty
Easy
Time
Less than 15 minutes
Tools Used
, Allen wrench
Parts Used
Removed 4 screws replaced 1 o-ring and 1 gasket, reinstall back cap.
Did you find this story helpful?
Thanks for voting and helping fellow customers!
A plastic seal disintegrated
William - January 22, 2023
Tool Type
Nailer
Difficulty
Medium
Time
30-60 minutes
Tools Used
Screwdriver, Pliers, Allen keys, pick
Had to disassemble the nailer, carefully clean all the debris from it and replace the failed part plus several o-rings.
Did you find this story helpful?
Thanks for voting and helping fellow customers!
Piston seal had aged and disintegrated and crumbeled. Brad nailer would not operated and had air leakage sound. New seal fixed the issue and it's back working like new.
Donald - March 7, 2022
Tool Type
Nailer
Difficulty
Easy
Time
Less than 15 minutes
Tools Used
, Allen key
Parts Used
Disconnect the Brad Nailer form the air supply BEFORE attempting any adjustments or repairs.
1. Remove the 4 socket head (Allen) screws that fasten the top cap to the main body, noting it's alignment to the main body.
2. Remove the top cap being carful not to damage the gasket.
3. Remove the remains of the old seal (O-ring).
4. If required, use a small brass wire brush to remove debris and surface corrosion from the O-ring groove.
5. Wipe away all debris from the parts and piston bore using paper towel or clean cloth.
6. Apply light coating of silicone grease to the O-ring seal and install into O-ring groove.
7. Re-install the top cap on the main body ensuring correct alignment.
8. Re-install the 4 socket head screws and torque.
9. Test Brad Nailer on scrap wood and return to service.
Did you find this story helpful?
Thanks for voting and helping fellow customers!
An o ring broke on a brad nailer that I have owned for over 20 years
Jason - August 19, 2021
Tool Type
Nailer
Difficulty
Easy
Time
Less than 15 minutes
Tools Used
, Allen key
Parts Used
I took the nail gun apart to diagnose the problem and identify the faulty part. Then I visited your website and was able to easily find the exploded diagram/schematic for my tool. I ordered the specific parts needed by item number, recieved everything a few days later, and had my nailgun back together in about 10 minutes. Field tested it the next day.
This is not the first time I have orderd parts successfully from your website and being a professional tradesman, it certainly will not be the last. You offer a great service.
Regards,
J. Chism
This is not the first time I have orderd parts successfully from your website and being a professional tradesman, it certainly will not be the last. You offer a great service.
Regards,
J. Chism
Did you find this story helpful?
Thanks for voting and helping fellow customers!
Load More Install Stories
OEM stands for Original Equipment Manufacturer and means the part you’re buying is sourced directly from the manufacturer who made your product. At eReplacementParts, we sell only genuine OEM parts, guaranteeing the part you’re purchasing is of better design and of higher quality than aftermarket parts.
Our product descriptions are a combination of data sourced directly from the manufacturers who made your product as well as content researched and curated by our content & customer service teams. This content is edited and reviewed internally before being made public to customers.
Our customer service team are at the ready daily to answer your part and product questions. We have a dedicated staff with decades of collective experience in helping customers just like you purchase parts to repair their products.
All our part reviews are solicited directly from other customers who have purchased this exact part. While we moderate these reviews for profanity, offensive language or personally identifiable information, these reviews are posted exactly as submitted and no alterations are made by our team.
All our customer repair instructions are solicited directly from other customers just like you who have purchased and replaced this exact part. While we moderate these reviews for profanity, offensive language or personally identifiable information, these reviews are posted exactly as submitted and no alterations are made by our team.
Based on data from past customer purchasing behaviors, these parts are most commonly purchased together along with the part you are viewing. These parts may be necessary or helpful to replace to complete your current repair.
All our installation videos are created and produced in collaboration with our in-house repair technician, Mark Sodja, who has helped millions of eReplacementParts customers over the last 13 years repair their products. Mark has years of experience in selling and repairing both commercial and residential products with a specialty in gas-powered equipment.
This data is collected from customers who submitted a repair instruction after replacing this exact part. Customers can rate how easy the repair was to complete and how long it took. We aggregate this data to provide a repair rating that allows customers to quickly determine the difficulty and time needed to perform their own repair.