


This high-quality component is made for use with walk-behind rotor tillers. It is an authentic oil seal which is supplied by the original equipment manufacturer. This item helps to provide a tight seal for the ball bearing and the transmission shaft. Over time it may wear out and begin to crack eventually requiring a replacement to prevent oil leaks. For the exact location and the correct installation check the diagrams of your model. This high-quality oil seal is made of a durable rubber material with a metal casing and is sold as an individual component. You will need wrench set and a tool to pull off the old seal when performing this repair.
Seal-oil 1.00 Shf 721-04232
OEM part for: Troy-Bilt, Yard Machines, MTD
Part Number: 721-04232
$16.42
In Stock
Jump To:
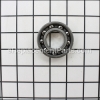
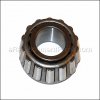
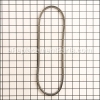
Frequently Purchased Together ?


Compatibility
This Seal-oil 1.00 Shf will fit the following 162 machines. Confirm this part works with your model, and view the detailed model diagrams and repair help we have to offer.
This item works with the following types of products:
Customer Part Reviews ?
Average Rating (out of 5):
Click to filter by ratings:
5 stars
4
4 stars
0
3 stars
0
2 stars
0
1 stars
0
< PREV
- 1
Guest -
April 20, 2021
Verified Purchase
Works great. No problems..
The seals were just what I needed. I was surprised at the speed in which they were shipped.
Guest -
April 1, 2021
Verified Purchase
Leaking oil tiller
New seals for my tiller, worked perfectly
larry -
November 12, 2019
Verified Purchase
easy repair
parts arrived in good condition. Screwed two screws into the old seal leaving enough of the head exposed to pry the seal out using a flat bar or claw hammer. installed new seal using a rubber mallet
norm -
July 26, 2019
Verified Purchase
Questions & Answers ?
Our customer Service team is at the ready daily to answer your part and product questions.

Ask our Team
We have a dedicated staff with decades of collective experience in helping customers just like you purchase parts to repair their products.
Does this fit my product?Questions & Answers for Seal-oil 1.00 Shf
No questions have been asked yet
Customer Repair Instructions ?
All our customer repair instructions are solicited directly from other customers just like you who have purchased and replaced this exact part.
Oil seal failed around tire
eric - June 27, 2017
👍 4 of 4 people found this instruction helpful
Tool Type
Cultivator
Difficulty
Easy
Time
15-30 minutes
Tools Used
Screwdriver, Pliers, Hammer
Parts Used
1. Remove tire pin and pull off tire
2. Most gear oil had leaked out, tipped on side to prevent more leakage
3. Remove old seal, used screw driver to pry out.
4. Lube and installed new seal, used PVC tube and wood block with hammer to install.
5. Put tire and pin back in and fill with correct gear oil to spec
2. Most gear oil had leaked out, tipped on side to prevent more leakage
3. Remove old seal, used screw driver to pry out.
4. Lube and installed new seal, used PVC tube and wood block with hammer to install.
5. Put tire and pin back in and fill with correct gear oil to spec
Did you find this story helpful?
Thanks for voting and helping fellow customers!
leaking transmission oil seals
Steve - April 23, 2020
👍 2 of 2 people found this instruction helpful
Tool Type
Cultivator
Difficulty
Hard
Time
More than 2 hours
Tools Used
Screwdriver, Pliers, Power Drill, Socket set, Wrench Set, Nutdriver, Adjustable Wrench, rubber hammer, dial micrometer, heavy duty c-ring pliers
Parts Used
Watched outstanding video provided by eReplacementParts on Youtube. TroyBilt Bronco tiller. Followed instructions exactly as shown.
Did you find this story helpful?
Thanks for voting and helping fellow customers!
replace tiller tine seals
Donald - February 13, 2019
👍 2 of 2 people found this instruction helpful
Tool Type
Cultivator
Difficulty
Medium
Time
30-60 minutes
Tools Used
Screwdriver, Socket set, Wrench Set, hammer, small chisel
Parts Used
1 remove tine retaining bolts from each tine set.
2 remove the tine sets.
3 use the screwdriver to lever the old seal out of the seal seat. This may require a small chisel be hammered between the seal and seal housing.be careful not to damage the seal seat housing
4 pry the old seal out
5 clean the seal seat housing area and tine shafts. You may need to polish the shafts with fine sand paper.
6Lubricate the rubber area of the seal with oil. install the new seals by lightly tapping the seal into place with the hammer. tap in a circular pattern around the outer edge of the seal until fully seated.
replace the tines and tine retaining bolts.
Did you find this story helpful?
Thanks for voting and helping fellow customers!
Axle seal leaked
Gayel - July 4, 2021
👍 1 of 1 people found this instruction helpful
Tool Type
Cultivator
Difficulty
Medium
Time
Less than 15 minutes
Tools Used
Screwdriver, Hammer
Parts Used
Pried out old seal pressed new one in.
Did you find this story helpful?
Thanks for voting and helping fellow customers!
All oil seals were leaking
Norman - May 31, 2018
👍 1 of 1 people found this instruction helpful
Tool Type
Cultivator
Difficulty
Medium
Time
1-2 hours
Tools Used
Screwdriver, Pliers, Power Drill, Socket set, Wrench Set, Seal puller
Removed wheels and tunes.
Cleaned shafts.
Drove screws into seal and used screws to pull out seal.
Used pieces of pic pipe to tap new seals into place.
Replaced wheels and tines.
Fill transmission with oil.
Replaced cover gaskets.
Cleaned shafts.
Drove screws into seal and used screws to pull out seal.
Used pieces of pic pipe to tap new seals into place.
Replaced wheels and tines.
Fill transmission with oil.
Replaced cover gaskets.
Did you find this story helpful?
Thanks for voting and helping fellow customers!
Leaking oil
Steve - March 22, 2018
👍 2 of 3 people found this instruction helpful
Tool Type
Cultivator
Difficulty
Medium
Time
1-2 hours
Tools Used
Screwdriver, Hammer
Parts Used
Removed seals and replaced oil seals and added new oil.
Did you find this story helpful?
Thanks for voting and helping fellow customers!
Wheel seals leaked.
Daniel - May 19, 2017
Tool Type
Cultivator
Difficulty
Easy
Time
30-60 minutes
Tools Used
Power Drill, Pry bar
Parts Used
1. Removed the wheels.
2. Inserted the screw into the old seal.
3. Placed the pry bar behind the screw head.
4. Removed the old seal.
5. Used a rubber mallet and a brass drift pin to seat the new seal in place.
6. Put the wheels back on.
7. Filled the transmission with the proper gear oil.
2. Inserted the screw into the old seal.
3. Placed the pry bar behind the screw head.
4. Removed the old seal.
5. Used a rubber mallet and a brass drift pin to seat the new seal in place.
6. Put the wheels back on.
7. Filled the transmission with the proper gear oil.
Did you find this story helpful?
Thanks for voting and helping fellow customers!
I had an oil leak
Michael - February 9, 2017
Tool Type
Cultivator
Difficulty
Easy
Time
30-60 minutes
Tools Used
Socket set, Nutdriver
I removed the wheel and removed the old seal with a puller and installed a new seal and filled with oil.
Did you find this story helpful?
Thanks for voting and helping fellow customers!
OEM stands for Original Equipment Manufacturer and means the part you’re buying is sourced directly from the manufacturer who made your product. At eReplacementParts, we sell only genuine OEM parts, guaranteeing the part you’re purchasing is of better design and of higher quality than aftermarket parts.
Our product descriptions are a combination of data sourced directly from the manufacturers who made your product as well as content researched and curated by our content & customer service teams. This content is edited and reviewed internally before being made public to customers.
Our customer service team are at the ready daily to answer your part and product questions. We have a dedicated staff with decades of collective experience in helping customers just like you purchase parts to repair their products.
All our part reviews are solicited directly from other customers who have purchased this exact part. While we moderate these reviews for profanity, offensive language or personally identifiable information, these reviews are posted exactly as submitted and no alterations are made by our team.
All our customer repair instructions are solicited directly from other customers just like you who have purchased and replaced this exact part. While we moderate these reviews for profanity, offensive language or personally identifiable information, these reviews are posted exactly as submitted and no alterations are made by our team.
Based on data from past customer purchasing behaviors, these parts are most commonly purchased together along with the part you are viewing. These parts may be necessary or helpful to replace to complete your current repair.
All our installation videos are created and produced in collaboration with our in-house repair technician, Mark Sodja, who has helped millions of eReplacementParts customers over the last 13 years repair their products. Mark has years of experience in selling and repairing both commercial and residential products with a specialty in gas-powered equipment.
This data is collected from customers who submitted a repair instruction after replacing this exact part. Customers can rate how easy the repair was to complete and how long it took. We aggregate this data to provide a repair rating that allows customers to quickly determine the difficulty and time needed to perform their own repair.