eReplacementParts.com
877-346-4815
Husqvarna Parts

Door Asy 593304501

OEM part for: Husqvarna

Part Number: 593304501


Install
Videos!
Usually ships in 7 - 12 business days
Leaves our warehouse within
7 - 12 business days
Medium 15-30 minutes (25 rated repairs)?
OEM: Original Equipment Manufacturer ?
Husqvarna

Product Description ?

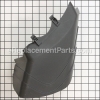
This is an authentic OEM part. The door assembly is made for use with several walk-behind lawn mowers. This plastic component is sold individually, and is fitted on the rear of the mower deck. A screwdriver and a socket set are needed for the installation.

  • Classification: Part
  • Weight: 1.54 lbs.
  • Shipping: Ships Worldwide

Frequently Purchased Together ?

Compatibility

This is the official OEM part for the following brands:

  • Husqvarna

This item works with the following types of products:

  • Lawn Mower

This part replaces obsolete part #: 532432642, 594942002_wasmerged, 532431391, 532431390

Customer Part Reviews ?

4.7
Average Rating (out of 5):
14 Reviews
Click to filter by ratings:
5 stars
11
4 stars
2
3 stars
1
2 stars
0
1 stars
0
  • Highest Rating
  • Most Recent
< PREV
  • 1
  • 2
NEXT >
  • Awesome!
    Need to keep my mower working for another year or two. Door broke and was using a clamp to hold in position when using the bag. Was glad that you all had the parts to fix! Thank you!
    Guest - April 14, 2024 Verified Purchase
    work very well and will need a another one for my hu 700f
    only took two year to get it but work great . Was not you fought was manufacture back log.
    Guest - August 4, 2023 Verified Purchase
    Easy to install
    Fit great
    Guest - September 13, 2022 Verified Purchase
    The rear door fit perfectly and was a breeze to replace
    The part matched the old door and the springs were easy to attach. It operates like new again!
    James - September 14, 2021 Verified Purchase
    Easy fix
    Mulching door fit great
    Guest - May 3, 2021 Verified Purchase
    Repair was difficult
    The part was fine however I need an impact drill/wrench to remove the bolt as it required a "star" bit. Service and delivery were excellent.
    Guest - August 13, 2020 Verified Purchase
    Mulch door
    Great part arrived on time little difficult to install compressed spring needed a few vice grips
    Michael - May 14, 2020 Verified Purchase
    Mower rear door
    Quality part and perfect fit! Thanks for the quick service . Will definitely use your company again when I need parts
    Guest - September 12, 2019 Verified Purchase
    perfect fit
    part arrived a few days later with an explanation of source and availability. Door came, installed easily, and performs as new.
    Guest - July 24, 2019 Verified Purchase
    worked as expected
    Brand new part. Fit perfectly.
    Guest - June 17, 2019 Verified Purchase

    Questions & Answers ?

    Our customer Service team is at the ready daily to answer your part and product questions.

    photo of team member
    Ask our Team

    We have a dedicated staff with decades of collective experience in helping customers just like you purchase parts to repair their products.

    Does this fit my product?

    Questions & Answers for Door Asy


    No questions have been asked yet

    Customer Repair Instructions ?

    All our customer repair instructions are solicited directly from other customers just like you who have purchased and replaced this exact part.

    Medium 15-30 minutes (25 rated repairs)?

    A stone broke the mulch door.

    Richard - June 14, 2016
    👍 10 of 12 people found this instruction helpful
    Tool Type

    Lawn Mower

    Difficulty

    Easy

    Time

    Less than 15 minutes

    Tools Used

    Pliers

    Pulled the pin and spring that hold the door on with a pair of pliers. Set the new door in place and push the pin with spring back through the hinge area of the door. Some pressure is needed to flatten out the spring enough to push the pin all the way in. It can be done by hand. The part came with no instructions. It wasn't too hard to figure out.
    Did you find this story helpful?
    Thanks for voting and helping fellow customers!

    Bagger Door broke at spring attaching point.

    Oscar - September 21, 2021
    👍 4 of 4 people found this instruction helpful
    Tool Type

    Lawn Mower

    Difficulty

    Easy

    Time

    15-30 minutes

    Tools Used

    Screwdriver, Pliers, Adjustable Wrench

    1. Remover the old door and springs
    2. Removed lock- ring on screw
    3. Removed screw
    4. Installed both new springs one on each side of the new door
    5. Re-installed screw and lock-ring
    Did you find this story helpful?
    Thanks for voting and helping fellow customers!

    The mulch door is rubber/plastic so not super durable. The ring on one end to hold the door snapped in two

    J - September 20, 2018
    👍 2 of 2 people found this instruction helpful
    Tool Type

    Lawn Mower

    Difficulty

    Medium

    Time

    15-30 minutes

    Tools Used

    Socket set

    As the door was already broken it was easy to disassemble by pulling out the pin. However the bracket plate had to also be removed from the mower bed in order to place the spring in the proper position in the mulch door. Once the parts were assembled on the bracket, it was easy to place the bracket back on the mower bed and tighten.

    I did find a YouTube video to assist and get me going in the right direction.
    Did you find this story helpful?
    Thanks for voting and helping fellow customers!

    Broken rear door assembly.

    Dexter - August 2, 2021
    👍 1 of 1 people found this instruction helpful
    Tool Type

    Lawn Mower

    Difficulty

    Medium

    Time

    30-60 minutes

    Tools Used

    Screwdriver, Pliers, Socket set, Wrench Set, Adjustable Wrench, Vise grips

    1 Removed placement bolt from one side of the push handle from mower base.
    2. Removed broken rear door assembly.
    3. Installed new door assembly, by placing the placement bolt into slots on the door assembly, both sides of the assembly.
    4. Set tension springs back in place.
    5. Tighten placement bolt. Only need to remove placement bolt from just one side. Either side will work.
    6. Job done, mower back in service.
    Did you find this story helpful?
    Thanks for voting and helping fellow customers!

    Drive wheel stripped teeth and bearing out on front wheel drive

    Gerald - July 3, 2016
    👍 1 of 1 people found this instruction helpful
    Tool Type

    Lawn Mower

    Difficulty

    Medium

    Time

    30-60 minutes

    Tools Used

    Screwdriver, Pliers, Socket set

    1. Removed defective wheel
    2. Removed C-clip
    3. Removed sprocket
    4. Removed cross pin
    5. Removed dust shield
    6. Removed height adjuster/bearing assembly
    7. Installed new height adjuster/bearing assembly
    8. Replace dust shield, cross pin, sprocket, and c clip
    9. Put on new wheel
    Did you find this story helpful?
    Thanks for voting and helping fellow customers!

    Mulch door broken

    Darrell - June 3, 2016
    👍 1 of 1 people found this instruction helpful
    Tool Type

    Lawn Mower

    Difficulty

    Easy

    Time

    15-30 minutes

    Tools Used

    Pliers

    Start by pushing the pin thru RH side of the mulch door and thru the bracket and part way thru the spring. Have someone else turn the spring until there is tension on the bracket. Meanwhile you are also pressing the spring into the mulch door hole, and keeping the spring straight and keeping the tension on it and pushing the rod thru the spring, thru the other end of the bracket, and thru the mulch door.
    Did you find this story helpful?
    Thanks for voting and helping fellow customers!

    Mulch door broke

    David - May 23, 2016
    👍 1 of 1 people found this instruction helpful
    Tool Type

    Lawn Mower

    Difficulty

    Easy

    Time

    Less than 15 minutes

    Tools Used

    Pliers

    Pull long pin which holds the spring and mulch door. Insert long pin through first mulch door hole and partially through the spring. Using pliers (or another appropriate tool), push down on spring making sure one tension leg is against the mower deck frame and the other spring leg is inserted in the hole in the mulch door. Continue pushing down on the assembly until you can align the pin with the second retainer hole on the mower deck and push the pin completely through. Note: While assembling these parts If you do not push down evenly the one spring leg that goes through the hole in the mulch door may come out of place and you will need to start over.
    Did you find this story helpful?
    Thanks for voting and helping fellow customers!

    Rear door and skirt needed to be replaced

    Timothy - January 8, 2021
    removed old/broken parts, installed new parts, very easy to complete, all parts ordered fit, no issues.
    Thank you!
    Did you find this story helpful?
    Thanks for voting and helping fellow customers!

    Drive belt worn out, trans cable worn and clutch cable worn.

    Pedro - November 12, 2020
    Tool Type

    Lawn Mower

    Difficulty

    Hard

    Time

    More than 2 hours

    Tools Used

    Pliers, Socket set, Wrench Set

    Removed cover, blade, center pulley, rear tires, dropped transmission to remove clutch belt, removed screws on rear pulley guard to be able to remove belt. Removed and replaced clutch and throttle springs.
    Did you find this story helpful?
    Thanks for voting and helping fellow customers!

    Broke the plastic part where spring attaches

    Michael - September 6, 2020
    Tool Type

    Lawn Mower

    Difficulty

    Easy

    Time

    15-30 minutes

    Tools Used

    , Allen wrench

    Remove screw from side
    Put new cover on and then put side screws on with the spring.
    Did you find this story helpful?
    Thanks for voting and helping fellow customers!

    OEM stands for Original Equipment Manufacturer and means the part you’re buying is sourced directly from the manufacturer who made your product. At eReplacementParts, we sell only genuine OEM parts, guaranteeing the part you’re purchasing is of better design and of higher quality than aftermarket parts.

    Learn More

    Our product descriptions are a combination of data sourced directly from the manufacturers who made your product as well as content researched and curated by our content & customer service teams. This content is edited and reviewed internally before being made public to customers.

    Our customer service team are at the ready daily to answer your part and product questions. We have a dedicated staff with decades of collective experience in helping customers just like you purchase parts to repair their products.

    All our part reviews are solicited directly from other customers who have purchased this exact part. While we moderate these reviews for profanity, offensive language or personally identifiable information, these reviews are posted exactly as submitted and no alterations are made by our team.

    All our customer repair instructions are solicited directly from other customers just like you who have purchased and replaced this exact part. While we moderate these reviews for profanity, offensive language or personally identifiable information, these reviews are posted exactly as submitted and no alterations are made by our team.

    Based on data from past customer purchasing behaviors, these parts are most commonly purchased together along with the part you are viewing. These parts may be necessary or helpful to replace to complete your current repair.

    All our installation videos are created and produced in collaboration with our in-house repair technician, Mark Sodja, who has helped millions of eReplacementParts customers over the last 13 years repair their products. Mark has years of experience in selling and repairing both commercial and residential products with a specialty in gas-powered equipment.

    This data is collected from customers who submitted a repair instruction after replacing this exact part. Customers can rate how easy the repair was to complete and how long it took. We aggregate this data to provide a repair rating that allows customers to quickly determine the difficulty and time needed to perform their own repair.

    eReplacementParts.com
    7174 South 400 West
    Suite 5
    Midvale, UT 84047
    visa mastercard discover american express PayPal
    Recent searches:
    Suggested searches:
    Models:
    Manufacturers:
    Need help finding your model number?