

It is an authentic component which is supplied by the original equipment manufacturer. This electrode set is designed for use with Char-Broil grills. The electrode provides the spark that ignites the main burner. It is an identical replacement for a faulty or a missing item that was installed on a new unit. If the burner won't light, first clean the electrode and check that it's aligned. If the problem persists, replace the igniter electrode. Make sure to refer to the owners manual and the diagrams of your model for the correct installation of the new electrode set. You may need pliers to disconnect the old wires and connect the new component.
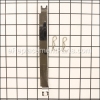
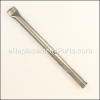
Main Burner Electrode G350-0064-W1
OEM part for: Char-Broil
Part Number: G350-0064-W1
$6.21
In Stock
Jump To:
Product Description ?
- Size: 450mm wire
- Classification: Part
- Weight: 0.06 lbs.
- Shipping: Ships Worldwide
Frequently Purchased Together ?


Compatibility
This Main Burner Electrode will fit the following 31 machines. Confirm this part works with your model, and view the detailed model diagrams and repair help we have to offer.
Char-Broil
Show More Compatible ModelsThis item works with the following types of products:
- Outdoor Grill Parts
Repair Videos ?

Articles:
|
Having trouble getting your grill to light up? A common cause of this issue is a defective ignition switch. We'll sho...
November 08, 2012
|

Customer Part Reviews ?
Average Rating (out of 5):
Click to filter by ratings:
5 stars
3
4 stars
1
3 stars
0
2 stars
0
1 stars
0
< PREV
- 1
Perfect parts
Exact part I needed, but now I have to order burner tubes as I found mine are cracked when I tried to install the electrodes
Guest -
March 2, 2022
Verified Purchase
Good repair parts, fit perfict.
Looked to be original parts.
WalterC.Hintz -
May 12, 2021
Verified Purchase
Part exact specification required and worked as expected.
Perfect fit.
Guest -
July 6, 2020
Verified Purchase
Easy
Fit well
Brett -
August 3, 2021
Verified Purchase
Questions & Answers ?
Our customer Service team is at the ready daily to answer your part and product questions.

Ask our Team
We have a dedicated staff with decades of collective experience in helping customers just like you purchase parts to repair their products.
Does this fit my product?Questions & Answers for Main Burner Electrode
No questions have been asked yet
Customer Repair Instructions ?
All our customer repair instructions are solicited directly from other customers just like you who have purchased and replaced this exact part.
The burners and the crossover tubes on the grille were rusted through causing severe hot spots in some reason and overall undesired operation. I replaced the ignitor electrodes because they were inex
Christopher - April 29, 2017
👍 4 of 5 people found this instruction helpful
Tool Type
Outdoor Grill
Difficulty
Easy
Time
Less than 15 minutes
Tools Used
Pliers
1. Shut off and disconnected the LP supply.
2.Removed the Grille grate and the 4 heat deflectors.
3. Removed retainer clips holding burners and cross over tubes.
4. Pulled burner tubes partially away from control valve and disconnected ignitor electrodes.
5. Removed all 4 burners tubes and 3 crossover tubes.
6. Unplugged the ignitor electrodes from the Spark module.
7. Took the opportunity to clean the inner fire box and inspect for any other signs of wear and tear.
8. Routed 4 ignitor electrodes through valve holes in firebox and plugged them on to the spark module
and snapped the other end of ignitor electrodes on to burner tubes.
9. Installed crossover tubes and clips onto burner tubes.
10. Reinstalled LP supply and checked operation.
11. Shut off grille and Reinstalled heat deflectors and grate.
Did you find this story helpful?
Thanks for voting and helping fellow customers!
Ignitor quit.
Reginald - November 29, 2020
Tool Type
Outdoor Grill
Difficulty
Medium
Time
Less than 15 minutes
Tools Used
Screwdriver
Parts Used
replaced.
Did you find this story helpful?
Thanks for voting and helping fellow customers!
The burner tubes were burnt out and falling apart
Matt - October 7, 2020
Tool Type
Outdoor Grill
Difficulty
Medium
Time
30-60 minutes
Tools Used
Screwdriver
I took out all the old pieces and replaced them.
Did you find this story helpful?
Thanks for voting and helping fellow customers!
Burner and associated parts were rusted, not heating properly
Jean - August 11, 2018
Tool Type
Outdoor Grill
Difficulty
Easy
Time
1-2 hours
Tools Used
Screwdriver, Pliers
This was a very simple repair.
Remove old rusted parts.
Minor clean up of the burner area.
Install replacement parts.
Everything fit in place correctly without modification.
Test for proper operation - good to go!
Remove old rusted parts.
Minor clean up of the burner area.
Install replacement parts.
Everything fit in place correctly without modification.
Test for proper operation - good to go!
Did you find this story helpful?
Thanks for voting and helping fellow customers!
Internals rusted out
Brian - July 11, 2018
👍 1 of 2 people found this instruction helpful
Tool Type
Outdoor Grill
Difficulty
Medium
Time
30-60 minutes
Tools Used
Screwdriver, Pliers
Removed the grill grates and cleaned them
Removed the heat emitters and tossed them
Removed the flame tamers and cleaned them
Unplugged the burner electrodes and removed the rusted out burner tubes
Completely cleaned out the main box
Attached the new igniters to the new tubes and replaced the tubes
Ran the wires to the new ignition module and attached them
Attached the flame carryover tubes
Started the grill, testing each burner
Reset the flame tamers, heat emitters, and grill grates
Did you find this story helpful?
Thanks for voting and helping fellow customers!
Burner tubes, carryover tube, and started electrode all rusted and coming apart
Jason - February 26, 2018
Tool Type
Outdoor Grill
Difficulty
Easy
Time
Less than 15 minutes
Tools Used
Removed damaged parts
Went to eReplacementParts.com and ordered all needed parts by model. Parts arrived as promised and completed repairs with no tools needed within 15 minutes. Spent less than $50 and have a whole new grill.
Went to eReplacementParts.com and ordered all needed parts by model. Parts arrived as promised and completed repairs with no tools needed within 15 minutes. Spent less than $50 and have a whole new grill.
Did you find this story helpful?
Thanks for voting and helping fellow customers!
Rusted carry over tubes. Bad ignition module.
Nathan - October 17, 2017
Tool Type
Outdoor Grill
Difficulty
Easy
Time
30-60 minutes
Tools Used
Power Drill
Steps to replace burners and carry-over tubes:
1) Take off grill grates
2) Remove cotter pins from burners
3) Pull burners and carry-over tubes out
4) Insert new burners
5) Insert new carry-over tubes
6) Insert new cotter pins
Ignition module required removing the gas pipe under the burner adjustment knobs with phillips screw gun...
1) Take off grill grates
2) Remove cotter pins from burners
3) Pull burners and carry-over tubes out
4) Insert new burners
5) Insert new carry-over tubes
6) Insert new cotter pins
Ignition module required removing the gas pipe under the burner adjustment knobs with phillips screw gun...
Did you find this story helpful?
Thanks for voting and helping fellow customers!
Burners were rusted and igniters were not working.
Dave - August 9, 2017
Tool Type
Outdoor Grill
Difficulty
Medium
Time
15-30 minutes
Tools Used
Screwdriver, Pliers
Parts Used
Removed rusted parts and replaced them with new ones that were an exact match to the original parts. The only difficult part was threading the igniter wires thru to the push button starter.
Did you find this story helpful?
Thanks for voting and helping fellow customers!
OEM stands for Original Equipment Manufacturer and means the part you’re buying is sourced directly from the manufacturer who made your product. At eReplacementParts, we sell only genuine OEM parts, guaranteeing the part you’re purchasing is of better design and of higher quality than aftermarket parts.
Our product descriptions are a combination of data sourced directly from the manufacturers who made your product as well as content researched and curated by our content & customer service teams. This content is edited and reviewed internally before being made public to customers.
Our customer service team are at the ready daily to answer your part and product questions. We have a dedicated staff with decades of collective experience in helping customers just like you purchase parts to repair their products.
All our part reviews are solicited directly from other customers who have purchased this exact part. While we moderate these reviews for profanity, offensive language or personally identifiable information, these reviews are posted exactly as submitted and no alterations are made by our team.
All our customer repair instructions are solicited directly from other customers just like you who have purchased and replaced this exact part. While we moderate these reviews for profanity, offensive language or personally identifiable information, these reviews are posted exactly as submitted and no alterations are made by our team.
Based on data from past customer purchasing behaviors, these parts are most commonly purchased together along with the part you are viewing. These parts may be necessary or helpful to replace to complete your current repair.
All our installation videos are created and produced in collaboration with our in-house repair technician, Mark Sodja, who has helped millions of eReplacementParts customers over the last 13 years repair their products. Mark has years of experience in selling and repairing both commercial and residential products with a specialty in gas-powered equipment.
This data is collected from customers who submitted a repair instruction after replacing this exact part. Customers can rate how easy the repair was to complete and how long it took. We aggregate this data to provide a repair rating that allows customers to quickly determine the difficulty and time needed to perform their own repair.