


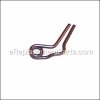
Genuine OEM Replacement Selector Knob Assembly for Bosch Rotary Hammers/Drills. This part is sold Individually and it is made out of Plastic. To remove the knob from the tool you would need to turn it all the way counter clockwise then push the red button. Then keep turning it counter clockwise until the knob lines up with a keyed slot so you can pull it out.
Knob Assembly 1612026037
OEM part for: Bosch
Part Number: 1612026037
$11.06
In Stock
Jump To:
Frequently Purchased Together ?


Compatibility
This Knob Assembly will fit the following 79 machines. Confirm this part works with your model, and view the detailed model diagrams and repair help we have to offer.
This item works with the following types of products:
- Drill Parts
- Hammer Drill Parts
- Rotary Hammer Parts
Customer Part Reviews ?
Average Rating (out of 5):
Click to filter by ratings:
5 stars
5
4 stars
0
3 stars
0
2 stars
0
1 stars
0
< PREV
- 1
Knob for Bosch hammer drill
Delivered quickly quality part
Guest -
July 7, 2023
Verified Purchase
Bulldog repair, good as new!
Great replacement part. Slipped right in and works perfect.
Doc -
February 10, 2023
Verified Purchase
drill repair
The company is so great they give videos on how to repair things. I even repaired my stove with their parts and support.
Thanks
Guest -
December 13, 2022
Verified Purchase
Correct part
The correct part was all needed to fix my drill. And shipping was fast. Thanks
Guest -
April 26, 2022
Verified Purchase
Len -
January 22, 2020
Verified Purchase
Questions & Answers ?
Our customer Service team is at the ready daily to answer your part and product questions.

Ask our Team
We have a dedicated staff with decades of collective experience in helping customers just like you purchase parts to repair their products.
Does this fit my product?Questions & Answers for Knob Assembly
No questions have been asked yet
Customer Repair Instructions ?
All our customer repair instructions are solicited directly from other customers just like you who have purchased and replaced this exact part.
Broken selector knob on Bosch hammer drill
David - January 15, 2016
👍 16 of 19 people found this instruction helpful
Tool Type
Hammer Drill
Difficulty
Easy
Time
Less than 15 minutes
Tools Used
Screwdriver
Parts Used
I found your video on YouTube,it made the replacement of the knob very easy. Here is a copy of the video.
https://www.youtube.com/watch?v=39X7pzONOSU
https://www.youtube.com/watch?v=39X7pzONOSU
Did you find this story helpful?
Thanks for voting and helping fellow customers!
Hammer setting on drill would not engage when knob was turned to the hammer setting.
Ben - September 7, 2017
👍 3 of 3 people found this instruction helpful
Tool Type
Hammer Drill
Difficulty
Medium
Time
30-60 minutes
Tools Used
Screwdriver, Power Drill, T20 Torx
Parts Used
1. Disassemble entire body of the drill
a. Disassemble bit holder
b. Turn setting selector knob 45 degrees past the hammer only setting by pressing in on the red button. Use a flat head screwdriver to pry out the selector knob.
c. Use T20 torx to remove screws the front section of the body.
d. Remove all of the internal components now exposed
i. Use a flat head screwdriver to remove the u-shaped lock holding the gears together
ii. Continue to remove all internal components.
e. Remove handle cover plate and detach handle from main body of drill
f. Remove screws and brushes to turn atmature
g. Remove armature by pulling main body out of rear plastic portion of the body
h. Use a screwdriver to pry the armature out of the center portion of the body. The bearing fits very tight.
I recommend de-greasing all of the internal gear components with mineral spirits
2.) Reassemble as the drill was taken apart.
a. Insert armature into main body part
b. Put rear plastic section with field over armature
c. Reinstall brushes
d. Reassemble handle
e. Reinstall gears
f. Apply plenty amounts of grease
g. Reinstall front portion of the body
h. Before replacing the selector knob, use a screwdriver to push the metal piece inside the selector knob hole towards the rear of the drill.
i. Press the selector knob back into the body, similar to how it was removed. 45 degrees beyond the hammer setting.
j. Reassemble the tool holder.
I recommend watching the following videos from ereplacementparts.com to take apart and reassemble the drill.
https://www.youtube.com/watch?v=39X7pzONOSU&t=17s
https://www.youtube.com/watch?v=LAq7w-6m2Zs
Did you find this story helpful?
Thanks for voting and helping fellow customers!
Selector switch was broken
Richard - February 28, 2016
👍 1 of 1 people found this instruction helpful
Tool Type
Hammer Drill
Difficulty
Medium
Time
15-30 minutes
Tools Used
Screwdriver
Parts Used
Do not take drill apart
Selector switch can be removed without disassembling the drill. You have to pry up slightly on switch and push the red button, rotate clockwise till tabs line up, switch will pop out.
Press new one in push down and turn counter clockwise it will drop it once it is turned push in red button while turning
Did you find this story helpful?
Thanks for voting and helping fellow customers!
Selector knob wore out
James - May 6, 2019
Tool Type
Hammer Drill
Difficulty
Easy
Time
Less than 15 minutes
Tools Used
Screwdriver
Parts Used
Followed instructions from your website.
Did you find this story helpful?
Thanks for voting and helping fellow customers!
Bit holder & brushes shot; leaking front seal
Alvin - April 1, 2016
👍 0 of 1 people found this instruction helpful
Tool Type
Hammer Drill
Difficulty
Easy
Time
15-30 minutes
Tools Used
Screwdriver, Pliers, Power Drill, knife
Remove the back handle from the hammer drill, disconnect the worn brushes and remove them from the holders. Install the new brushes and connect them and reattach the the back handle. For the bit holder assembly and the knob assembly I viewed ereplacementparts you tube video. Here is a link to it.
https://www.youtube.com/watch?v=39X7pzONOSU
https://www.youtube.com/watch?v=39X7pzONOSU
Did you find this story helpful?
Thanks for voting and helping fellow customers!
OEM stands for Original Equipment Manufacturer and means the part you’re buying is sourced directly from the manufacturer who made your product. At eReplacementParts, we sell only genuine OEM parts, guaranteeing the part you’re purchasing is of better design and of higher quality than aftermarket parts.
Our product descriptions are a combination of data sourced directly from the manufacturers who made your product as well as content researched and curated by our content & customer service teams. This content is edited and reviewed internally before being made public to customers.
Our customer service team are at the ready daily to answer your part and product questions. We have a dedicated staff with decades of collective experience in helping customers just like you purchase parts to repair their products.
All our part reviews are solicited directly from other customers who have purchased this exact part. While we moderate these reviews for profanity, offensive language or personally identifiable information, these reviews are posted exactly as submitted and no alterations are made by our team.
All our customer repair instructions are solicited directly from other customers just like you who have purchased and replaced this exact part. While we moderate these reviews for profanity, offensive language or personally identifiable information, these reviews are posted exactly as submitted and no alterations are made by our team.
Based on data from past customer purchasing behaviors, these parts are most commonly purchased together along with the part you are viewing. These parts may be necessary or helpful to replace to complete your current repair.
All our installation videos are created and produced in collaboration with our in-house repair technician, Mark Sodja, who has helped millions of eReplacementParts customers over the last 13 years repair their products. Mark has years of experience in selling and repairing both commercial and residential products with a specialty in gas-powered equipment.
This data is collected from customers who submitted a repair instruction after replacing this exact part. Customers can rate how easy the repair was to complete and how long it took. We aggregate this data to provide a repair rating that allows customers to quickly determine the difficulty and time needed to perform their own repair.