


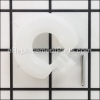
Genuine manufacturer approved carburetor needle valve for lawn and garden equipment engines. This item includes the seat. The needle valve opens and closes to control the flow of fuel into the carburetor. Make sure to disconnect the spark plug wire and drain all gasoline from the carburetor and fuel tank before starting a repair.
Kit-needle/seat 398188
OEM part for: Briggs and Stratton
Part Number: 398188
$6.97
In Stock
Jump To:
Frequently Purchased Together ?


Compatibility
This Kit-needle/seat will fit the following 22899 machines. Confirm this part works with your model, and view the detailed model diagrams and repair help we have to offer.
Briggs and Stratton
Show More Compatible ModelsThis item works with the following types of products:
- Engine Parts
Customer Part Reviews ?
Average Rating (out of 5):
Click to filter by ratings:
5 stars
13
4 stars
1
3 stars
0
2 stars
0
1 stars
0
< PREV
- 1
- 2
Carb repair
The new needle & seal were what I needed to stop the carb from leaking.
Robert -
November 12, 2022
Verified Purchase
Carberator repair
Worked perfectly. Pressure wash is working like Swiss clock work.
Guest -
June 13, 2022
Verified Purchase
Worked great
Fit perfectly
Guest -
October 12, 2021
Verified Purchase
Easy web site to navigate.Fast delivery
Correct part Everytime
Guest -
September 10, 2021
Verified Purchase
parts
The part was exactly what I ordered and came very quickly
Guest -
September 24, 2020
Verified Purchase
just what was needed
worked like it should
Guest -
April 27, 2020
Verified Purchase
this part fixed my problem
good condition fast delivery
Guest -
April 25, 2020
Verified Purchase
Easy replacement
Eliminated the running out of fuel issue. More fuel in bowl engine ran correctly
gene -
March 30, 2020
Verified Purchase
Its alive
New float valve kit was a Perfect fit. My sister's lawnmower runs awesome again. A big thumbs up
Guest -
October 6, 2019
Verified Purchase
Perfect, exactly what I was looking for
Arrived very fast, I tried to find this part everywhere but eReplacements was the only one to have them! This was for an 2000 model chipper,shredder that no one makes anymore! Thanks
Debi -
September 26, 2019
Verified Purchase
Questions & Answers ?
Our customer Service team is at the ready daily to answer your part and product questions.

Ask our Team
We have a dedicated staff with decades of collective experience in helping customers just like you purchase parts to repair their products.
Does this fit my product?Questions & Answers for Kit-needle/seat
The float valve seat was a groove around one side of it and the other side is smooth. Which side goes down as you install it into the hole?
Kris
for model number 12S9 07 1411 B1
asked on 2023-04-01
Hello Kris, Thank you for your inquiry. The seat would need to be inserted with the grooved side down. Good luck with your repair.
eReplacementParts Team April 01, 2023
Customer Repair Instructions ?
All our customer repair instructions are solicited directly from other customers just like you who have purchased and replaced this exact part.
The ethanol gas damage old needle seat..
Paul - April 14, 2016
👍 23 of 23 people found this instruction helpful
Tool Type
Engine
Difficulty
Easy
Time
30-60 minutes
Tools Used
Screwdriver, Pliers, Socket set, small crochet hook
Parts Used
Remove carburetor. Remove float bowl and float. Use crochet hook to remove old seat, use the flat end of a drill bit to set new seat. Reassemble carburetor, and install on engine..
Did you find this story helpful?
Thanks for voting and helping fellow customers!
Hard to start, little power. Black smoke at start. Symptoms indicate flooded carb situation
Galen - June 26, 2016
👍 18 of 19 people found this instruction helpful
Tool Type
Lawn Mower
Difficulty
Medium
Time
1-2 hours
Tools Used
Screwdriver, Pliers, Socket set, Wrench Set
Suspected problem due to ethanol damage to engine not designed to use it.
1. Drained fuel tank.
2. Removed shroud, air filter assembly and disconnected fuel line. (Good time to replace air filter)
3. Removed carburetor, noting manner of attachment of throttle linkage.
4. Disassembled float bowl from carb.
5. Removed float, needle valve and needle valve seat.
6. Remove old air cleaner gasket.
7. Thoroughly cleaned carb and parts to be reused.
8. Replace needle valve seat per instructions supplied with new part.
9. Replace float and needle valve with new parts.
10. Reassembly float bowl on carb.
11. Reattach carb to engine, including reattachment of throttle linkage.
12. Reinstall fuel line. (Note: I recommend installing an in-line fuel strainer.)
13. Reinstall air filter assembly and shroud.
14. Fill fuel tank
15. Test run engine.
Engine now starts easy and has same power as before.
I try to avoid ethanol in my small engines even in those supposedly designed for it. It's a powerful solvent and a potential troublemaker in my experience.
Did you find this story helpful?
Thanks for voting and helping fellow customers!
Float needle seat washer failed from old age.
Theron - August 14, 2016
👍 9 of 9 people found this instruction helpful
Tool Type
Lawn Mower
Difficulty
Medium
Time
Less than 15 minutes
Tools Used
Screwdriver, Nutdriver
Parts Used
Old float seat swelled up and crumbled, carefully removed all old pieces with a small stiff wire.
After making sure new seat was correctly oriented and centered in hole, I pressed it in with the blunt end of a drill bit that was almost as big as the hole. Then reassembled carb and put it back on the mower.
After making sure new seat was correctly oriented and centered in hole, I pressed it in with the blunt end of a drill bit that was almost as big as the hole. Then reassembled carb and put it back on the mower.
Did you find this story helpful?
Thanks for voting and helping fellow customers!
Lawn mower would start and die almost immediately afterwards
Martin - September 23, 2016
👍 7 of 7 people found this instruction helpful
Tool Type
Lawn Mower
Difficulty
Medium
Time
15-30 minutes
Tools Used
Screwdriver, Socket set, needle nosed pliers, small drill bit
Parts Used
1. Removed carburetor from engine.
2. Removed float bowl cover, float, main jet and needle.
3. Removed plastic seat from carburetor body by inserting a small drill bit into it and levering it out.
4. Inserted new plastic seat into carburetor body. Used same drill bit to guide it into place and firmly seat it.
5. Installed needle valve and float and checked for correct operation by inverting carburetor and making sure that float fully closed (float is horizontal).
6. Reassembled carburetor and installed it back on engine.
Did you find this story helpful?
Thanks for voting and helping fellow customers!
Would not run
Jack - July 11, 2017
👍 3 of 3 people found this instruction helpful
Tool Type
Lawn Mower
Difficulty
Easy
Time
15-30 minutes
Tools Used
Pliers, Wrench Set, T25 torx wrench
1. Removed and disassembled carburetor
2, Determined main jet damaged
3. Ordered required (obsolete) parts from eReplacements
4. Installed replacement parts
5. Re-installed carburetor
6. Started engine and mowed lawn.
2, Determined main jet damaged
3. Ordered required (obsolete) parts from eReplacements
4. Installed replacement parts
5. Re-installed carburetor
6. Started engine and mowed lawn.
Did you find this story helpful?
Thanks for voting and helping fellow customers!
The seat for the needle was in up side down
Michael - May 6, 2017
👍 2 of 2 people found this instruction helpful
Tool Type
Engine
Difficulty
Easy
Time
30-60 minutes
Tools Used
Screwdriver, Socket set
I took off the air cleaner and the float bowl, removed the float and needle. looked up the hole with a mirror and flash light and saw the seats groved edge. stuck a long screw in the seat hole and pulled it out. sprayed with carburator cleaner and installed the new seat with the groved edge facing away from the float. installed the needle and bowl gasket. forgot to get bottom gasket so I used the old one. filled with gass and checked for leakes. started on first pull. thats it, MIKE
Did you find this story helpful?
Thanks for voting and helping fellow customers!
Rebuild Carburetor
douglas - April 20, 2016
👍 3 of 5 people found this instruction helpful
Tool Type
Engine
Difficulty
Medium
Time
30-60 minutes
Tools Used
Screwdriver, Pliers, Socket set, Wrench Set
Took apart this carb. several times, had to break down and order a new needle and seat and new gaskets, got this power washer to run finally, it was given to Me and has been sitting for years.
Did you find this story helpful?
Thanks for voting and helping fellow customers!
Carburetor had old gas clogging the fuel flow
Kevin - August 6, 2021
Tool Type
Engine
Difficulty
Medium
Time
30-60 minutes
Tools Used
Pliers, Socket set, Wrench Set, Nutdriver
Pulled, rebuild and reinstalled the carburetor.
Did you find this story helpful?
Thanks for voting and helping fellow customers!
Old gas had clogged the carb
Kevin - August 1, 2021
Tool Type
Lawn Mower
Difficulty
Medium
Time
15-30 minutes
Tools Used
Screwdriver, Pliers, Socket set, Wrench Set, Nutdriver
Removed the air filter and covering
Removed the carburetor
Removed the lower jet holding the carburetor bowl and removed the bowl
Pulled the pin and removed the float
Removed the old seat
Installed the new needle and seat and float
Reinstalled the bowl and jet
Reinstalled the carburetor, coverings and air filter
Removed the carburetor
Removed the lower jet holding the carburetor bowl and removed the bowl
Pulled the pin and removed the float
Removed the old seat
Installed the new needle and seat and float
Reinstalled the bowl and jet
Reinstalled the carburetor, coverings and air filter
Did you find this story helpful?
Thanks for voting and helping fellow customers!
no engine compression, carb overflow due to needle valve not seating
stephen - June 18, 2021
Tool Type
Engine
Difficulty
Medium
Time
1-2 hours
Tools Used
Screwdriver, Socket set, Wrench Set
Parts Used
Replaced rings in engine.
Replace carb needle valve and seat.
Unit started on first pull.
Replace carb needle valve and seat.
Unit started on first pull.
Did you find this story helpful?
Thanks for voting and helping fellow customers!
Load More Install Stories
OEM stands for Original Equipment Manufacturer and means the part you’re buying is sourced directly from the manufacturer who made your product. At eReplacementParts, we sell only genuine OEM parts, guaranteeing the part you’re purchasing is of better design and of higher quality than aftermarket parts.
Our product descriptions are a combination of data sourced directly from the manufacturers who made your product as well as content researched and curated by our content & customer service teams. This content is edited and reviewed internally before being made public to customers.
Our customer service team are at the ready daily to answer your part and product questions. We have a dedicated staff with decades of collective experience in helping customers just like you purchase parts to repair their products.
All our part reviews are solicited directly from other customers who have purchased this exact part. While we moderate these reviews for profanity, offensive language or personally identifiable information, these reviews are posted exactly as submitted and no alterations are made by our team.
All our customer repair instructions are solicited directly from other customers just like you who have purchased and replaced this exact part. While we moderate these reviews for profanity, offensive language or personally identifiable information, these reviews are posted exactly as submitted and no alterations are made by our team.
Based on data from past customer purchasing behaviors, these parts are most commonly purchased together along with the part you are viewing. These parts may be necessary or helpful to replace to complete your current repair.
All our installation videos are created and produced in collaboration with our in-house repair technician, Mark Sodja, who has helped millions of eReplacementParts customers over the last 13 years repair their products. Mark has years of experience in selling and repairing both commercial and residential products with a specialty in gas-powered equipment.
This data is collected from customers who submitted a repair instruction after replacing this exact part. Customers can rate how easy the repair was to complete and how long it took. We aggregate this data to provide a repair rating that allows customers to quickly determine the difficulty and time needed to perform their own repair.