


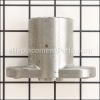
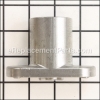
This is a genuine manufacturer sourced replacement part designed for use with walk behind lawn mowers. It is used to secure the blade to the spindle/shaft. This part is made out of metal and it is sold individually. Requires a wrench to tighten/loosen this screw.
Bolt-hex 710-1257
OEM part for: Ryobi, MTD
Part Number: 710-1257
$8.08
In Stock
Jump To:
Frequently Purchased Together ?


Compatibility
This Bolt-hex will fit the following 2267 machines. Confirm this part works with your model, and view the detailed model diagrams and repair help we have to offer.
This item works with the following types of products:
- Lawn Mower Parts
This part replaces obsolete part #: 910-1257, 7101257, 01000943
Customer Part Reviews ?
Average Rating (out of 5):
Click to filter by ratings:
5 stars
5
4 stars
0
3 stars
0
2 stars
0
1 stars
0
< PREV
- 1
review
Hard to write a review for a bolt! I have used this site before when ordering parts and was again pleased with the pricing, availability, and ease of use.
Guest -
April 16, 2022
Verified Purchase
A perfect replacement part
My old part was rusted and the threads were in bad shape. The new part restored the integrity of my blade.
James -
August 2, 2021
Verified Purchase
My favorite parts place
I've ordered items from Replacement Parts before, and they have always provided quality parts and great service.
Guest -
July 24, 2020
Verified Purchase
Exactly what I needed.
The exact part ordered and was delivered. Very satisfied. service.
Guest -
June 2, 2020
Verified Purchase
Exactly what I needed! Tried ordering from manufacturer and they sent the wrong one. Thanks!
Easy ordering, arrived quickly
Guest -
June 21, 2019
Verified Purchase
Questions & Answers ?
Our customer Service team is at the ready daily to answer your part and product questions.

Ask our Team
We have a dedicated staff with decades of collective experience in helping customers just like you purchase parts to repair their products.
Does this fit my product?Questions & Answers for Bolt-hex
No questions have been asked yet
Customer Repair Instructions ?
All our customer repair instructions are solicited directly from other customers just like you who have purchased and replaced this exact part.
Blade shafts bolt broke in side if shaft.
Daniel - July 8, 2016
👍 1 of 1 people found this instruction helpful
Tool Type
Lawn Mower
Difficulty
Easy
Time
Less than 15 minutes
Tools Used
Pliers, Socket set
Since the bolt was already broken removal was easy.
1. Pulled blade adapter with pully off by hand.
2. Used pliers to remove broken bolt.
3. Put new blade adapter with pully on shaft.
4. Lined up blade and blade support and then installer new hex bolt to secure all to the shaft.
1. Pulled blade adapter with pully off by hand.
2. Used pliers to remove broken bolt.
3. Put new blade adapter with pully on shaft.
4. Lined up blade and blade support and then installer new hex bolt to secure all to the shaft.
Did you find this story helpful?
Thanks for voting and helping fellow customers!
Blade bolt broke off
John - August 13, 2017
Tool Type
Lawn Mower
Difficulty
Easy
Time
Less than 15 minutes
Tools Used
Wrench Set
Parts Used
Removed the small part of the old bolt that was still in the threads of the blade holder, put the blade on then ran the new bolt thru the complete unit tightened it, all fixed mowed grass.
Did you find this story helpful?
Thanks for voting and helping fellow customers!
easy and smooth
md - August 7, 2016
Tool Type
Lawn Mower
Difficulty
Easy
Time
15-30 minutes
Tools Used
Screwdriver, Wrench Set
Turn the lawn mower on the engine oil side (done turn on filter side)
remove the nut with wrench
Replace the adapter and screw it with a new hex nut
It was very easy.
remove the nut with wrench
Replace the adapter and screw it with a new hex nut
It was very easy.
Did you find this story helpful?
Thanks for voting and helping fellow customers!
Bolt broke in shaft
gregory - May 8, 2016
Tool Type
Lawn Mower
Difficulty
Easy
Time
Less than 15 minutes
Tools Used
Socket set
Drilled out broken screw, and used an easy out to remove it. Removed the blade adapter by tapping on it. I then install the new one by lining up the key inside of it with the key slot on the engine shaft. And I tapped it on. I then attached the blade to the adapter with blade support. And the blade bolt and tightened it into the shaft. Works great now.
Did you find this story helpful?
Thanks for voting and helping fellow customers!
Blade adapter and blade was worn out
rick - May 7, 2016
Tool Type
Lawn Mower
Difficulty
Easy
Time
15-30 minutes
Tools Used
Socket set, puller
Everything went well. Had to use a puller to remove blade adapter. Then lined up the internal key in the blade adapter with the key way in the engine shaft and tapped it on. Put the new blade on and tighten it up with the new blade bolt.
Did you find this story helpful?
Thanks for voting and helping fellow customers!
The bolt broke
Alejandro - April 20, 2016
Tool Type
Lawn Mower
Difficulty
Easy
Time
Less than 15 minutes
Tools Used
Socket set, Vise grips
Parts Used
Removed what was left of the old bolt with vise grips, then installed the new bolt. Thanks.!!
Did you find this story helpful?
Thanks for voting and helping fellow customers!
Stripped blade support.
James - February 27, 2018
👍 0 of 1 people found this instruction helpful
Tool Type
Lawn Mower
Difficulty
Medium
Time
30-60 minutes
Tools Used
Wrench Set
Parts Used
1. Removed the stripped bell blade support.
2. Attempted to replace but would not go on shaft.
3. Drilled holes in old support and bolted blade on.
4. Now if I hit another rock I will probably bend the motor shaft.
2. Attempted to replace but would not go on shaft.
3. Drilled holes in old support and bolted blade on.
4. Now if I hit another rock I will probably bend the motor shaft.
Did you find this story helpful?
Thanks for voting and helping fellow customers!
Replace Blade adapter
Valerie - July 15, 2017
👍 0 of 1 people found this instruction helpful
Tool Type
Lawn Mower
Difficulty
Easy
Time
Less than 15 minutes
Tools Used
Socket set, Wrench Set, Adjustable Wrench
1. Remove spark plug wire
2. Empty gas from tank
3. Turn mower on its side
4. Use an appropriate wrench to remove the bolt, the blade, and the blade adapter. Be sure to wear leather gloves when handling the mower blade.
5. Replace the blade adapter, the blade, and the bolt. BE SURE TO TIGHTEN THE BOLT SO THE BLADE DOES NOT COME OFF! You may need to wedge a piece of wood between the blade and the mower deck to keep the blade from rotating while tightening the bolt.
Did you find this story helpful?
Thanks for voting and helping fellow customers!
OEM stands for Original Equipment Manufacturer and means the part you’re buying is sourced directly from the manufacturer who made your product. At eReplacementParts, we sell only genuine OEM parts, guaranteeing the part you’re purchasing is of better design and of higher quality than aftermarket parts.
Our product descriptions are a combination of data sourced directly from the manufacturers who made your product as well as content researched and curated by our content & customer service teams. This content is edited and reviewed internally before being made public to customers.
Our customer service team are at the ready daily to answer your part and product questions. We have a dedicated staff with decades of collective experience in helping customers just like you purchase parts to repair their products.
All our part reviews are solicited directly from other customers who have purchased this exact part. While we moderate these reviews for profanity, offensive language or personally identifiable information, these reviews are posted exactly as submitted and no alterations are made by our team.
All our customer repair instructions are solicited directly from other customers just like you who have purchased and replaced this exact part. While we moderate these reviews for profanity, offensive language or personally identifiable information, these reviews are posted exactly as submitted and no alterations are made by our team.
Based on data from past customer purchasing behaviors, these parts are most commonly purchased together along with the part you are viewing. These parts may be necessary or helpful to replace to complete your current repair.
All our installation videos are created and produced in collaboration with our in-house repair technician, Mark Sodja, who has helped millions of eReplacementParts customers over the last 13 years repair their products. Mark has years of experience in selling and repairing both commercial and residential products with a specialty in gas-powered equipment.
This data is collected from customers who submitted a repair instruction after replacing this exact part. Customers can rate how easy the repair was to complete and how long it took. We aggregate this data to provide a repair rating that allows customers to quickly determine the difficulty and time needed to perform their own repair.