

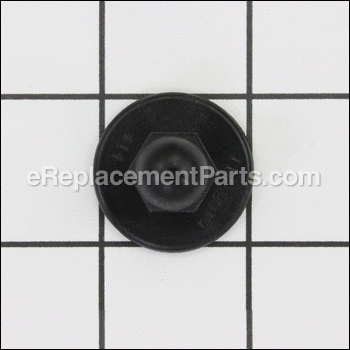
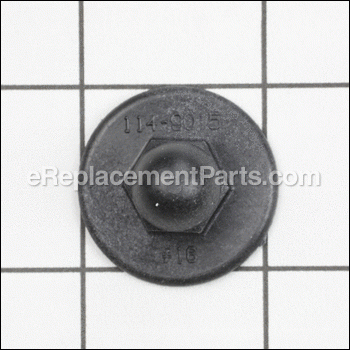
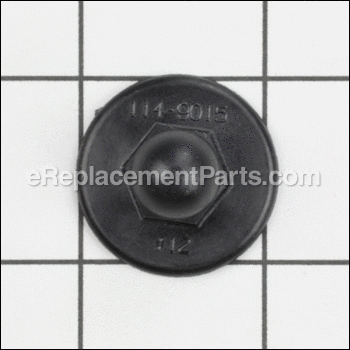


This item is OEM sourced to ensure quality and is intended to be used with blower/vacs from Toro and Lawn-Boy. The hex nut is used to secure the blower impeller assembly to the motor's drive shaft. The hex nut is available as an individual replacement part.
Hex Nut 114-9015
OEM part for: Toro
Part Number: 114-9015
$3.99
In Stock
Jump To:
Frequently Purchased Together ?


Compatibility
This Hex Nut will fit the following 436 machines. Confirm this part works with your model, and view the detailed model diagrams and repair help we have to offer.
This item works with the following types of products:
- Blower Parts
- Vacuum Parts
This part replaces obsolete part #: 100-9075, 73-5380
Customer Part Reviews ?
Average Rating (out of 5):
Click to filter by ratings:
5 stars
15
4 stars
2
3 stars
0
2 stars
0
1 stars
0
< PREV
- 1
- 2
Easy work
Arrived pretty fast needed to shred last of gathered pile of leaves.
Guest -
January 23, 2023
Verified Purchase
Worked fine
Arrived quickly any correct part
Craig -
January 18, 2022
Verified Purchase
Great part
Thanks
Guest -
September 7, 2021
Verified Purchase
Quick service.
Exact part I needed.
Guest -
August 31, 2021
Verified Purchase
The part was perfect and the repair easy.
It arrived right on time. My leaf blower is blowing again.
Guest -
June 7, 2021
Verified Purchase
OEM part
Right OEM part. Arrived quickly. My leaf blower works like new again.
Guest -
May 11, 2021
Verified Purchase
Great Parts!!!!
Nice to find the parts I needed for leafblower,back in service!!
Guest -
December 8, 2020
Verified Purchase
Leaf blower repaired works like new.
Received parts I ordered on date promised they fit perfectly,well satisfied.
Guest -
October 10, 2020
Verified Purchase
Got the parts quickly, they were exactly what I needed. thanks!
Parts wer in great condition.
Guest -
July 8, 2020
Verified Purchase
Right part.
perfect
Guest -
April 27, 2020
Verified Purchase
Questions & Answers ?
Our customer Service team is at the ready daily to answer your part and product questions.

Ask our Team
We have a dedicated staff with decades of collective experience in helping customers just like you purchase parts to repair their products.
Does this fit my product?Questions & Answers for Hex Nut
No questions have been asked yet
Customer Repair Instructions ?
All our customer repair instructions are solicited directly from other customers just like you who have purchased and replaced this exact part.
Hex nut was broken and washer was missing.
JOAN - November 24, 2021
Tool Type
Blower
Difficulty
Easy
Time
15-30 minutes
Tools Used
Adjustable Wrench
Parts Used
Put the washer and the hex on.
Did you find this story helpful?
Thanks for voting and helping fellow customers!
Treads were stripped
Leo - September 8, 2020
Tool Type
Blower
Difficulty
Easy
Time
Less than 15 minutes
Tools Used
Socket set
Parts Used
Released blower fan guard.
Unscrewed nut
Pulled fan and replaced with new one. Old
one center broken
Pushed in new fan and replaced nut with new and tightened with socket wrench being careful not to over torque
Unscrewed nut
Pulled fan and replaced with new one. Old
one center broken
Pushed in new fan and replaced nut with new and tightened with socket wrench being careful not to over torque
Did you find this story helpful?
Thanks for voting and helping fellow customers!
Hex nut came off
Rachel - November 20, 2019
Tool Type
Blower
Difficulty
Easy
Time
Less than 15 minutes
Tools Used
Screwdriver
Parts Used
Did you find this story helpful?
Thanks for voting and helping fellow customers!
Impeller split
Dennis - November 3, 2019
Tool Type
Blower
Difficulty
Easy
Time
Less than 15 minutes
Tools Used
Adjustable Wrench
Parts Used
Removed old impeller installed new one easy as pie
Did you find this story helpful?
Thanks for voting and helping fellow customers!
Toro leaf blower/shredder impeller cracked on rock it sucked up
Frederick - May 10, 2019
Tool Type
Blower
Difficulty
Medium
Time
15-30 minutes
Tools Used
Screwdriver, Utility knife
Parts Used
This Toro Ultra 250 MPH 350 CFM Electric 12 Amp Blower/Vacuum/Mulcher uses a cast metal impeller to blow air or to shred leaves it sucks up. I had some stones in my patio and one of the stones cracked a blade on the impeller. Immediate scary racket occurred along with violent vibration. When the "vacuum tube" was removed from the body of the blower/shredder, it was obvious that one of the impeller blades was gone. The blower body was two molded halves held together by about a dozen of the same philips head screws. One screw was hidden under the model number label. I had to cut out a corner of the label to get to the screw. The halves fell apart. At that point, replacing the impeller consisted of removing a nut, pulling off the impeller by hand, then using the new screw to secure the replacement impeller. The old nut would probably have worked fine. Reassembling the two halves was simple. It worked like new. Anyone reading this description would find this to be an easy repair. It was medium difficulty for me because I took a while to find the screw hidden under the label.
Did you find this story helpful?
Thanks for voting and helping fellow customers!
I had almost 2 years with blower until one day the Plastic impeller (fan) and the hex nut both worn out. Blower wasn't blowing strong air anymore and was making a loud noise. I opened it up and figur
Carlos - April 24, 2018
Tool Type
Blower
Difficulty
Easy
Time
Less than 15 minutes
Tools Used
Removed the cover, unscrewed the nut, removed the fan, put in the new fan, screwed in the new nut. Put the cover back on. Connected the extension cord, at last it worked like new! Happy with the purchase.
Did you find this story helpful?
Thanks for voting and helping fellow customers!
Severe vibration due to broken impeller mounting point.This allowed the impeller to move out of alignment on the motor shaft.
Sid - December 7, 2017
Tool Type
Blower
Difficulty
Easy
Time
Less than 15 minutes
Tools Used
Socket set
Parts Used
Removed the hex nut and removed the impeller from the shaft. The broken impeller mounting point was then noted and a replacement was the obvious fix. The hex nut was ordered since it was a plastic part and some deformations were noted on the threads. Repair was completed by sliding the impeller onto the motor shaft (note orientation of shaft and impeller mounting slot!) and securing with the hex nut. I had ordered the impeller washer but it wasn't needed as the original washer was in perfect condition.
Did you find this story helpful?
Thanks for voting and helping fellow customers!
Blower impeller failed
Charles - October 12, 2017
Tool Type
Blower
Difficulty
Easy
Time
15-30 minutes
Tools Used
Adjustable Wrench
Remove the bottom cover
Removed the nut
Removed the broken fan
Installed the new fan
Used a wrench to tighten the nut
Installed the bottom cover
Removed the nut
Removed the broken fan
Installed the new fan
Used a wrench to tighten the nut
Installed the bottom cover
Did you find this story helpful?
Thanks for voting and helping fellow customers!
Zipper busted on old bag & the old plastic impeller had worn down badly and did not grind leaves.
EUGENE - September 27, 2017
Tool Type
Blower
Difficulty
Easy
Time
15-30 minutes
Tools Used
Socket set
1. Removed vacuum tube.
2. Loosened Removed Hex Nut with socket.
3. Removed old impeller and washer.
4. Installed new impeller and washer.
5. Installed and tightened new hex nut with socket.
6. Attached vacuum tube.
7. Attached new bag.
2. Loosened Removed Hex Nut with socket.
3. Removed old impeller and washer.
4. Installed new impeller and washer.
5. Installed and tightened new hex nut with socket.
6. Attached vacuum tube.
7. Attached new bag.
Did you find this story helpful?
Thanks for voting and helping fellow customers!
Impeller center cracked
Jeff - September 6, 2017
Tool Type
Blower
Difficulty
Easy
Time
Less than 15 minutes
Tools Used
Socket set
1. Removed the old impeller
2. Installed the flat washer
3. Installed the impeller
4. Installed and tightened the hex nut
2. Installed the flat washer
3. Installed the impeller
4. Installed and tightened the hex nut
Did you find this story helpful?
Thanks for voting and helping fellow customers!
Load More Install Stories
OEM stands for Original Equipment Manufacturer and means the part you’re buying is sourced directly from the manufacturer who made your product. At eReplacementParts, we sell only genuine OEM parts, guaranteeing the part you’re purchasing is of better design and of higher quality than aftermarket parts.
Our product descriptions are a combination of data sourced directly from the manufacturers who made your product as well as content researched and curated by our content & customer service teams. This content is edited and reviewed internally before being made public to customers.
Our customer service team are at the ready daily to answer your part and product questions. We have a dedicated staff with decades of collective experience in helping customers just like you purchase parts to repair their products.
All our part reviews are solicited directly from other customers who have purchased this exact part. While we moderate these reviews for profanity, offensive language or personally identifiable information, these reviews are posted exactly as submitted and no alterations are made by our team.
All our customer repair instructions are solicited directly from other customers just like you who have purchased and replaced this exact part. While we moderate these reviews for profanity, offensive language or personally identifiable information, these reviews are posted exactly as submitted and no alterations are made by our team.
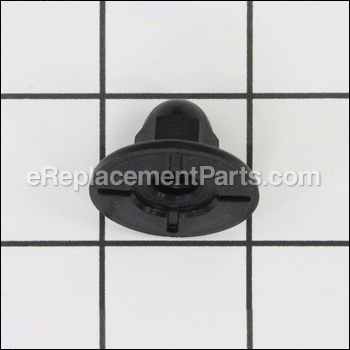
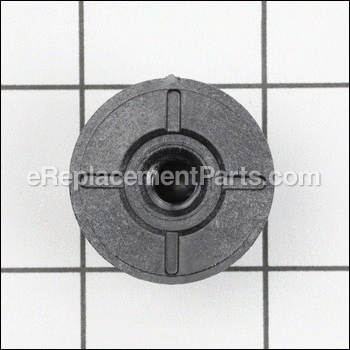
Based on data from past customer purchasing behaviors, these parts are most commonly purchased together along with the part you are viewing. These parts may be necessary or helpful to replace to complete your current repair.
All our installation videos are created and produced in collaboration with our in-house repair technician, Mark Sodja, who has helped millions of eReplacementParts customers over the last 13 years repair their products. Mark has years of experience in selling and repairing both commercial and residential products with a specialty in gas-powered equipment.
This data is collected from customers who submitted a repair instruction after replacing this exact part. Customers can rate how easy the repair was to complete and how long it took. We aggregate this data to provide a repair rating that allows customers to quickly determine the difficulty and time needed to perform their own repair.