


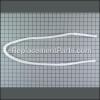
This is an upper drum glide kit designed for various dryer models. The kit includes adhesive glue, drum felt, and three nylon bearing glides. Please note that this upper drum glide kit is sold as a standalone product and does not include the lower attachment required for reducing noise and stabilizing the inner drum. Drum glides are essential components that enable the drum to rotate smoothly and quietly. When these glides wear out and become thin, they can cause the dryer to become noisy and create excessive movement, potentially damaging other parts. If you observe banging, scraping, or excessive vibrating from your dryer, inspect the glides for signs of wear and tear. If they are worn out, immediate replacement is necessary. To replace the drum felt and glides, you will need a screwdriver, wrench, and putty knife. Start by disconnecting your dryer from the wall outlet. Then, use the appropriate tools to remove the front panel of your dryer and its wire harnesses, allowing you access to the old felt. Utilize a putty knife to scrape off the old drum felt and excess adhesive. Afterward, apply the new adhesive and firmly attach the new felt pad. Reassemble your dryer, ensuring all wire connections are securely reconnected, and your dryer is properly secured.
Glide-drum/ Top 5303937139
OEM part for: Electrolux, Frigidaire
Part Number: 5303937139
Jump To:
Frequently Purchased Together ?


Compatibility
This Glide-drum/ Top will fit the following 1705 machines. Confirm this part works with your model, and view the detailed model diagrams and repair help we have to offer.
Frigidaire
Show More Compatible ModelsThis item works with the following types of products:
- Dryer Parts
Customer Part Reviews ?
- 1
Questions & Answers ?
Our customer Service team is at the ready daily to answer your part and product questions.

Ask our Team
We have a dedicated staff with decades of collective experience in helping customers just like you purchase parts to repair their products.
Does this fit my product?Questions & Answers for Glide-drum/ Top
Customer Repair Instructions ?
All our customer repair instructions are solicited directly from other customers just like you who have purchased and replaced this exact part.
Clothing getting caught on top of drum
Tool Type
Dryer
Difficulty
Easy
Time
15-30 minutes
Tools Used
Screwdriver, Scraper
Parts Used
Cleaned drier.
It is important to clean lint from drier periodically, they are a common cause of fires.
Ereplacementparts is great!
Worn through
Tool Type
Dryer
Difficulty
Easy
Time
1-2 hours
Tools Used
Screwdriver, Scrapers
Parts Used
Dryer was very noisy and clothes often got caught between the drum and frame
Tool Type
Dryer
Difficulty
Medium
Time
More than 2 hours
Tools Used
Screwdriver, Pliers, Power Drill, Socket set, Wrench Set, Nutdriver, Adjustable Wrench, putty knife/scraper, wire brush on drill
Parts Used
I ordered and quickly received the exact parts from E-REPLACEMENT (thank you).
I have some mechanical ability, but was pretty intimated at first. I figured I had nothing to lose so I went at it.
P.S. I also replaced the rear bearing while the dryer was apart.
Now all's well- HAPPY WIFE- HAPPY LIFE
Dryer would rip holes on clothing
Tool Type
Dryer
Difficulty
Medium
Time
1-2 hours
Tools Used
Screwdriver, Pliers, Socket set
From there I took apart my dryer to inspect which elements were broken or worn.
Read drum bearing was worn out and broken, upper drum glide was worn, sealbasket lower was replaced to have all new seals. I also ordered a dryer belt since the original was a little cracked.
Looked online for parts to my dryer and ordered them. About a week later I received them and replaced the parts.
Replacing the parts was fairly easy with the help of youtube. I also cleaned the interior and inspected any other components in my dryer. Heater coil had come off one of the ceramic holders. Duct seal was not properly sitting which caused leaking of lint inside dryer.
I let the dryer sit for couple days before any loads were ran through it, to make sure glue had dried properly.
It is now running better than before, and no more hole on clothing.
OEM stands for Original Equipment Manufacturer and means the part you’re buying is sourced directly from the manufacturer who made your product. At eReplacementParts, we sell only genuine OEM parts, guaranteeing the part you’re purchasing is of better design and of higher quality than aftermarket parts.
Our product descriptions are a combination of data sourced directly from the manufacturers who made your product as well as content researched and curated by our content & customer service teams. This content is edited and reviewed internally before being made public to customers.
Our customer service team are at the ready daily to answer your part and product questions. We have a dedicated staff with decades of collective experience in helping customers just like you purchase parts to repair their products.
All our part reviews are solicited directly from other customers who have purchased this exact part. While we moderate these reviews for profanity, offensive language or personally identifiable information, these reviews are posted exactly as submitted and no alterations are made by our team.
All our customer repair instructions are solicited directly from other customers just like you who have purchased and replaced this exact part. While we moderate these reviews for profanity, offensive language or personally identifiable information, these reviews are posted exactly as submitted and no alterations are made by our team.
Based on data from past customer purchasing behaviors, these parts are most commonly purchased together along with the part you are viewing. These parts may be necessary or helpful to replace to complete your current repair.
All our installation videos are created and produced in collaboration with our in-house repair technician, Mark Sodja, who has helped millions of eReplacementParts customers over the last 13 years repair their products. Mark has years of experience in selling and repairing both commercial and residential products with a specialty in gas-powered equipment.
This data is collected from customers who submitted a repair instruction after replacing this exact part. Customers can rate how easy the repair was to complete and how long it took. We aggregate this data to provide a repair rating that allows customers to quickly determine the difficulty and time needed to perform their own repair.