


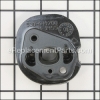
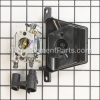
This is an authentic manufacturer-sourced replacement part which is specially designed for use with Poulan gas powered chainsaws. Gaskets are generally utilized to provide a tight seal between connected parts, over time the material may wear out and even begin to crack eventually requiring a replacement. This high-quality kit is sold individually, keep in mind it includes all the necessary components to fix a leaking carburetor. Please make sure to refer to the appropriate diagrams of your model for the correct location and application of these components.
We do offer an article and video on How to Clean a 2 Cycle Engine Carburetor. Here is the link.
How to Clean a 2 Cycle Engine Carburetor How to Clean a 2 Cycle Engine Carburetor " />
Gasket Kit 530069608
OEM part for: Poulan
Part Number: 530069608
Jump To:
Product Description ?
- Classification: Part
- Weight: 0.01 lbs.
- Shipping: Ships Worldwide
Frequently Purchased Together ?


Compatibility
This Gasket Kit will fit the following 1273 machines. Confirm this part works with your model, and view the detailed model diagrams and repair help we have to offer.
Poulan
Show More Compatible ModelsThis item works with the following types of products:
- Chain Saw Parts
- Saw Parts
Customer Part Reviews ?
- 1
Questions & Answers ?
Our customer Service team is at the ready daily to answer your part and product questions.

Ask our Team
We have a dedicated staff with decades of collective experience in helping customers just like you purchase parts to repair their products.
Does this fit my product?Questions & Answers for Gasket Kit
Customer Repair Instructions ?
All our customer repair instructions are solicited directly from other customers just like you who have purchased and replaced this exact part.
Cracked Carburetor Adapter.
Tool Type
Chain Saw
Difficulty
Easy
Time
30-60 minutes
Tools Used
Screwdriver, Wrench Set
Priming bulb and fuel lines were rotten and falling apart. Alcohol fuel additives will dissolve old fuel lines and primer bulbs
Tool Type
Chain Saw
Difficulty
Easy
Time
30-60 minutes
Tools Used
Screwdriver, Pliers, Nutdriver, Long Nose Pliers, Small Wire Cutter
2. Remove upper and side covers
3. Remove 2 air filter hold down nuts which also holds carburetor to engine
4. Remove plastic choke lever from carburetor by pinching tabs and pushing through hole for access in order to run the new fuel lines
5. Remove old fuel line remnants from carburetor connections and fuel tank penetrations and inside fuel tank, including the fuel pickup filter (replace if necessary)
6. Replace fuel lines through tank penetration holes by splitting new hose about 1/2' and cutting off one side, then insert into tank hole and pulling through with long nose pliers. Note that there are 2 sizes of tubing used, one for the fuel pickup and the other for priming bulb return to tank. Recommend using at least E10 (10% alcohol fuel) tubing (yellow). E 80 tubing is also available, but very expensive.
7. With the pickup filter attached to the tubing, leave enough tubing length inside the fuel tank so that the pickup can flop around and reach all parts of the tank at any angle.
8. Complete remaining tubing runs. Since the original tubing on my saw had fallen apart, it was necessary for me to go to the internet to find a diagram on where to hook up the tubing to priming bulb and carburetor. This info was not in the owners manual, and not as obvious as you might think.
9. Added some fuel, primed the carburetor, and the saw ran perfectly! Good luck on your project!
No problems
Tool Type
Chain Saw
Difficulty
Medium
Time
30-60 minutes
Tools Used
Screwdriver, Socket set, Nutdriver, No other tools
Fuel leakage from old gasket on cap
Tool Type
Chain Saw
Difficulty
Easy
Time
Less than 15 minutes
Tools Used
Pliers
Parts Used
Wouldn’t start after replacing primer pump
Tool Type
Chain Saw
Difficulty
Easy
Time
30-60 minutes
Tools Used
Screwdriver, Socket set, Hemostat
Parts Used
Air/Vac Leak - would not throttle up.
Tool Type
Chain Saw
Difficulty
Medium
Time
30-60 minutes
Tools Used
Socket set, torx driver and socket, clutch removal tool, worm gear tool
- clutch removal tool
-worm gear removal/installation tool
-coil spacer device (thick business card)
I would attempt this repair again with confidence.
Another hint, since you have to do a total dis-assemble of the engine you may consider replacing the piston ring while you have it apart. Also the oil pump to be safe.
This saw was purchased in 2006 and was 13 years old before it needed this type of repair.
chainsaw had no power. Would not rev up. Turned out the plastic carb adapter was broken and caused a bad vacumn leak and was not sucking enough gas at wide open trottle.
Tool Type
Chain Saw
Difficulty
Easy
Time
15-30 minutes
Tools Used
Screwdriver, Pliers, Socket set, Wrench Set
2. removed 2 nuts holding air cleaner and carb
3. removed carb and air cleaner and carb
4. removed 2 screws holding plastic carb adapter
5 removed gaskets and cleaned surface of old gaskets
6. replaced in reverse order
7 put in gas, start, adjust low and high carb needles
8. runs great now.
PS: do not tighten 2 nuts holding carb and adapter too much or the plastic adapter will crack!
Piston worn out
Tool Type
Chain Saw
Difficulty
Medium
Time
1-2 hours
Tools Used
, A variety of different common hand tools
Chainsaw would not run
Tool Type
Chain Saw
Difficulty
Medium
Time
30-60 minutes
Tools Used
Screwdriver, Pliers, Socket set
Parts Used
2. Removed old carburetor.
3. Checked primer bulb to make sure that fuel lines would be connected correctly.
4. Installed new carburetor with new mounting gasket, connected fuel lines, choke and throttle linkages.
5. Re-installed air filter and covers.
6. started chainsaw.
Chainsaw actually runs better than it ever did. Did not have to adjust carburetor settings, everything was spot on.
Would not idle
Tool Type
Chain Saw
Difficulty
Medium
Time
30-60 minutes
Tools Used
Screwdriver, Pliers, Socket set, Wrench Set
Parts Used
2 Adjusted lo speed fuel mixture and idle speed screw.
3 Apparently fixed an air leak and now idles properly
OEM stands for Original Equipment Manufacturer and means the part you’re buying is sourced directly from the manufacturer who made your product. At eReplacementParts, we sell only genuine OEM parts, guaranteeing the part you’re purchasing is of better design and of higher quality than aftermarket parts.
Our product descriptions are a combination of data sourced directly from the manufacturers who made your product as well as content researched and curated by our content & customer service teams. This content is edited and reviewed internally before being made public to customers.
Our customer service team are at the ready daily to answer your part and product questions. We have a dedicated staff with decades of collective experience in helping customers just like you purchase parts to repair their products.
All our part reviews are solicited directly from other customers who have purchased this exact part. While we moderate these reviews for profanity, offensive language or personally identifiable information, these reviews are posted exactly as submitted and no alterations are made by our team.
All our customer repair instructions are solicited directly from other customers just like you who have purchased and replaced this exact part. While we moderate these reviews for profanity, offensive language or personally identifiable information, these reviews are posted exactly as submitted and no alterations are made by our team.
Based on data from past customer purchasing behaviors, these parts are most commonly purchased together along with the part you are viewing. These parts may be necessary or helpful to replace to complete your current repair.
All our installation videos are created and produced in collaboration with our in-house repair technician, Mark Sodja, who has helped millions of eReplacementParts customers over the last 13 years repair their products. Mark has years of experience in selling and repairing both commercial and residential products with a specialty in gas-powered equipment.
This data is collected from customers who submitted a repair instruction after replacing this exact part. Customers can rate how easy the repair was to complete and how long it took. We aggregate this data to provide a repair rating that allows customers to quickly determine the difficulty and time needed to perform their own repair.