Genuine Husqvarna replacement part, this item is sold individually.
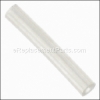
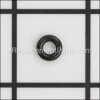
The purpose of the Fuel Tank Bushing is to create a seal and prevent leaks from the fuel tank. The fuel line are inserted in to the Bushing.
It is then pressed into the holes provided in the fuel tank.
Fuel Tank Bushing 580457501
OEM part for: Husqvarna
Part Number: 580457501
$7.46
In Stock
Jump To:
Product Description ?
- Classification: Part
- Weight: 0.01 lbs.
- Shipping: Ships Worldwide
Frequently Purchased Together ?


Compatibility
This Fuel Tank Bushing will fit the following 529 machines. Confirm this part works with your model, and view the detailed model diagrams and repair help we have to offer.
Displaying 20 of 529 matching models.
Husqvarna
Show More Compatible Models529 total model matches. Try the above search to narrow your results.
This is the official OEM part for the following brands:
- Husqvarna
This item works with the following types of products:
- Blower
- Chain Saw
- Edger
- Hedge Trimmer
- Lawn Mower
- Lawn Tractor
- Pole Saw
- Pruner
- Saw
- Trimmer
This part replaces obsolete part #: 503735801, 5037358-01
Repair Videos ?
Watch the Repair Video for
Fuel Tank Bushing

Customer Part Reviews ?
Average Rating (out of 5):
Click to filter by ratings:
5 stars
6
4 stars
0
3 stars
0
2 stars
0
1 stars
0
< PREV
- 1
Worked as expected!
The part was exactly what we were looking for, easy to find! Now our trimmer is working again!!
Guest -
June 13, 2023
Verified Purchase
FIT PERFECTLY
Install was easy and the parts were excellent quality.
Guest -
April 16, 2023
Verified Purchase
Fast
Always quick service.
Guest -
February 9, 2023
Verified Purchase
Price, availability, service, & speedy delivery!
I contacted local husquavarna dealers that had not gotten parts order deliveries in 2.5 months! Eplacementparts had all my parts in stock for a decent price! Knowledgeable service gal shipped them right out! Fixed my chainsaw easily without paying a $100 an hour mechanic who was booked out 1 month! I'll remember to return to this site 1st next time.
Guest -
January 18, 2022
Verified Purchase
quality part
fit great.
Guest -
September 23, 2020
Verified Purchase
Easy repair. Correct part the first time
Great condition, correct part
Guest -
July 8, 2019
Verified Purchase
Questions & Answers ?
Our customer Service team is at the ready daily to answer your part and product questions.

Ask our Team
We have a dedicated staff with decades of collective experience in helping customers just like you purchase parts to repair their products.
Does this fit my product?Questions & Answers for Fuel Tank Bushing
where to find the fuel vent and replacing it
ken
for model number Husqvarna 50
asked on 2023-03-23
Hi Ken,
Thank you for your question. The part number listed under your model number for the fuel tank vent is 501873101. If you would like to place an order for it, please call our customer service line and anyone will be happy to assist you. We look forward to hearing from you!
eReplacementParts Team March 23, 2023
Customer Repair Instructions ?
All our customer repair instructions are solicited directly from other customers just like you who have purchased and replaced this exact part.
Was leaking fuel around the fuel lines that go from the gas tank to the carb.
James - September 9, 2016
👍 8 of 8 people found this instruction helpful
Tool Type
Trimmer
Difficulty
Easy
Time
15-30 minutes
Tools Used
Screwdriver, Nutdriver
1 removed outside plastic covers
2. Removed dirt and fuel from around the motor.
3 removed fuel tank
4 removed old fuel lines and grommets from gas tank
5 replaced fuel lines and grommets Be clean entire trimmer.
6 hooked fuel tank back up attached plastic covers.
7 filled fuel tank and checked for leaks and started trimmer. Everything works great just like new.
Did you find this story helpful?
Thanks for voting and helping fellow customers!
Gas line plugged and damaged
John - August 5, 2017
👍 3 of 3 people found this instruction helpful
Tool Type
Chain Saw
Difficulty
Medium
Time
15-30 minutes
Tools Used
Screwdriver, Pliers
Removed gas line and determined it was plugged - also had small crack
Replaced gas line, fuel tank bushing and bellows
To reinstall bushing, remove two rear shock bushings holding gas tank to engine body - this gives you more space to work bushing into tank opening without damaging it.
Run fuel line under kill switch wire and under choke connector
Replaced gas line, fuel tank bushing and bellows
To reinstall bushing, remove two rear shock bushings holding gas tank to engine body - this gives you more space to work bushing into tank opening without damaging it.
Run fuel line under kill switch wire and under choke connector
Did you find this story helpful?
Thanks for voting and helping fellow customers!
Fuel tank leaking
James - March 18, 2018
👍 1 of 1 people found this instruction helpful
Tool Type
Chain Saw
Difficulty
Easy
Time
15-30 minutes
Tools Used
Screwdriver, Allen Wrench
Removed plastic protective cover to expose fuel tank. Removed tank screws and replaced bushing and fuel line while I was at it. No issues and fairly easy repair. This was on a Husqvarna pole saw. 326P5X
Did you find this story helpful?
Thanks for voting and helping fellow customers!
Prime bulb return line dry rotted, leaking gas.
brandon - September 11, 2016
👍 1 of 1 people found this instruction helpful
Tool Type
Chain Saw
Difficulty
Hard
Time
1-2 hours
Tools Used
Screwdriver, Pliers, Nutdriver, Two picks, one straight, one 90 degrees, knife
1. Remove chain and bar( for easy maneuverability), empty gas in tank, then top cover, followed by handle and throttle grip. The throttle has to be disconnected from carb, and you have to spin the linkage to remove because it does not come straight out.
2. You can choose to remove carb, I was able to do repair without removing, probably more difficult, but might have saved a little time. I removed return line and fuel lines and prime bulb from saw, followed by grommets. To remove fuel line you have to open gas tank and pull out filter and fuel line with your 90 degree pick. Remove filter and hose, replace with new.
3. When I replaced grommets and hose, I put a little oil on them to make things go on a little easier. I found it is easier to install grommets on hose first and then install grommets on saw. You can always push and pull hose through.
4. Once all hoses are on and secure, reinstall your filter on line and replace inside tank. I cut about two inches off the tank line before installing filter, just because it seemed a little long, your choice. I only had one line that was bad, but I figured while I was replacing one, might as well do them all, the others are probably going to fail soon.
5. In order to replace exhaust screen, you will have to remove chain break handle, two hex head bolts, slide screen out, slide new one in and done.
6. Once installed, I reassembled everything in the reverse order it come out. Chain brake handle, main handle then throttle cover, remember to install throttle linkage, you have to spin it to get back next to the carb, this can be a little tedious, but make sure it is where it needs to go before bolting main handle on, or you have to take it apart again(my mistake).
7. After throttle cover, replace your top cover, and chain and bar, add gas and your good to go.
Did you find this story helpful?
Thanks for voting and helping fellow customers!
Broken fuel line
William - February 16, 2024
Tool Type
Chain Saw
Difficulty
Medium
Time
15-30 minutes
Tools Used
Screwdriver, Pliers, 12-2 romex
Parts Used
R&R old fuel line & grommet
Did you find this story helpful?
Thanks for voting and helping fellow customers!
hose/tank grommets leaked when trimmer tilted during operation
William - June 25, 2022
Tool Type
Trimmer
Difficulty
Medium
Time
1-2 hours
Tools Used
Pliers, allen wrench with the trimmer
Removed covers including recoil starter assy.
Removed fuel tank, disconnecting fuel lines.
drained/emptied fuel tank.
Removed priming bulb and fuel lines.
Removed fuel lines and grommets from fuel tank.
Installed new grommets in tank.
installed new lines in tank.
installed new lines to priming bulb.
installed priming bulb and lines.
connected lines to carb.
reinstalled tank.
reinstalled covers and recoil starter assy.
checked all connections and retightened all screws.
fueled the unit.
Started unit checking for leaks, none found.
trimmer ops ck satis.
Did you find this story helpful?
Thanks for voting and helping fellow customers!
Bad piston/rings, low compression
Todd - February 7, 2020
Tool Type
Trimmer
Difficulty
Medium
Time
30-60 minutes
Tools Used
Pliers, Torx or hex driver
Parts Used
1. Removed all plastic covers
2. Removed tank and carb
3. Removed cylinder
4. Remove old piston
5. Replace new piston, align rings and compress, lube with some motor oil
6. Replace cylinder, carb, tank and all covers
2. Removed tank and carb
3. Removed cylinder
4. Remove old piston
5. Replace new piston, align rings and compress, lube with some motor oil
6. Replace cylinder, carb, tank and all covers
Did you find this story helpful?
Thanks for voting and helping fellow customers!
leaking gas
Elmer - October 3, 2019
Tool Type
Chain Saw
Difficulty
Medium
Time
1-2 hours
Tools Used
Screwdriver, Pliers, twezzers
look at youtube
Did you find this story helpful?
Thanks for voting and helping fellow customers!
Fuel tank was leaking through the old bushing.
William - August 20, 2019
Tool Type
Edger
Difficulty
Easy
Time
Less than 15 minutes
Tools Used
Screwdriver, Allen key
Parts Used
1. Remove carburetor.
2. Remove fuel line and bushing.
3. Trim new fuel line at an angle to aid in installation.
4. Thread new fuel line through new bushing.
5. Thread new fuel line into tank and grab the tapered end with a needle nose pliers.
6. Push the new bushing with the installed fuel line through the hole in the fuel tank using a screw
driver to help push the edges of the bushing into the tank.
7. Install the Carburetor.
8. Hook up fuel lines, install all the covers.
9. Purge the fuel system, pull cord, start trimmer and get back to work.
Did you find this story helpful?
Thanks for voting and helping fellow customers!
Fuel line and grommet leaking where it exits the fuel tank.
stephen - May 25, 2019
Tool Type
Chain Saw
Difficulty
Medium
Time
1-2 hours
Tools Used
Screwdriver, Pliers, Socket set, Nutdriver, Long needle nose pliers
Remove upper handle and lower the throttle handle assembly to access fuel line and grommet where it inters fuel tank. You have to remove carburetor and linkage to lower the lower handle assembly. Feed the new fuel line through the grommet and push the new fuel line through the fuel tank from the outside. You will need long needle nose pliers to grip the fuel line at inside bottom of the fuel tank. Reattach the fuel filter and reassemble.
Did you find this story helpful?
Thanks for voting and helping fellow customers!
Load More Install Stories
OEM stands for Original Equipment Manufacturer and means the part you’re buying is sourced directly from the manufacturer who made your product. At eReplacementParts, we sell only genuine OEM parts, guaranteeing the part you’re purchasing is of better design and of higher quality than aftermarket parts.
Learn MoreOur product descriptions are a combination of data sourced directly from the manufacturers who made your product as well as content researched and curated by our content & customer service teams. This content is edited and reviewed internally before being made public to customers.
Our customer service team are at the ready daily to answer your part and product questions. We have a dedicated staff with decades of collective experience in helping customers just like you purchase parts to repair their products.
All our part reviews are solicited directly from other customers who have purchased this exact part. While we moderate these reviews for profanity, offensive language or personally identifiable information, these reviews are posted exactly as submitted and no alterations are made by our team.
All our customer repair instructions are solicited directly from other customers just like you who have purchased and replaced this exact part. While we moderate these reviews for profanity, offensive language or personally identifiable information, these reviews are posted exactly as submitted and no alterations are made by our team.
Based on data from past customer purchasing behaviors, these parts are most commonly purchased together along with the part you are viewing. These parts may be necessary or helpful to replace to complete your current repair.
All our installation videos are created and produced in collaboration with our in-house repair technician, Mark Sodja, who has helped millions of eReplacementParts customers over the last 13 years repair their products. Mark has years of experience in selling and repairing both commercial and residential products with a specialty in gas-powered equipment.
This data is collected from customers who submitted a repair instruction after replacing this exact part. Customers can rate how easy the repair was to complete and how long it took. We aggregate this data to provide a repair rating that allows customers to quickly determine the difficulty and time needed to perform their own repair.