


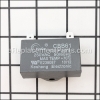
This is an electrode flame sensor designed for various heating models. Its primary function is to detect the presence of the ignition flame and activate the heater. This sensor serves as a safety device to prevent the heater from operating in the absence of a flame and to shut it off when the flame is no longer present. If your heater is not turning on or frequently cycles on and off, it is likely due to a faulty sensor that needs replacement. This flame sensor is an authentic OEM part and is sold individually, without any additional parts or accessories. Ensuring that the flame sensor remains clean and free of debris or dust is crucial for its proper operation and long-term reliability. Regularly inspecting and cleaning it before or after use can help prevent future sensor failures. To replace this sensor, you will need tools such as a screwdriver or socket wrench and a set of pliers. Begin by disconnecting your heater from the power source and removing its side panel. Locate the flame sensor within the heater and disconnect the wire attached to it. Remove the securing screws and the old sensor, making note of its orientation. Install the new sensor in its place, secure it with the screws, and reconnect the appropriate wire. Then reassemble the heater and test its operation.
Electrode Sensor 60141
OEM part for: Heatstar, Mr. Heater
Part Number: 60141
Jump To:
Frequently Purchased Together ?


Compatibility
This Electrode Sensor will fit the following 3 machines. Confirm this part works with your model, and view the detailed model diagrams and repair help we have to offer.
This item works with the following types of products:
- Heater Parts
This part replaces obsolete part #: ENE60141, 60040
Customer Part Reviews ?
- 1
Questions & Answers ?
Our customer Service team is at the ready daily to answer your part and product questions.

Ask our Team
We have a dedicated staff with decades of collective experience in helping customers just like you purchase parts to repair their products.
Does this fit my product?Questions & Answers for Electrode Sensor
Customer Repair Instructions ?
All our customer repair instructions are solicited directly from other customers just like you who have purchased and replaced this exact part.
Heater was shutting off during heat cycle.
Tool Type
Heater
Difficulty
Medium
Time
30-60 minutes
Tools Used
Screwdriver, Power Drill, Socket set, Nutdriver
Removed burner assembly.
Cleaned burners.
Removed parts that were bad while burners were out.
Put burner assemble back in and checked all parts and screws were back in.
Put side panel back on.
Plugged in and tested heater.
Ran perfect.
flame sensor Mr. Heater Big Maxx
Tool Type
Heater
Difficulty
Easy
Time
15-30 minutes
Tools Used
Screwdriver, Pliers, ladder
Parts Used
Remove side panel, remove connector/wire to sensor, remove two screws holding sensor, remove sensor remembering orientation, install new sensor and reassemble in reverse order.
Done
Defective circuit board
Tool Type
Heater
Difficulty
Easy
Time
15-30 minutes
Tools Used
Screwdriver
heater would not stay lit.
Tool Type
Heater
Difficulty
Hard
Time
1-2 hours
Tools Used
Screwdriver, Pliers, Socket set, Wrench Set, Nutdriver
Parts Used
OEM stands for Original Equipment Manufacturer and means the part you’re buying is sourced directly from the manufacturer who made your product. At eReplacementParts, we sell only genuine OEM parts, guaranteeing the part you’re purchasing is of better design and of higher quality than aftermarket parts.
Our product descriptions are a combination of data sourced directly from the manufacturers who made your product as well as content researched and curated by our content & customer service teams. This content is edited and reviewed internally before being made public to customers.
Our customer service team are at the ready daily to answer your part and product questions. We have a dedicated staff with decades of collective experience in helping customers just like you purchase parts to repair their products.
All our part reviews are solicited directly from other customers who have purchased this exact part. While we moderate these reviews for profanity, offensive language or personally identifiable information, these reviews are posted exactly as submitted and no alterations are made by our team.
All our customer repair instructions are solicited directly from other customers just like you who have purchased and replaced this exact part. While we moderate these reviews for profanity, offensive language or personally identifiable information, these reviews are posted exactly as submitted and no alterations are made by our team.
Based on data from past customer purchasing behaviors, these parts are most commonly purchased together along with the part you are viewing. These parts may be necessary or helpful to replace to complete your current repair.
All our installation videos are created and produced in collaboration with our in-house repair technician, Mark Sodja, who has helped millions of eReplacementParts customers over the last 13 years repair their products. Mark has years of experience in selling and repairing both commercial and residential products with a specialty in gas-powered equipment.
This data is collected from customers who submitted a repair instruction after replacing this exact part. Customers can rate how easy the repair was to complete and how long it took. We aggregate this data to provide a repair rating that allows customers to quickly determine the difficulty and time needed to perform their own repair.