


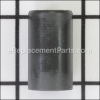
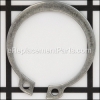
This dust seal is an authentic replacement part sourced directly from the original parts manufacturer. This dust seal is used in a Honda lawn mower and is used keep dust from entering the adjusting arm. This part is made of a durable rubber and is sold as an individual replacement part.
Dust Seal (12.7mm) 42944-VE2-801
OEM part for: Honda
Part Number: 42944-VE2-801
$4.99
In Stock
Jump To:
Frequently Purchased Together ?

Compatibility
This Dust Seal (12.7mm) will fit the following 101 machines. Confirm this part works with your model, and view the detailed model diagrams and repair help we have to offer.
This item works with the following types of products:
- Lawn Mower Parts
Customer Part Reviews ?
Average Rating (out of 5):
Click to filter by ratings:
5 stars
1
4 stars
0
3 stars
0
2 stars
0
1 stars
0
< PREV
- 1
Order was complete and correct, well packed and shipped fast!
Factory part exactly as decribed.
Richard -
November 7, 2021
Verified Purchase
Questions & Answers ?
Our customer Service team is at the ready daily to answer your part and product questions.

Ask our Team
We have a dedicated staff with decades of collective experience in helping customers just like you purchase parts to repair their products.
Does this fit my product?Questions & Answers for Dust Seal (12.7mm)
No questions have been asked yet
Customer Repair Instructions ?
All our customer repair instructions are solicited directly from other customers just like you who have purchased and replaced this exact part.
Honda Lawnmower (Model No. HRX217K3-HYAA) Drive Transmission Replacement
Gary - October 24, 2022
Tool Type
Engine
Difficulty
Medium
Time
30-60 minutes
Tools Used
Pliers, Socket set, Snap Ring Pliers / Spring Extender Cable
NOTE: I highly recommend utilizing exploded parts views on eReplacementparts.com website to reference sequence of assembly for all parts on the mower.
The Drive Transmission replacement sequence I followed is as follows:
1. Emptied all fuel & placed Fuel Shutoff Valve in the closed position
2. Removed Pull Start Assembly & Engine Cowling (with integrated fuel tank)
3. Secured mower upside-down on workbench
4. Removed Cutting Blades
5. Removed Mulching/Bagging Assembly to expose drive belt
6. Removed Rear Wheels (single bolt, thrust washer & flat washer)
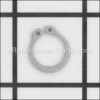
7. Removed Pinion Gear Assemblies (12.7mm Circlip, Bushing, Pinion Gear, Ratchet Key &
Spring, Bushing)
8. Removed Rear Wheel back Covers
9. Removed Rear Wheel Height Adjustment Assemblies (12.7mm Circlip & Bushing)
10. Disengaged Transmission Axle from inside of Mower Deck (22mm Circlip & Washer)
11. Disengaged Change Cable
12. Disengaged Tension Spring (Tight fit - used old wire cable to disengage/engage spring from
Transmission lever)
13. Disengaged Drive Belt
14. Removed Transmission Assembly from inside of mover deck.
15. Transferred control arm from old Transmission Assembly to new Transmission Assembly.
15. Reverse steps 14 thru 1 for reassembly
The Drive Transmission replacement sequence I followed is as follows:
1. Emptied all fuel & placed Fuel Shutoff Valve in the closed position
2. Removed Pull Start Assembly & Engine Cowling (with integrated fuel tank)
3. Secured mower upside-down on workbench
4. Removed Cutting Blades
5. Removed Mulching/Bagging Assembly to expose drive belt
6. Removed Rear Wheels (single bolt, thrust washer & flat washer)
7. Removed Pinion Gear Assemblies (12.7mm Circlip, Bushing, Pinion Gear, Ratchet Key &
Spring, Bushing)
8. Removed Rear Wheel back Covers
9. Removed Rear Wheel Height Adjustment Assemblies (12.7mm Circlip & Bushing)
10. Disengaged Transmission Axle from inside of Mower Deck (22mm Circlip & Washer)
11. Disengaged Change Cable
12. Disengaged Tension Spring (Tight fit - used old wire cable to disengage/engage spring from
Transmission lever)
13. Disengaged Drive Belt
14. Removed Transmission Assembly from inside of mover deck.
15. Transferred control arm from old Transmission Assembly to new Transmission Assembly.
15. Reverse steps 14 thru 1 for reassembly
Did you find this story helpful?
Thanks for voting and helping fellow customers!
Axle and related parts were worn out
kendall - June 23, 2021
Tool Type
Engine
Difficulty
Medium
Time
1-2 hours
Tools Used
Screwdriver, Pliers, Socket set, Wrench Set, Rubber mallet, Hammer, drift
Parts Used
- Washer, Wheel - 90455-VA2-000
- Pinion Gear - 42661-VE2-800
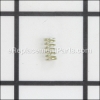
- Ratchet Return Spring - 42668-VE2-800
- Dust Seal (12.7mm) - 42944-VE2-801
- Cover - 42866-VE2-800
- Washer, Thrust (13x27x1) - 90505-VG3-000
- Bush, Driveshaft - 44327-VG3-B00
- Collar, Thrust - 91553-VG3-B00
- Wheel Nh164 (grip Gray) (rr.) - 44710-VE2-M02ZD
- Transmission Assembly - 20001-VL0-S00
Turned off gas to carb
Supported mower vertical
Removed wheels and related parts
Removed blade
Removed belt guide
Removed spring from axle assembly
Removed control cable
Removed axle assembly
Reverse order with new parts
Takes about 11/2 hours
Supported mower vertical
Removed wheels and related parts
Removed blade
Removed belt guide
Removed spring from axle assembly
Removed control cable
Removed axle assembly
Reverse order with new parts
Takes about 11/2 hours
Did you find this story helpful?
Thanks for voting and helping fellow customers!
Drive shaft bushing worn out
KENNETH - November 9, 2020
Tool Type
Engine
Difficulty
Medium
Time
1-2 hours
Tools Used
Pliers, Socket set, Channel lock
Removed plastic cover
Removed both wheels
Removed all c lock washers
Removed transmission and drive shaft
Replaced shaft bushing
Reinstalled transmission and shift
Reinstalled drive gears and wheels
Removed both wheels
Removed all c lock washers
Removed transmission and drive shaft
Replaced shaft bushing
Reinstalled transmission and shift
Reinstalled drive gears and wheels
Did you find this story helpful?
Thanks for voting and helping fellow customers!
Honda lawnmower rear wheels bind when pulling it backwards.
Michael - April 26, 2020
Tool Type
Engine
Difficulty
Medium
Time
30-60 minutes
Tools Used
, Snap ring pliers
Replace bushing on axle where it passes thru the bed.
Did you find this story helpful?
Thanks for voting and helping fellow customers!
Transmission failed
Robert - March 21, 2018
Tool Type
Engine
Difficulty
Medium
Time
1-2 hours
Tools Used
Screwdriver, Pliers, Socket set, Wrench Set, Adjustable Wrench
Parts Used
- Circlip - Outer - 25mm - 94510-25000
- Washer, Thrust (13mm) - 90502-VE2-800
- Snap Retaining Ring - 90651-VE2-800
- Ratchet Return Spring - 42668-VE2-800
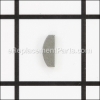
- Ratchet Key - 42672-VE2-800
- Dust Seal (12.7mm) - 42944-VE2-801
- Collar, Pinion Gear - 91559-VE2-800
- Washer, Thrust (13x27x1) - 90505-VG3-000
- Transmission Assembly - 20001-VG4-H02
- Bush, Driveshaft - 44327-VG3-B00
- Collar, Thrust - 91553-VG3-B00
- Cable, Change - 54630-VG4-H01
Removed transmission and control assembly. Replaced same. Used parts catalog pictures for reassembling. Pretty much straight forward. Appreciated timely and complete delivery of parts. Main delay was in assembling the new shift lever for handlebar.
Did you find this story helpful?
Thanks for voting and helping fellow customers!
OEM stands for Original Equipment Manufacturer and means the part you’re buying is sourced directly from the manufacturer who made your product. At eReplacementParts, we sell only genuine OEM parts, guaranteeing the part you’re purchasing is of better design and of higher quality than aftermarket parts.
Our product descriptions are a combination of data sourced directly from the manufacturers who made your product as well as content researched and curated by our content & customer service teams. This content is edited and reviewed internally before being made public to customers.
Our customer service team are at the ready daily to answer your part and product questions. We have a dedicated staff with decades of collective experience in helping customers just like you purchase parts to repair their products.
All our part reviews are solicited directly from other customers who have purchased this exact part. While we moderate these reviews for profanity, offensive language or personally identifiable information, these reviews are posted exactly as submitted and no alterations are made by our team.
All our customer repair instructions are solicited directly from other customers just like you who have purchased and replaced this exact part. While we moderate these reviews for profanity, offensive language or personally identifiable information, these reviews are posted exactly as submitted and no alterations are made by our team.
Based on data from past customer purchasing behaviors, these parts are most commonly purchased together along with the part you are viewing. These parts may be necessary or helpful to replace to complete your current repair.
All our installation videos are created and produced in collaboration with our in-house repair technician, Mark Sodja, who has helped millions of eReplacementParts customers over the last 13 years repair their products. Mark has years of experience in selling and repairing both commercial and residential products with a specialty in gas-powered equipment.
This data is collected from customers who submitted a repair instruction after replacing this exact part. Customers can rate how easy the repair was to complete and how long it took. We aggregate this data to provide a repair rating that allows customers to quickly determine the difficulty and time needed to perform their own repair.