


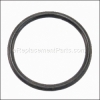
This is a genuine OEM sourced part which is specially designed for use with Kohler faucets. The diverter helps to control and direct the flow of water. It provides an identical replacement for a missing or a faulty component that was installed on a new unit. Please make sure to check the owners manual and the appropriate diagrams of your model for the correct location and application of this part. Keep in mind this high-quality item is made of durable material and is sold individually.
Diverter GP75878
OEM part for: Kohler
Part Number: GP75878
$11.45
In Stock
Jump To:
Frequently Purchased Together ?


Compatibility
This Diverter will fit the following 23 machines. Confirm this part works with your model, and view the detailed model diagrams and repair help we have to offer.
Kohler
Show More Compatible ModelsThis item works with the following types of products:
- Faucet Parts
This part replaces obsolete part #: 75878
Customer Part Reviews ?
Average Rating (out of 5):
Click to filter by ratings:
5 stars
1
4 stars
0
3 stars
0
2 stars
0
1 stars
0
< PREV
- 1
Worked great
This product saved me a $1000 plumber visit and new faucet. The description on the replacement technique was both helpful and accurate.
Guest -
July 16, 2019
Verified Purchase
Questions & Answers ?
Our customer Service team is at the ready daily to answer your part and product questions.

Ask our Team
We have a dedicated staff with decades of collective experience in helping customers just like you purchase parts to repair their products.
Does this fit my product?Questions & Answers for Diverter
How to replace the split retaining ring, do I need a special tool ?
ed
for model number kohler GP75878
asked on 2023-10-26
Hi Ed,
Thank you for your question. You can use two small straight end stainless steel probes to carefully compress and remove the split ring without damage to the split ring or the faucet assembly core. We hope this helps!
eReplacementParts Team October 26, 2023
Customer Repair Instructions ?
All our customer repair instructions are solicited directly from other customers just like you who have purchased and replaced this exact part.
Worn diverter valve in sick faucet that redirects water to hand sprayer.
Robert - December 21, 2018
👍 8 of 8 people found this instruction helpful
Tool Type
Faucet
Difficulty
Medium
Time
30-60 minutes
Tools Used
Pliers, Allen Wrench, Needle&Split Ring Pliers and small metal picks
1. I reviewed the parts diagrams for my single handle kitchen sink faucet assembly, manufactured by Kohler, Part Number K-10441, on the e-Replacement web site. The Kohler K-10441 is very similar to the Kohler Forte K-10430 kitchen faucet in construction.
2. I then located what where hand spray diverter valve was located. I had assumed the diverter valve was in the remote faucet value housing, but instead found the diverter within the faucet spout.
3. Since the faucet water control valve was mounted separately from the faucet spout, I did not turn off the hot and cold-water supply valves under the sink. Next, I removed the Allen set screw on the faucet spout and carefully lifted the spout from the faucet spout core body assembly. A small amount water is normally within the faucet spout and emptied onto the sink lip.
4. Next, I removed the small spit ring in the faucet neck assembly. I found my split ring plier jaw points were too big to grasp the split ring end holes. Instead I used two small straight end stainless steel probes to carefully compress and remove the split ring without damage to the split ring or the faucet assembly core.
5. Then I located the diverter valve and attempted to remove it with small needle nose pliers. The diverter valve was stuck and could not be removed without possible damage to the existing diverter value. Instead I used a small 90-degree stainless steel probe to loosen the diverter valve and remove it with the small needle nose pliers.
6. I inspected the 2 O-rings and diverter value but did not see any visual problems or damage to these parts. I reused the 2 O-rings but replaced the diverter value on suspicion.
7. Next I cleaned the faucet parts with a paper towels then re-lubed all those parts with silicon grease I had removed.
8. I reinstalled the faucet spout, opened the faucet valve, checked for presence of any water leaks and tested the new diverter valve. There were no presence of any water leaks and the faucet worked again as when it was new.
My previous single handle Delta kitchen faucet had the diverter valve mounted in the value assembly not the faucet spout. My repaired Kohler kitchen faucet had the valve assembly remotely mounted within the faucet sink spout, so this repair was new for me. Thanks to the e-Replacement web site and their replacement parts diagrams with the associated part numbers. The replacement parts including shipping were far less in cost than a new kitchen sink faucet, and the elapsed time between parts ordering and receipt was only a few days.
Did you find this story helpful?
Thanks for voting and helping fellow customers!
Sink sprayer sprayed slowly, then stopped
David - August 18, 2023
👍 1 of 1 people found this instruction helpful
Tool Type
Faucet
Difficulty
Medium
Time
30-60 minutes
Tools Used
Screwdriver, Adjustable Wrench, Needle nose pliers, small picking device
Parts Used
1 My faucet had an on off mixing valve so no need to close valves below sink, but may be needed for some sinks.
2 Removed screw with Allen wrench and removed on back of hooking water spigot then pulled spigot up and off.
3 Diffuser on my faucet could be seen looking down where spigot was attached and was removed with needle nose pliers, small screw driver, and small picking tool.
4 Once diffuser was completely out, put new diffuser in place and applied o ring lube on the rings involved.
5 Reversed removal procedures and tested spayer.
Did you find this story helpful?
Thanks for voting and helping fellow customers!
Faucet leaked just above sink level.
Daniel - April 19, 2024
Tool Type
Faucet
Difficulty
Easy
Time
15-30 minutes
Tools Used
Screwdriver, Pliers, Adjustable Wrench
Followed the diagram provided.
Did you find this story helpful?
Thanks for voting and helping fellow customers!
The hand sprayer wasn't getting much pressure
Brian - December 9, 2021
Tool Type
Faucet
Difficulty
Easy
Time
15-30 minutes
Tools Used
, Channel lock pilers and allen wrench
Parts Used
Turned off water supply to faucet. Removed the handle. Removed the spout and o rings, as well as the diverter valve. Cleaned up everything. Installed the new diverter valve and o rings. coated the o ring with the included lube. Then reinstalled the spout and handle. Turned water back on and tested the sprayer. Everything's back to normal.
Did you find this story helpful?
Thanks for voting and helping fellow customers!
OEM stands for Original Equipment Manufacturer and means the part you’re buying is sourced directly from the manufacturer who made your product. At eReplacementParts, we sell only genuine OEM parts, guaranteeing the part you’re purchasing is of better design and of higher quality than aftermarket parts.
Our product descriptions are a combination of data sourced directly from the manufacturers who made your product as well as content researched and curated by our content & customer service teams. This content is edited and reviewed internally before being made public to customers.
Our customer service team are at the ready daily to answer your part and product questions. We have a dedicated staff with decades of collective experience in helping customers just like you purchase parts to repair their products.
All our part reviews are solicited directly from other customers who have purchased this exact part. While we moderate these reviews for profanity, offensive language or personally identifiable information, these reviews are posted exactly as submitted and no alterations are made by our team.
All our customer repair instructions are solicited directly from other customers just like you who have purchased and replaced this exact part. While we moderate these reviews for profanity, offensive language or personally identifiable information, these reviews are posted exactly as submitted and no alterations are made by our team.
Based on data from past customer purchasing behaviors, these parts are most commonly purchased together along with the part you are viewing. These parts may be necessary or helpful to replace to complete your current repair.
All our installation videos are created and produced in collaboration with our in-house repair technician, Mark Sodja, who has helped millions of eReplacementParts customers over the last 13 years repair their products. Mark has years of experience in selling and repairing both commercial and residential products with a specialty in gas-powered equipment.
This data is collected from customers who submitted a repair instruction after replacing this exact part. Customers can rate how easy the repair was to complete and how long it took. We aggregate this data to provide a repair rating that allows customers to quickly determine the difficulty and time needed to perform their own repair.