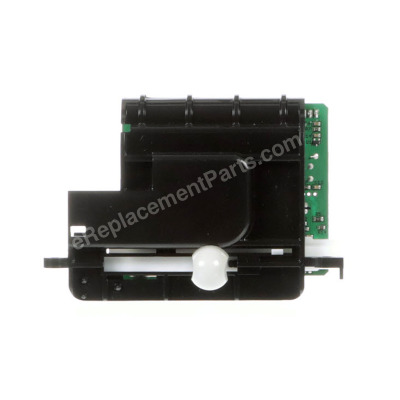
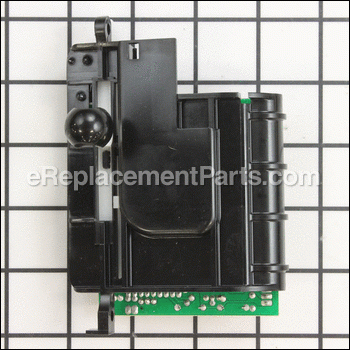
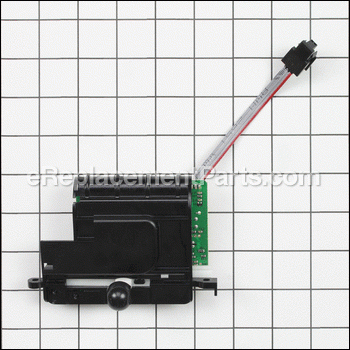
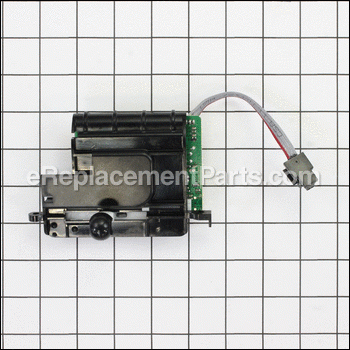
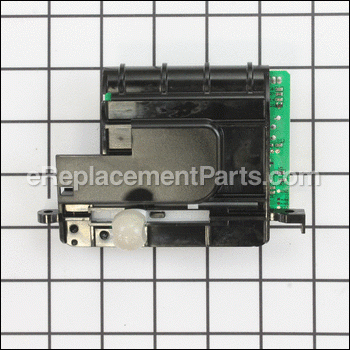
This is an authentic KitchenAid part. The Control Assembly comes with a buff colored knob that does not come separately. The Control Assembly controls and regulates the mixing speeds. This part should be replaced when the speeds don\\\'t engage correctly or when they don\\\'t engage at all. This part is commonly replaced with the Hall Effect Sensor, part number 9703312. The Control Assembly is moderately easy to replace. This part is held in place with only two screws. Once the screws are removed switch the connections, one at a time, to the new part.
Tools needed:
• Philips Head Screw Driver
• Needle Nose Pliers (to aid in removing connections)
Stand Mixer Motor Control Boar WP9706648
OEM part for: KitchenAid
Part Number: WP9706648
Jump To:
Product Description ?
- Classification: Part
- Weight: 0.30 lbs.
- Shipping: Ships Worldwide
Frequently Purchased Together ?
Compatibility
This Stand Mixer Motor Control Boar will fit the following 482 machines. Confirm this part works with your model, and view the detailed model diagrams and repair help we have to offer.
KitchenAid
Show More Compatible ModelsThis item works with the following types of products:
- Mixer Parts
This part replaces obsolete part #: 9706649, WP9706649, WP9706650, 9703312, 9706648, 9706650, 9707220, 9707511, 9707172, 9706508, 9706052
Repair Videos ?
|
This article will help you diagnose and repair a bad speed sensor or control switch on your KitchenAid Pro 6 mixer. ...
March 28, 2013
|
Customer Part Reviews ?
- 1
Questions & Answers ?
Our customer Service team is at the ready daily to answer your part and product questions.

Ask our Team
We have a dedicated staff with decades of collective experience in helping customers just like you purchase parts to repair their products.
Does this fit my product?Questions & Answers for Stand Mixer Motor Control Boar
Customer Repair Instructions ?
All our customer repair instructions are solicited directly from other customers just like you who have purchased and replaced this exact part.
My Kitchenaid Professional 6 mixer speed control was not working. I would turn it on high and it would go slow, then faster, then slow...etc....
Tool Type
Mixer
Difficulty
Medium
Time
15-30 minutes
Tools Used
Screwdriver
It worked perfectly.
Could not control speed. Would start at maximum speed regardless of setting. Then turn off after a few seconds.
Tool Type
Mixer
Difficulty
Easy
Time
15-30 minutes
Tools Used
Screwdriver
This KitchenAid mixer was an older model with a 5-wire speed control board with a ribbon and a micro switch. The new board had 4 wires, there were no boards available with 5 wires. The new board had the micro switch mounted on the board. With the old design there was one power supply wire to the separate micro switch then two wires from the switch to the board. One was un switched power and one was switched power. Plus two wires for the motor and one neutral, for a total of 5 wires. The new design only requires the un switched power to be connected to the board. The switched power wire can be discarded. So, only one wire plus two for the motor and one neutral, for a total of 4 wires.
No changes to the ribbon wire...except the connector on the new board was mounted in a different orientation, so be careful to install the connector plug in the correction direction.
In order to update the mixer wiring, you can either cut off the un switched power, add a new connector and connect to the new board. Or, transfer the switch to the new board (there is a place for it to mount), then connect the un switched power to the switch (it won't do anything except allow a connector for the wire the switch is no longer needed for operation) and connect the other end to the board. Discard the switched power wire. This allows the new style board to be installed with not cutting or splicing wires.
In my case, the real problem with the hall effect switch, but I replaced that and the board since they were both pretty old.
Easy repair, mixer works great. Hope this is helpful if you have an older style mixer like mine.
Mixer would run in fastest setting when turned on slowest setting. Then would shutdown.
Tool Type
Mixer
Difficulty
Easy
Time
Less than 15 minutes
Tools Used
Screwdriver, Pliers
Speed control intermittent
Tool Type
Mixer
Difficulty
Easy
Time
15-30 minutes
Tools Used
Screwdriver, Pliers, Square drive bit
Parts Used
The mixer would not start.
Tool Type
Mixer
Difficulty
Medium
Time
15-30 minutes
Tools Used
Screwdriver
Parts Used
https://www.youtube.com/watch?v=41qTqTWQkMI
Switch assembly was not working.
Tool Type
Mixer
Difficulty
Easy
Time
30-60 minutes
Tools Used
Screwdriver, Pliers
Parts Used
I also made use of a repair video that was provided on the eReplacement Parts website. You can find repair videos for just about anything you can imagine. Anytime I'm going to do a repair I do a web search for a repair video, usually found on YouTube. Sometimes the video production is terrible, but you can almost always learn something of great value to your repair.
If you are mechanically inclined, you can repair anything using the two methods above.
This repair took longer than it should have because the previous owner had cross threaded one of the screws that mounts the switch. I had to break the old switch off and remove the screw with pliers with about an eighth of a turn at a time.
The knob to turn on and adjust speeds stopped working/would not engage.
Tool Type
Mixer
Difficulty
Easy
Time
Less than 15 minutes
Tools Used
Screwdriver, Pliers
Parts Used
2. Removed the top, four screws.
3. Unscrewed the panel that housed the knob, two screws.
4. Determined that the plastic channel which guides the knob action was cracked.
5. Unplugged the electrical connection plugs of broken channel guide, one at a time (labeled A1, A2, A3, A4).
6. Replaced plugs into new panel.
7. Replaced panel with knob in place, replacing screws.
8. Replaced top and screwed into place.
9. Replaced Kitchen Aid label band and screwed back together to fit tightly.
Mixer, in my wife's bakery blender, wouldn't work on slow speed.
Tool Type
Mixer
Difficulty
Easy
Time
15-30 minutes
Tools Used
Screwdriver
Parts Used
2. Unhook the wiring, one at a time and hooked to the new switch board.
3. Remove the old switch and circuit board.
4. Install the new switch and circuit board.
5. Reinstall the mixer cover.
Mixer would not run.
Tool Type
Mixer
Difficulty
Easy
Time
30-60 minutes
Tools Used
Screwdriver
Parts Used
Mixer. Took a while to turn on, then could not adjust speed
Tool Type
Mixer
Difficulty
Easy
Time
Less than 15 minutes
Tools Used
Screwdriver
Parts Used
OEM stands for Original Equipment Manufacturer and means the part you’re buying is sourced directly from the manufacturer who made your product. At eReplacementParts, we sell only genuine OEM parts, guaranteeing the part you’re purchasing is of better design and of higher quality than aftermarket parts.
Our product descriptions are a combination of data sourced directly from the manufacturers who made your product as well as content researched and curated by our content & customer service teams. This content is edited and reviewed internally before being made public to customers.
Our customer service team are at the ready daily to answer your part and product questions. We have a dedicated staff with decades of collective experience in helping customers just like you purchase parts to repair their products.
All our part reviews are solicited directly from other customers who have purchased this exact part. While we moderate these reviews for profanity, offensive language or personally identifiable information, these reviews are posted exactly as submitted and no alterations are made by our team.
All our customer repair instructions are solicited directly from other customers just like you who have purchased and replaced this exact part. While we moderate these reviews for profanity, offensive language or personally identifiable information, these reviews are posted exactly as submitted and no alterations are made by our team.
Based on data from past customer purchasing behaviors, these parts are most commonly purchased together along with the part you are viewing. These parts may be necessary or helpful to replace to complete your current repair.
All our installation videos are created and produced in collaboration with our in-house repair technician, Mark Sodja, who has helped millions of eReplacementParts customers over the last 13 years repair their products. Mark has years of experience in selling and repairing both commercial and residential products with a specialty in gas-powered equipment.
This data is collected from customers who submitted a repair instruction after replacing this exact part. Customers can rate how easy the repair was to complete and how long it took. We aggregate this data to provide a repair rating that allows customers to quickly determine the difficulty and time needed to perform their own repair.

