


This is a genuine OEM sourced replacement carburetor. It is specially designed for use with Echo and Shindaiwa trimmer/brushcutters. Carburetor plays a key role in a gas powered equipment. It is used to mix the air and gas before the fuel mix goes to the engine. This is a metal body carburetor with a rubber primer bulb. Please note gaskets are sold separately.
To complete this repair you will need a screwdriver.
• Remove the rear cover
• Remove the carburetor
• Remove the fuel filter
• Install the fuel filter
• Install the carburetor
• Re-assemble and test the unit
Carburetor Rb-k75 A021000742
OEM part for: Echo, Shindaiwa
Part Number: A021000742
$82.78
In Stock
Jump To:
Product Description ?
- Classification: Part
- Weight: 0.26 lbs.
- Shipping: Ships Worldwide
Frequently Purchased Together ?


Compatibility
This Carburetor Rb-k75 will fit the following 113 machines. Confirm this part works with your model, and view the detailed model diagrams and repair help we have to offer.
This item works with the following types of products:
- Hedge Trimmer Parts
- Trimmer Parts
- Grass Trimmer Parts
This part replaces obsolete part #: A021000741, A021000740
Repair Videos ?
Articles:
|
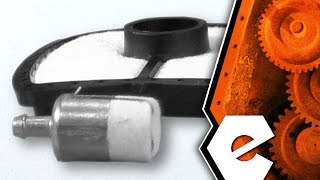
Filthy Filters? This article will show you how to install a filter kit on an Echo SRM-225 trimmer....
May 27, 2015
|

Customer Part Reviews ?
Average Rating (out of 5):
Click to filter by ratings:
5 stars
6
4 stars
0
3 stars
0
2 stars
0
1 stars
0
< PREV
- 1
Carb purchase
Save yourself the trouble and buy the new carb first. For 70$ you can’t go wrong. I tried the money saving route with rebuild kit. The time I spent taking carb apart and soaking in cleaner then re building it to discover that the jets must have still had some obstruction. I ordered the mew carb and in 10 minutes had the weed-eater running like a champ. I love the fact that I can order parts for my serial number. That makes you guys awesome.
Joel -
April 15, 2021
Verified Purchase
Replacement Carburetor
Works like new now don’t buy anything else buy here Good People
Guest -
March 29, 2021
Verified Purchase
worked perfect. arrived quick.
Worked Great. hedger started first try after first pull.
Guest -
May 16, 2020
Verified Purchase
Easy fix
The part worked excellant, a little pricey as opposed to other sites, but it works.
Dale -
October 1, 2019
Verified Purchase
Easy repair and worked great!
Replaced the newly replaced cheap carburetor with this oem replacement one and the edger worked and ran great! Very happy with this purchase.
Guest -
September 17, 2019
Verified Purchase
Better then New
We took our echo trimmer to repair shop, He said “can’t fix junk it “ Got a second Opinion he told us about ereplacementparts.com .. Ordered by phone , Very helpful , got the right part .. the repair man put it on less then 10 min.. RUN FANTASTIC
Thank You for Fast Friendly Services
Guest -
August 16, 2019
Verified Purchase
Questions & Answers ?
Our customer Service team is at the ready daily to answer your part and product questions.

Ask our Team
We have a dedicated staff with decades of collective experience in helping customers just like you purchase parts to repair their products.
Does this fit my product?Questions & Answers for Carburetor Rb-k75
No questions have been asked yet
Customer Repair Instructions ?
All our customer repair instructions are solicited directly from other customers just like you who have purchased and replaced this exact part.
Trimmer would not run @ high speed
Brent - July 11, 2016
👍 5 of 6 people found this instruction helpful
Tool Type
Hedge Trimmer
Difficulty
Easy
Time
15-30 minutes
Tools Used
Screwdriver
Parts Used
Removed original carb from trimmer intake being carful not to damage the gasket between carb & intake because there is not on supplied with new carb. Affixed new carb with the original unint gasket snugged all machine screws reattached supply & return fuel lines primed bulb checked for leaks in two pulls of chord I was back in business. I did have to adjust the idle so trimmers would stay running @ idle.
Did you find this story helpful?
Thanks for voting and helping fellow customers!
Couldn't stop fuel from leaking out of the intake orifice causing the air filter to soak up the fuel.
Norman - July 26, 2017
👍 1 of 1 people found this instruction helpful
Tool Type
Edger
Difficulty
Medium
Time
15-30 minutes
Tools Used
Screwdriver
Parts Used
1. Removed air filter & cover.
2. Removed carburetor, (2-screws, Phillips head).
3. Disconnected fuel control cable.
4. Disconnected fuel lines one at a time insuring the port I removed one from I installed onto the same one on the new carburetor.
5. Using the two screws removed in item#2 above, re-installed the new carburetor.
6. Installed the fuel control cable.
7. Primed the plastic primer bulb.
8. Started engine on second pull.
Did you find this story helpful?
Thanks for voting and helping fellow customers!
Trimmer would only run with almost full choke, carburetor needed rebuilding
Richard - June 19, 2016
👍 1 of 1 people found this instruction helpful
Tool Type
Hedge Trimmer
Difficulty
Medium
Time
15-30 minutes
Tools Used
Screwdriver, Spark plug socket
I put my Echo hedge trimmer in my bench vice ,removed the air filter removed two screws holding the carburetor to the engine unhook throttle cable installed new carburetor in reverse. New carburetor was an exact match the only tool needed was a screwdriver the repair took ten minutes could not have been easier and I also replaced the spark plug .
Did you find this story helpful?
Thanks for voting and helping fellow customers!
Would not start
Danny - May 12, 2022
Tool Type
Trimmer
Difficulty
Easy
Time
15-30 minutes
Tools Used
Screwdriver, Pliers
Parts Used
Took old carb.off and put new carb.on.
Did you find this story helpful?
Thanks for voting and helping fellow customers!
it would pnly run with choke slightly on low idle
Mark - June 14, 2021
Tool Type
Trimmer
Difficulty
Easy
Time
30-60 minutes
Tools Used
Screwdriver
Parts Used
removed carburetor installed new one runs perfect
Did you find this story helpful?
Thanks for voting and helping fellow customers!
Would not start
Robert - July 9, 2017
Tool Type
Trimmer
Difficulty
Medium
Time
30-60 minutes
Tools Used
Screwdriver, Pliers, Socket set, Wrench Set
1. Drained fuel from tank
2. Disconnected throttle cable and fuel lines from carburetor
3. Removed carburetor
4. Removed fuel tank and cleaned w/carburetor cleaner
5. Replaced in-tank pickup
6. Installed carburetor
6. Installed new air filter case
7. Added fuel and started trimmer
2. Disconnected throttle cable and fuel lines from carburetor
3. Removed carburetor
4. Removed fuel tank and cleaned w/carburetor cleaner
5. Replaced in-tank pickup
6. Installed carburetor
6. Installed new air filter case
7. Added fuel and started trimmer
Did you find this story helpful?
Thanks for voting and helping fellow customers!
Trimmer would only run on near full to full choke.
James - June 7, 2017
Tool Type
Trimmer
Difficulty
Easy
Time
15-30 minutes
Tools Used
Screwdriver, No other tools
Parts Used
Removed the air filter
Removed the fuel lines and throttle
Removed the two screws and the old carburetor
Installed the new carburetor on the screws
Replace the fuel lines and throttle and the air filter
Removed the fuel lines and throttle
Removed the two screws and the old carburetor
Installed the new carburetor on the screws
Replace the fuel lines and throttle and the air filter
Did you find this story helpful?
Thanks for voting and helping fellow customers!
Ran rough, would not accelerate.
Stephen - June 1, 2017
Tool Type
Trimmer
Difficulty
Medium
Time
15-30 minutes
Tools Used
Screwdriver, Pliers
Disconnected the old carb. Popped in the new carb and it ran like new. Thanks!
Did you find this story helpful?
Thanks for voting and helping fellow customers!
String Trimmer would start and then die. Would not stay running
Dennis - April 1, 2017
👍 1 of 2 people found this instruction helpful
Tool Type
Trimmer
Difficulty
Easy
Time
15-30 minutes
Tools Used
Screwdriver, Socket set
1. Removed air cleaner cover and filter and removed the three fuel lines
2. Using slotted screwdriver removed two screws holding air filter base and carburetor from engine and removed carburetor.
3. Disconnected throttle cable from carburetor
4. Removed old carburetor gasket from engine
5. Put new gasket on engine
6. Attached throttle cable
7. Set new carburetor in place and set carburetor in place
8. Attached carburetor and filter base to engine using two screws previously removed
9. Reattached fuel lines
10. Replaced air filter and cover.
11. Started engine by pushing priming bulb several times and pulling starter cord approximately 6 times.
Engine now runs great.
Did you find this story helpful?
Thanks for voting and helping fellow customers!
Would not idle
John - August 29, 2016
Tool Type
Hedge Trimmer
Difficulty
Easy
Time
Less than 15 minutes
Tools Used
Screwdriver
Parts Used
1. Removed old carb
2. Put new one on
2. Put new one on
Did you find this story helpful?
Thanks for voting and helping fellow customers!
Load More Install Stories
OEM stands for Original Equipment Manufacturer and means the part you’re buying is sourced directly from the manufacturer who made your product. At eReplacementParts, we sell only genuine OEM parts, guaranteeing the part you’re purchasing is of better design and of higher quality than aftermarket parts.
Our product descriptions are a combination of data sourced directly from the manufacturers who made your product as well as content researched and curated by our content & customer service teams. This content is edited and reviewed internally before being made public to customers.
Our customer service team are at the ready daily to answer your part and product questions. We have a dedicated staff with decades of collective experience in helping customers just like you purchase parts to repair their products.
All our part reviews are solicited directly from other customers who have purchased this exact part. While we moderate these reviews for profanity, offensive language or personally identifiable information, these reviews are posted exactly as submitted and no alterations are made by our team.
All our customer repair instructions are solicited directly from other customers just like you who have purchased and replaced this exact part. While we moderate these reviews for profanity, offensive language or personally identifiable information, these reviews are posted exactly as submitted and no alterations are made by our team.
Based on data from past customer purchasing behaviors, these parts are most commonly purchased together along with the part you are viewing. These parts may be necessary or helpful to replace to complete your current repair.
All our installation videos are created and produced in collaboration with our in-house repair technician, Mark Sodja, who has helped millions of eReplacementParts customers over the last 13 years repair their products. Mark has years of experience in selling and repairing both commercial and residential products with a specialty in gas-powered equipment.
This data is collected from customers who submitted a repair instruction after replacing this exact part. Customers can rate how easy the repair was to complete and how long it took. We aggregate this data to provide a repair rating that allows customers to quickly determine the difficulty and time needed to perform their own repair.