eReplacementParts.com
877-346-4815
Husqvarna Parts

Carb Float 49-009

OEM part for: Oregon, Husqvarna, Toro

Part Number: 49-009


Install
Videos!
Carb Float - 49-009:Oregon 360 View
Carb Float - 49-009:OregonCarb Float - 49-009:OregonCarb Float - 49-009:Oregon 360 View
In Stock
Ships within 1 business day
Medium 30-60 minutes (6 rated repairs)?
OEM: Original Equipment Manufacturer ?
OregonHusqvarnaToro

Product Description ?

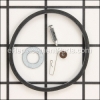
It is an authentic manufacturer-approved replacement component which is specially designed for lawn and garden equipment. This float controls the fuel flow into the carburetor bowl by adjusting the needle valve. Please make sure to refer to the appropriate diagrams of your model for the correct location and application of this component. Keep in mind it is made of high-quality metal and is sold individually.

  • Part Type: Carburetor
  • Classification: Part
  • Weight: 0.03 lbs.
  • Shipping: Ships Worldwide

Frequently Purchased Together ?

Compatibility

This item works with the following types of products:

  • Engine Parts
  • Snowblower Parts

This part replaces obsolete part #: 632019A, 632019

Customer Part Reviews ?

5
Average Rating (out of 5):
2 Reviews
Click to filter by ratings:
5 stars
2
4 stars
0
3 stars
0
2 stars
0
1 stars
0
  • Highest Rating
  • Most Recent
< PREV
  • 1
NEXT >
  • Quick & Easy.
    Great fit. Just like new.
    Guest - November 19, 2021 Verified Purchase
    $12 float
    Nailed it. I got a 32 yr old mower from the hunt camp running with a $12 part. Part diagram, description was great. Arrived promptly and work immediately. 5*
    Guest - May 2, 2020 Verified Purchase

    Questions & Answers ?

    Our customer Service team is at the ready daily to answer your part and product questions.

    photo of team member
    Ask our Team

    We have a dedicated staff with decades of collective experience in helping customers just like you purchase parts to repair their products.

    Does this fit my product?

    Questions & Answers for Carb Float


    No questions have been asked yet

    Customer Repair Instructions ?

    All our customer repair instructions are solicited directly from other customers just like you who have purchased and replaced this exact part.

    Medium 30-60 minutes (6 rated repairs)?

    snow blower would not run

    paul - December 27, 2021
    Tool Type

    Snowblower

    Difficulty

    Expert

    Time

    Less than 15 minutes

    Tools Used

    Wrench Set, Nutdriver

    rebuilt carburetor and cleaned out old gas from tank made fresh gas
    Did you find this story helpful?
    Thanks for voting and helping fellow customers!

    Flooding, gas leak due to carb float internal leak

    James - February 26, 2021
    Tool Type

    Snowblower

    Difficulty

    Medium

    Time

    15-30 minutes

    Tools Used

    Pliers, Wrench Set, Hex Socket, metric wrench

    1. removed gas line, primer lines,
    2. Removed carb from snowblower
    3. Disassembled, replaced float, reassembled
    4. Installed repaired card
    5 installed gas and primer hoses
    6 Checked for leaks, started engine
    Did you find this story helpful?
    Thanks for voting and helping fellow customers!

    Would not start.

    Jeffrey - July 31, 2019
    Tool Type

    Lawn Mower

    Difficulty

    Easy

    Time

    1-2 hours

    Tools Used

    Screwdriver, Pliers, Socket set, Wrench Set

    Removed the carburetor, dismantled, cleaned and installed new parts.
    Did you find this story helpful?
    Thanks for voting and helping fellow customers!

    Snowblower Motor wouldn't run smoothly and stalled frequently

    Richard - December 16, 2017
    Tool Type

    Snowblower

    Difficulty

    Easy

    Time

    1-2 hours

    Tools Used

    Screwdriver, Pliers, Socket set, Wrench Set

    Removed carburetor from Motor
    Removed float bowl from carburetor
    Removed float float needle valve and seat. Removed seat with a screw installed new seat with butt end of a drill.
    Also removed low idle needle valve which was missing o ring and washer allowing air too bleed past threads leaning out fuel mixture causing the engine to surge and stall adjusting high speed needle could not compensate for the extra air getting in.
    Cleaned all parts reinstalled everything using all the new parts I purchased started engine and adjusted low idle speed mixture then high idle speed mixture needle
    Did you find this story helpful?
    Thanks for voting and helping fellow customers!

    The carb float developed a hole and the float bowl gasket was leaking.

    William - May 5, 2016
    Tool Type

    Snowblower

    Difficulty

    Easy

    Time

    30-60 minutes

    Tools Used

    Pliers, Wrench Set, Small cup and rags to drain gas from carb. A six inch ruler

    The Toro single stage snow blower (mod. # 3875) has a fuel line going from the tank to the carb. Use a small vice grip to pinch the fuel line to stop the flow of gas from the tank. Use a marker to scribe a line on the float bowl and carb. The float bowl needs to go back in the same location when replaced. When you look at the bottom of the float bowl one half is deeper then the other. This allows the float to move up an down when the motor is running. Place your small cup and rags under the carb to catch the gas that is going to leak from the float bowl. On the bottom of the carb is a 1/2" bolt that holds the float bowl to the carb, remove the bolt & washer. Gas will start leaking from the float bowl, that is normal. With the bolt removed, remove the float bowl. You may need small hammer to lightly tap on the side of float bowl to break the gasket seal. You are now looking at the brass float. Gently move the float up and down to take note that the needle for the needle and seat assemble is attached to the float by a small wire. This needs to be attached to the new float the same way as you take it out. The wire goes under the tab on the float. Using the six inch ruler, place the end of the ruler on the float bowl gasket area and push up on the float. Measure the distance to the bottom of the float and wright this measurement down, you will need it later. Hold the float in one hand and using a needle nose pliers remove the float hinge pin, it should just slide out very easy. The float with the needle can be removed. If needed clean the carb and float bowl with carb cleaner before assembly. Place the needle on the new float, install the needle and float in its proper location and install the hinge pin. Now use your ruler to measure the float level. Bend the tab on the top of the float till the float level is the same as you measured on the old one. This is a very important step, take your time to do it right. You have just adjusted the float level so it will function properly when the motor is running. Remove the rubber o-ring type bowl gasket and install the new gasket on the carb. The carb has a flat area around the top for the gasket, if the gasket is installed properly it will stay in place so you can install the bowl. Put a new washer on the bolt and install the bowl, bolt and washer. Tighten the bolt, don't kill it, just snug will work. Remove the small vice grips from the fuel line and check for leaks.
    Did you find this story helpful?
    Thanks for voting and helping fellow customers!

    Fuel coming out carburetor.

    Wendell - June 9, 2017
    👍 0 of 1 people found this instruction helpful
    Tool Type

    Cultivator

    Difficulty

    Easy

    Time

    Less than 15 minutes

    Tools Used

    Screwdriver, Pliers, Adjustable Wrench

    Removed carburetor bowl.
    Removed float.
    Installed new one. Made sure float was sitting level.
    Installed carburetor bowl.
    Did you find this story helpful?
    Thanks for voting and helping fellow customers!

    OEM stands for Original Equipment Manufacturer and means the part you’re buying is sourced directly from the manufacturer who made your product. At eReplacementParts, we sell only genuine OEM parts, guaranteeing the part you’re purchasing is of better design and of higher quality than aftermarket parts.

    Our product descriptions are a combination of data sourced directly from the manufacturers who made your product as well as content researched and curated by our content & customer service teams. This content is edited and reviewed internally before being made public to customers.

    Our customer service team are at the ready daily to answer your part and product questions. We have a dedicated staff with decades of collective experience in helping customers just like you purchase parts to repair their products.

    All our part reviews are solicited directly from other customers who have purchased this exact part. While we moderate these reviews for profanity, offensive language or personally identifiable information, these reviews are posted exactly as submitted and no alterations are made by our team.

    All our customer repair instructions are solicited directly from other customers just like you who have purchased and replaced this exact part. While we moderate these reviews for profanity, offensive language or personally identifiable information, these reviews are posted exactly as submitted and no alterations are made by our team.

    Based on data from past customer purchasing behaviors, these parts are most commonly purchased together along with the part you are viewing. These parts may be necessary or helpful to replace to complete your current repair.

    All our installation videos are created and produced in collaboration with our in-house repair technician, Mark Sodja, who has helped millions of eReplacementParts customers over the last 13 years repair their products. Mark has years of experience in selling and repairing both commercial and residential products with a specialty in gas-powered equipment.

    This data is collected from customers who submitted a repair instruction after replacing this exact part. Customers can rate how easy the repair was to complete and how long it took. We aggregate this data to provide a repair rating that allows customers to quickly determine the difficulty and time needed to perform their own repair.

    eReplacementParts.com
    7174 South 400 West
    Suite 5
    Midvale, UT 84047
    visa mastercard discover american express PayPal
    Recent searches:
    Suggested searches:
    Models:
    Manufacturers:
    Need help finding your model number?