


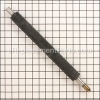
Bushings provide a tight fit between connected parts while allowing for movement with minimum friction. It is an authentic DeWALT component which is specially designed for use with planers. If the original item is damaged or is missing, this will provide an identical replacement. The bushing is made of high-quality metal and is sold as an individual item. Check the diagram for your model to ensure the correct replacement procedure.
Bushing 5140010-92
OEM part for: DeWALT
Part Number: 5140010-92
$10.69
In Stock
Jump To:
Frequently Purchased Together ?


Compatibility
This Bushing will fit the following 2 machines. Confirm this part works with your model, and view the detailed model diagrams and repair help we have to offer.
This item works with the following types of products:
- Planer Parts
Customer Part Reviews ?
Average Rating (out of 5):
Click to filter by ratings:
5 stars
3
4 stars
0
3 stars
0
2 stars
0
1 stars
0
< PREV
- 1
Servicio rapido
I get the parts faster than I thought and fits perfectly. Thanks
Guest -
March 4, 2023
Verified Purchase
Good to have
This bushing was a good buy and was worth ordering as an extra part. During maintenence on my DX735 13 inch planer, this bushing damaged inside and I was pleased I ordered it. This part was a perfect fit and worked great.
Guest -
June 8, 2022
Verified Purchase
Planner parts
Parts were perfect. Working great again.
Guest -
January 6, 2021
Verified Purchase
Questions & Answers ?
Our customer Service team is at the ready daily to answer your part and product questions.

Ask our Team
We have a dedicated staff with decades of collective experience in helping customers just like you purchase parts to repair their products.
Does this fit my product?Questions & Answers for Bushing
No questions have been asked yet
Customer Repair Instructions ?
All our customer repair instructions are solicited directly from other customers just like you who have purchased and replaced this exact part.
Outfeed roller had worn and was not pulling wood through.
Steve - October 17, 2022
Tool Type
Planer
Difficulty
Easy
Time
1-2 hours
Tools Used
Screwdriver, Pliers, Power Drill, torx and allen wrenches
Parts Used
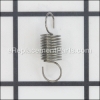
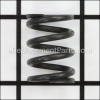
Flipped the planer upside down. Took off all cover plates exposing the chain drives. Removed sprokers and chains. Removed the two side plates. Removed the four screws holding the bushing plate and bushings. Removed outfeed roller. Took out the springs to inspect. Pulled off the bushings on each end of the roller. Took off the washers on each end and inspected for wear. Put washers and new bushings on new roller. Installed springs and roller into cradle.
I replaced all the phillip head screws with button head allen screws to make it easier to replace if needed next time. Factory screws are phillip head and will strip the head if not careful. Replaced the side shields, sprockets and chains, covers, and fired her up. Ran like new. Turned planer right side up and tested with a piece of wood.. Worked like new.
I replaced all the phillip head screws with button head allen screws to make it easier to replace if needed next time. Factory screws are phillip head and will strip the head if not careful. Replaced the side shields, sprockets and chains, covers, and fired her up. Ran like new. Turned planer right side up and tested with a piece of wood.. Worked like new.
Did you find this story helpful?
Thanks for voting and helping fellow customers!
Broken shaft on rear roller
Michael - October 30, 2020
Tool Type
Planer
Difficulty
Easy
Time
30-60 minutes
Tools Used
Screwdriver, Split ring tool
Parts Used
I found a video on Youtube which showed detailed instructions for replacing the roller shaft. Replacing the shaft and roller was really easy. The planer, however, is heavy.
Did you find this story helpful?
Thanks for voting and helping fellow customers!
The lead roller lost it's rubber covering and wood not feed wood into the planer.
Ken - July 14, 2020
Tool Type
Planer
Difficulty
Medium
Time
1-2 hours
Tools Used
Screwdriver, Socket set, wood blocks
1- Disconnect the power
2- Remove both side covers and both side shields
3- Remove the roller gears and chains from both ends.
4- Slide blocks in and lower the planer down to just about to tough the blocks.
5- Remove the retainer clips at each end, then slowly raise the planer until you can remove the roller.
6- Keep the bus hinging in place on the original in order to see how to assemble the new assemblies.
7- Set the new roller and bushings in place on top of the wood blocks.
8- Start to lower the planer head and help guide the springs back into the pockets above the bushings. Continue to lower the head until just short of fully seated.
9- Tighten the screws to secure the retaining clips at each end. Once snug, slide the wood blocks out. Follow the reverse of steps 1-3 to complete the repair.
Did you find this story helpful?
Thanks for voting and helping fellow customers!
Outfeed roller bushing was worn out
Ruth - December 24, 2017
👍 1 of 2 people found this instruction helpful
Tool Type
Planer
Difficulty
Easy
Time
15-30 minutes
Tools Used
Screwdriver, Power Drill, Snap ring pliers, Dewalt offset driver
Parts Used
Before you get started it is very helpful to make sure you have a set of snap ring pliers otherwise you will find yourself trying to compromise and possibly damage the snap rings.
Another very useful tool for me was an offset adapter for the impact driver because the space is so limited you will otherwise need a really stubby screwdriver and I found myself almost not having enough leverage trying to do it with one of those.
1. Unplug machine of course.
2. Crank the thickness depth all the way up, flip planer upside down.
3. Remove both side side covers as well as the shields.
4. Remove both drive chains, (you'll need snap ring pliers).
5. Remove retainers on both ends of the roller and lift it out.
6. Replace the bushing taking note of the groove in the one side and placing it in the same direction as the one you removed.
7. Install everything in reverse order of how you took it apart.
Your planer should work like new again.
Several things I've discovered over the years that are very helpful in getting my planer to feed constantly are cleaning the rollers with spray brake cleaner and lubing the bed with silicone spray.
At one time my planer wouldn't feed at all anymore, I have found the best way to do this cleaning and lubing procedure is to crank it all the way up and reach in and wipe the rollers down with a rag that I saturated with brake clean. In order to reach all sides of the rollers I will power the machine on momentarily and then unplug it wipe down the sections you can reach then repeat until all sides have been cleaned.
I have tried different types of cleaner to clean the rollers and have found brake clean to be the best because it leaves them almost sticky and just really aides in getting those boards pulled through.
Did you find this story helpful?
Thanks for voting and helping fellow customers!
Rear roller was bent causing the bushing to seize.
Burt - May 15, 2018
👍 0 of 1 people found this instruction helpful
Tool Type
Planer
Difficulty
Medium
Time
30-60 minutes
Tools Used
Screwdriver, Pliers, Power Drill, Allen that comes attached to tool.
Parts Used
1) Raise tool to max height then turn unit upside down
2) Remove the gear covers from both sides of the tool
3) Remove the safety Shields from both sides of the tool
4) Carefully remove the roller mounts and lift out roller
5) Slide off old bushings, and discard
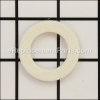
6) Slide off plastic spacers and slide onto new roller
7) Slide on new bushings to roller snugly against plastic spacers
8) Reassemble in reverse order
9) Take your time, be patient, and good luck!
2) Remove the gear covers from both sides of the tool
3) Remove the safety Shields from both sides of the tool
4) Carefully remove the roller mounts and lift out roller
5) Slide off old bushings, and discard
6) Slide off plastic spacers and slide onto new roller
7) Slide on new bushings to roller snugly against plastic spacers
8) Reassemble in reverse order
9) Take your time, be patient, and good luck!
Did you find this story helpful?
Thanks for voting and helping fellow customers!
Worn parts.
Edward - November 1, 2017
👍 0 of 1 people found this instruction helpful
Tool Type
Planer
Difficulty
Medium
Time
15-30 minutes
Tools Used
Screwdriver, Pliers, Wrench Set, Nutdriver
Parts Used
Removed some screws and nuts. New part slipped in. No problems.
Did you find this story helpful?
Thanks for voting and helping fellow customers!
Lumber would not feed
Ryan - February 12, 2017
👍 0 of 1 people found this instruction helpful
Tool Type
Planer
Difficulty
Easy
Time
30-60 minutes
Tools Used
, torx and allen wrench
Turned planer upside down ,took off base, removed chain sprockets ,then roller bushing keepers, removed rollers and installed new parts
Did you find this story helpful?
Thanks for voting and helping fellow customers!
OEM stands for Original Equipment Manufacturer and means the part you’re buying is sourced directly from the manufacturer who made your product. At eReplacementParts, we sell only genuine OEM parts, guaranteeing the part you’re purchasing is of better design and of higher quality than aftermarket parts.
Our product descriptions are a combination of data sourced directly from the manufacturers who made your product as well as content researched and curated by our content & customer service teams. This content is edited and reviewed internally before being made public to customers.
Our customer service team are at the ready daily to answer your part and product questions. We have a dedicated staff with decades of collective experience in helping customers just like you purchase parts to repair their products.
All our part reviews are solicited directly from other customers who have purchased this exact part. While we moderate these reviews for profanity, offensive language or personally identifiable information, these reviews are posted exactly as submitted and no alterations are made by our team.
All our customer repair instructions are solicited directly from other customers just like you who have purchased and replaced this exact part. While we moderate these reviews for profanity, offensive language or personally identifiable information, these reviews are posted exactly as submitted and no alterations are made by our team.
Based on data from past customer purchasing behaviors, these parts are most commonly purchased together along with the part you are viewing. These parts may be necessary or helpful to replace to complete your current repair.
All our installation videos are created and produced in collaboration with our in-house repair technician, Mark Sodja, who has helped millions of eReplacementParts customers over the last 13 years repair their products. Mark has years of experience in selling and repairing both commercial and residential products with a specialty in gas-powered equipment.
This data is collected from customers who submitted a repair instruction after replacing this exact part. Customers can rate how easy the repair was to complete and how long it took. We aggregate this data to provide a repair rating that allows customers to quickly determine the difficulty and time needed to perform their own repair.