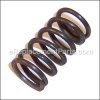
Genuine Dewalt replacement part, this item is sold individually.
This Bushing is installed on the ends of the feed rollers of the Dewalt Planers shown below, there are four of these bushings used on the planer.
Over time because of metal to metal contact these bearings will wear and have to be replaced.
If the feed rollers are loose or they are not feeding the stock correctly these parts be inspected for wear.
Bushing 285945-00
OEM part for: DeWALT
Part Number: 285945-00
Jump To:
Product Description ?
- Classification: Part
- Weight: 0.06 lbs.
- Shipping: Ships Worldwide
Frequently Purchased Together ?
Compatibility
This Bushing will fit the following 8 machines. Confirm this part works with your model, and view the detailed model diagrams and repair help we have to offer.
Displaying 4 of 8 matching models.
DeWALT
8 total model matches. Try the above search to narrow your results.
This is the official OEM part for the following brands:
- DeWALT
This item works with the following types of products:
- Planer
Customer Part Reviews ?
- 1
- 2
Questions & Answers ?
Our customer Service team is at the ready daily to answer your part and product questions.

Ask our Team
We have a dedicated staff with decades of collective experience in helping customers just like you purchase parts to repair their products.
Does this fit my product?Questions & Answers for Bushing
Customer Repair Instructions ?
All our customer repair instructions are solicited directly from other customers just like you who have purchased and replaced this exact part.
The rollers on my DeWalt 12inch wood planner were stuck and wouldn't turn Bushing were worn out.
Tool Type
Planer
Difficulty
Medium
Time
More than 2 hours
Tools Used
Screwdriver, Pliers, Wrench Set, a washer spring compression tool with two small prongs
Parts Used
Next there are chain sprockets that have to be taken off on the left side of the Unit.
They are held by some compression spring washers.. I had to use a special tool for
those compression washers. Took the sprocket off and the chains off. They have to
be taken off together or they won't come off. Now there are two sets of screws, with Philips
screw driver heads that hold some small brackets that hold the bushings in place. Those
are going to be hard to take off with out messing up the heads of those screws. The rollers
have a spring that pushes down on the rollers.. It would be a good Idea to relieve the pressure of the springs and rollers that the brackets are holding back before trying to remove those two screws on each bracket. I used a piece of wood and cranked the rollers down to relieve some of the pressure. But still had a hard time to removing those two screws without messing the heads of those Philip Screw Heads. But I finally got them off. I'll never forget their size. They are 10/32 SAE small Philip Headed Screws. { I replaced these with some easier to take off and put back on screws. }
Before I put everything back the way I disassembled my Unit, I went out and purchased new screws to replace the 8 Philip Headed Screws that go through the brackets that hold down the bushing that the rollers run on.
Those screws that I replace, I used Allen Wrench Head, Case Hardened Screws. They can be purchased at Lowes, or any good Hardware Store that handle small case hardened screws..
Everything put back the way I found it, I turned it on and my Wood Planner runs like a champ. Those bushing were oblong and wouldn't let the rollers turn, and push the boards through the machine. I ordered a new Belt, just in case I would need to replace it.. But it wasn't the belt that was causing my problem. So I now have a spare belt just in case I should ever need one.
Dw733 feed was "skipping"
Tool Type
Planer
Difficulty
Easy
Time
1-2 hours
Tools Used
Screwdriver, Allen Wrenches, snap ring pliers
Parts Used
Stand the planer upright and remove the top cover..... 4 corner screws plus the handle on top for the vertical adjustment.
Remove the 4 bolts holding the vertical adjustment rods in place.
The planer power head can now be removed from the base, carefully as the vertical adjustment rods go thru it.
Remove the plastic cover shielding the feed roller drive end.
Remove 3 snap rings, 2 chains and 4 sprockets from drive end
Remove 2 bolts holding each end of each (2) feed roller.
Feed rollers will be pushed out slightly by springs and will easily slide out after that.
Replace bushings. The one with the double sprocket was completely worn out on mine but the other 3 looked new ... replaced all 4.
Reverse above procedure to re-assemble.
Worn bushing causing material feed hesitations
Tool Type
Planer
Difficulty
Medium
Time
15-30 minutes
Tools Used
Screwdriver, hex key, snap ring pliers
Parts Used
rebuild planners worn parts
Tool Type
Planer
Difficulty
Medium
Time
More than 2 hours
Tools Used
Screwdriver, Socket set, Wrench Set
Feed rollers kept skipping. Initially thought it was bad chain, but turned out one of the bushings had been almost entirely worn through.
Tool Type
Planer
Difficulty
Medium
Time
30-60 minutes
Tools Used
Screwdriver, Pliers, Adjustable Wrench, Retaining Clip Pliers
Parts Used
2) Remove plastic yellow side panels. You must remove the one on left side of planer, the one on the right just makes it easier. There are two small screws at the top holding each in place. Quite a lot of force is required to pop these panels out.
3) On left side of unit, remove plastic housing covering chain/sprocket assembly. There are two screws from the bottom holding cover in place, one on either side, near the vertical rails. This should expose the ends of three axles, with two chain connecting them.
4) Remove retaining clips from end of axles to release sprockets. This was the hardest part, especially if you don't have the correct tool. I tried to get them with needle nose pliers and screwdrivers, but folded and purchased specialty pliers. Much easier with the right tool.
5) Remove sprockets, chains and spacers from axles.
6) The two bushings on this side should be exposed. You can identify the retaining bracket that is holding the bushings against some springs.
7) Remove all four retaining brackets. Each one is held in with two screws from the bottom of the assembly. This will require a very short screw driver as the clearance is minimal.
8) As the retaining brackets are removed the bushings will drop as they are being pressed by springs out of the assembly. Be sure to retain springs, they rolled all over my shop when I was not paying attention. There are two springs pushing the back left bushing, be aware.
9) Remove old bushings. Inspect for wear on the rollers. As the rollers are now out of the planer, this is a good time to clean them.
10) Lubricate new bushings. I used a silicon spray lubricant as suggested by my local power tool store. Slide new bushings on to rollers. Wipe away excess lubricant, you don't want that interacting with the rubber on the rollers.
11) Prepare retaining brackets, springs and bushing/roller assemblies. Insert spring first, then slide in bushing, paying attention to orientation. The long side should be parallel with the planing bed. This should mean there are no gaps between the sides of the bushing and the cutting assembly. Once spring and bushing are in place, re attach retaining bracket. Do this for all four bushings. Be sure to add the second spring to the back left bushing. This is the bushing where the rod had two sprockets, one from the motor and one going to the other roller.
12) Inspect chains. Lubricate or replace as needed. Re-attach sprockets with chains. Put the spacer on before putting the front roller sprocket on. Re-attach retaining clips.
13) Re-assemble housings and you should be good to go.
Dewalt DW733 type 1 skipping
Tool Type
Planer
Difficulty
Medium
Time
1-2 hours
Tools Used
Screwdriver, Pliers, Wrench Set
Parts Used
Note:
I'd ensure each problem is fixed before you delve deeper, though understand consolidating part order. Ensure planer unplugged, blah, blah, blah. steps 1-3 are ok for novice, step 4 intermediate/difficult
1. Check feed rollers if show significant wear, replace will need to follow chain and bushing steps below. If glazed clean with solvent (alcohol or thinner using scrub pad). Don't cut yourself on blades
2. Check rubber (nylon) drive belt (located right side from front)
> remove top 4 allen bolts
> remove allen securing height adjuster, then remove handle assembly
> remove 4 screws holding left and right plastic side panels
> lift out side panels
> inspect belt if shows any wear, replace
3. Check drive chains (located left side from front, FYI chains do have normal slack, no tension adj)
> Remove plastic chain cover, 2 screws on bottom front/back
> Remove snap rings
> Ease out sprockets front/rear to remove chains
> Check chains, make sure all links flex easily, if any bind replace chain
> Inspect sprockets, any damage replace
4.Inspect bushings (securing screws are a tough to get out, can try ratchet w/ phillips, I had to use vice grips on heads when phillips started to strip)
> raise cutterhead all the way
> Start with 2 rear bushings
> 2 screws secure each bushing retaining bracket, FYI there are springs pushing down on bushings, but not heavily loaded, ease both out a few turns at a time. Watch bushing, should move downward with spring pressure easily. If it binds bushing and/or spring may need replacement
> Same deal with front
> When reinstalling, ease screws in back/front a bit at a time
5. Drive gears (now we're getting into more difficulty, proceed at you own risk. may have missed some screws, but if you're game for attempting this, you'll get the jist)
> Remove top cover (black) of planer.
> Remove dust chute (3 phillips) and rear blade access cover (2 allen)
> Remove 4 allen screws underneath front of motor assembly
> Remove power switch (6 phillips), disconnect leads (label to ensure proper reattachment)
> Remove nylon belt shroud (rt side, 1 phillips), take belt off rollers
> remove power cord securing screw (left side, 1 phillips)
> Lift out motor assembly
> Remove 2 screws left side securing plastic housing, remove housing
> Detach ground lead (green wire, 1 phillips)
> Remove 4 screws securing gearcase cover, remove carefully
> Inspect all gears replace if damaged. Note: if smallest drive gear damaged is actually the end of armature. big money part...plus bearings, etc...
Put everything back together
This is what I found:
> Drive rollers worn but I decided not to replace yet
> Nylon drive belt was original, looked ok but had discolored to almost brown so I replaced
> 1 drive chain (inner) had bad link
> Bushing on left rear (drive side) had been a bit mangled/cracked either causing or caused by skipping, so I replaced both rear bushings
> Armature spiral drive gear showed wear but big $ part, plus bearings..etc... older planer so no replacement for me
> Everything else looked fine
I fixed the problems in order as listed but still skipped. Not until I got into gearcase (with no replacements) and reassembled did skipping stop, but no obvious problems...
Have planed quite a bit since with no problems, running like new-
...Disassemble..reassemble..disassemble...I've heard patience is a virtue, hours spent, good luck
Planer was not feeding properly
Tool Type
Planer
Difficulty
Medium
Time
30-60 minutes
Tools Used
Nutdriver, Impact screw gun
Parts Used
2. Raise unit to top position.
3. Remove raising/lowering handle.
4. Remove four screws holding top cover in place , and then remove cover.
5. Remove dust collection chute.
6. Remove two screws holding chain cover in place and remove cover.
7. Carefully remove snap rings from ends of shafts.
8. Next, remove gears and chains, keeping them together, if possible.
9. If you are able, lay planer on it's back.
10. Next, remove the screws (four per roller) and retainers that hold the feed rollers in place.
11. Bushings should slide off the shafts easily.
12. Clean and inspect each roller.
13. Lubricate the ends and place the bushings on the shafts being careful to orient them properly.
14. The final step is to start reassembling the unit in reverse order.
Note: The planer blades will be locked until the dust chute is replaced. Also, be very careful when handling the blades, they are extremely sharp!
The drive rollers skipped feeding the wood
Tool Type
Planer
Difficulty
Easy
Time
15-30 minutes
Tools Used
, Allen screws
Parts Used
Boards fed into he planer would not feed completely out on the left side. The board would stop at the cutter head and snipe the last few inches.
Tool Type
Planer
Difficulty
Easy
Time
15-30 minutes
Tools Used
Screwdriver, Snap Ring Pliers
Parts Used
2. Tilted planer on its front and removed gear box cover
3. Removed snap rings and gear sprockets and chains.
4. Removed roller retainer clips (screws were too tight for a hand screwdriver, so I used an impact driver)
5. Removed roller (rear only) and bushings
6. Discarded old roller and bushings.
7. Inserted rollers, bushings.
8. Reinstalled clips, gears, chains, snap rings, gearbox cover and side covers.
Feed rollers were worn out
Tool Type
Planer
Difficulty
Easy
Time
1-2 hours
Tools Used
Screwdriver, Pliers, Power Drill, Socket set, Nutdriver, Adjustable Wrench
Parts Used
OEM stands for Original Equipment Manufacturer and means the part you’re buying is sourced directly from the manufacturer who made your product. At eReplacementParts, we sell only genuine OEM parts, guaranteeing the part you’re purchasing is of better design and of higher quality than aftermarket parts.
Learn MoreOur product descriptions are a combination of data sourced directly from the manufacturers who made your product as well as content researched and curated by our content & customer service teams. This content is edited and reviewed internally before being made public to customers.
Our customer service team are at the ready daily to answer your part and product questions. We have a dedicated staff with decades of collective experience in helping customers just like you purchase parts to repair their products.
All our part reviews are solicited directly from other customers who have purchased this exact part. While we moderate these reviews for profanity, offensive language or personally identifiable information, these reviews are posted exactly as submitted and no alterations are made by our team.
All our customer repair instructions are solicited directly from other customers just like you who have purchased and replaced this exact part. While we moderate these reviews for profanity, offensive language or personally identifiable information, these reviews are posted exactly as submitted and no alterations are made by our team.
Based on data from past customer purchasing behaviors, these parts are most commonly purchased together along with the part you are viewing. These parts may be necessary or helpful to replace to complete your current repair.
All our installation videos are created and produced in collaboration with our in-house repair technician, Mark Sodja, who has helped millions of eReplacementParts customers over the last 13 years repair their products. Mark has years of experience in selling and repairing both commercial and residential products with a specialty in gas-powered equipment.
This data is collected from customers who submitted a repair instruction after replacing this exact part. Customers can rate how easy the repair was to complete and how long it took. We aggregate this data to provide a repair rating that allows customers to quickly determine the difficulty and time needed to perform their own repair.


