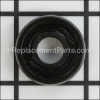
This steel piece is an authentic replacement part manufactured for Snapper tractors and mowers. Ball bearings reduce friction between moving metal parts. Metal fatigue causes wear on ball bearings and they should be replaced regularly. A screwdriver and/or wrench will commonly be needed to remove/replace this part.
Ball Bearing 707608
OEM part for: Snapper, Murray
Part Number: 707608
Jump To:
Frequently Purchased Together ?
Compatibility
This Ball Bearing will fit the following 703 machines. Confirm this part works with your model, and view the detailed model diagrams and repair help we have to offer.
This item works with the following types of products:
- Lawn Mower Parts
This part replaces obsolete part #: 7026693YP, 7029027YP, 7029027, 7026693
Customer Part Reviews ?
- 1
Questions & Answers ?
Our customer Service team is at the ready daily to answer your part and product questions.

Ask our Team
We have a dedicated staff with decades of collective experience in helping customers just like you purchase parts to repair their products.
Does this fit my product?Questions & Answers for Ball Bearing
Customer Repair Instructions ?
All our customer repair instructions are solicited directly from other customers just like you who have purchased and replaced this exact part.
Bad Bearing on drive shaft bar
Tool Type
Lawn Mower
Difficulty
Easy
Time
15-30 minutes
Tools Used
Screwdriver, Socket set, Wrench Set, Rubber Hammer
Parts Used
frame.
2. Ball Bearing is mounted on left side of "L" frame (left side as you are standing behind mower
holding handle).
3. Use Socket Set or Wrench Set to remove the 4 self thread nuts holding the Bearing in place.
Note: of the 4 nuts, one will be shorter than the other 3, keep in mind which hole that you
took the shorter nut from when putting the new Bearing in.
4. The Bearing has a "Lip-Ring" on one side (same side as the side you removed the 4 bolts
from). On the other side, use a Screwdriver and a Rubber Hammer and "lightly" tap the old
Bearing out.
5. Insert the New Bearing in the same manner the old one came out and make sure the "Lip
-Ring" is on the same side as it was for the old Bearing (the Heads of the 4 nuts will hold the
new Bearing in place.
6. Install the 4 Nuts back in place and remember that they must be holding the "Lip-Ring" in
place.
7. Slide Drive Shaft back on "L" Frame.
8. Install Drive Shaft "L" Frame back on Lawnmower Deck.
Self propel stopped working
Tool Type
Lawn Mower
Difficulty
Hard
Time
1-2 hours
Tools Used
Screwdriver, Pliers, Socket set, Wrench Set, bench grinder
Parts Used
Then I had to add 4 self tapping screws to hold the bearing onto the mounting bracket. Once again the service instructions did not take this into account. It was as if the service instructions that came with the mower were for a different model.
Snapper mower instructions leave a lot to be desired.
All parts of the power drive were worn.
Tool Type
Lawn Mower
Difficulty
Medium
Time
More than 2 hours
Tools Used
Pliers, Socket set, Wrench Set
Drive system rebuild, total frame and deck rework
Tool Type
Lawn Mower
Difficulty
Medium
Time
More than 2 hours
Tools Used
Screwdriver, Pliers, Socket set, Wrench Set, Nutdriver, Adjustable Wrench
Parts Used
- Pulley/spring Assembly - 498144
- Filter-a/c Cartridge - 697029
- Rope-starter - 697316
- Tube-breather - 692937
- O-ring, 1idx1.25x.125 - 704008
- Blade, 21 - 7019795BZYP
- Poly V-belt - 7012354YP
- Ball Bearing - 7028014YP
- Ball Bearing - 707608
- Assembly, Drive-disc - 7073528YP
- Bushing - 703971
- Belt, Engine Drive - 7046784YP
- Disc, Driven - 7041855YP
Rubber Drive disc and support bearing failed
Tool Type
Lawn Mower
Difficulty
Medium
Time
30-60 minutes
Tools Used
Screwdriver, Power Drill, Nutdriver, Snap ring pliers and hammer
Parts Used
Slid assembly off of machine
Removed external snap ring and drive disc
Drove bearing from the bracket it was swaged in place from snapper
Installed new bearing and retained it with four 10/32 screws, nuts, flat washers and lock washers. Not included
Installed drive disc and retaining snap ring
Slid assembly back in place after sanding and cleaning the drive plate that runs the rubber drive disc
Reinstalled the tension spring and tested the mower
All good
Drive for walk behind mower
Tool Type
Lawn Mower
Difficulty
Medium
Time
30-60 minutes
Tools Used
Socket set, Adjustable Wrench, Snap ring plyrrs
front axle, wheel adjustment brackets and drive bearings were all worn and decals in bad shape.
Tool Type
Lawn Mower
Difficulty
Easy
Time
More than 2 hours
Tools Used
Socket set, Wrench Set, Snap ring pliers
self propell froze up
Tool Type
Lawn Mower
Difficulty
Easy
Time
15-30 minutes
Tools Used
Socket set, Wrench Set, n/a
Parts Used
Bearings locked up on the self propel mechanism .
Tool Type
Lawn Mower
Difficulty
Medium
Time
1-2 hours
Tools Used
Screwdriver, Pliers, Socket set, Wrench Set, Snap ring pliers
Self propelled bearings and drive wheel, completly worn out.
Tool Type
Lawn Mower
Difficulty
Medium
Time
15-30 minutes
Tools Used
Screwdriver, Socket set, Wrench Set
Removed lawnmower blade to install new drive belt.
Disassembled Drive wheel and shaft.
Removed, replaced 4 screws to install new rubber on drive wheel.
Removed necessary screws and replaced both bearings.
Replaced belt and reassembled drive unit and blade.
Fairly simple job, Self propelled drive back in business.
OEM stands for Original Equipment Manufacturer and means the part you’re buying is sourced directly from the manufacturer who made your product. At eReplacementParts, we sell only genuine OEM parts, guaranteeing the part you’re purchasing is of better design and of higher quality than aftermarket parts.
Our product descriptions are a combination of data sourced directly from the manufacturers who made your product as well as content researched and curated by our content & customer service teams. This content is edited and reviewed internally before being made public to customers.
Our customer service team are at the ready daily to answer your part and product questions. We have a dedicated staff with decades of collective experience in helping customers just like you purchase parts to repair their products.
All our part reviews are solicited directly from other customers who have purchased this exact part. While we moderate these reviews for profanity, offensive language or personally identifiable information, these reviews are posted exactly as submitted and no alterations are made by our team.
All our customer repair instructions are solicited directly from other customers just like you who have purchased and replaced this exact part. While we moderate these reviews for profanity, offensive language or personally identifiable information, these reviews are posted exactly as submitted and no alterations are made by our team.
Based on data from past customer purchasing behaviors, these parts are most commonly purchased together along with the part you are viewing. These parts may be necessary or helpful to replace to complete your current repair.
All our installation videos are created and produced in collaboration with our in-house repair technician, Mark Sodja, who has helped millions of eReplacementParts customers over the last 13 years repair their products. Mark has years of experience in selling and repairing both commercial and residential products with a specialty in gas-powered equipment.
This data is collected from customers who submitted a repair instruction after replacing this exact part. Customers can rate how easy the repair was to complete and how long it took. We aggregate this data to provide a repair rating that allows customers to quickly determine the difficulty and time needed to perform their own repair.


