


Why Read This Article?
Finish Nailer Repair - Replacing the Driver Guide (Ridgid Part # 79004001022)
Article Breakdown
Finish Nailer Repair - Replacing the Driver Guide (Ridgid Part # 79004001022)
Video

 Trimmer owners often have questions about this repair, because disassembling a trimmer's fuel system requires many steps. Inserting the new, filtered fuel line into the trimmer's fuel tank is one of the trickiest parts of the repair.
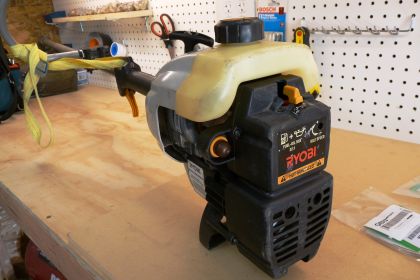
We explain the steps for replacing fuel lines below, and provide an example repair on a Ryobi 767rj Line Trimmer. The steps used in this article and its accompanying video demonstration will be similar for most gas-powered trimmers.
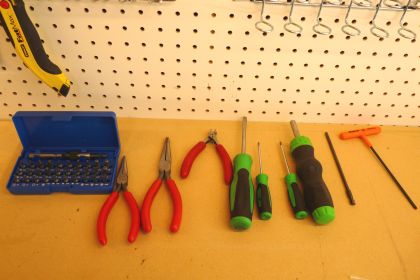
Tools needed for this repair:
Trimmer owners often have questions about this repair, because disassembling a trimmer's fuel system requires many steps. Inserting the new, filtered fuel line into the trimmer's fuel tank is one of the trickiest parts of the repair.
We explain the steps for replacing fuel lines below, and provide an example repair on a Ryobi 767rj Line Trimmer. The steps used in this article and its accompanying video demonstration will be similar for most gas-powered trimmers.
Tools needed for this repair:
- a set of drivers that fit your tool's fasteners
- a pair of flush cut diagonals (or other cutters)
- some needle nose pliers
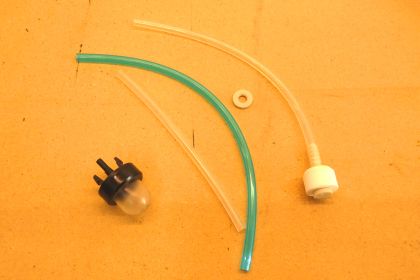
- new fuel lines
 Remove the Trimmer's Fuel System
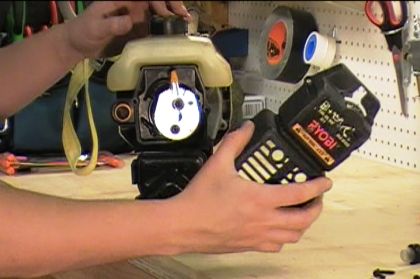
The first step in this multi-part repair requires disassembling the trimmer enough to have access to its entire fuel system.
In the case of our demonstration trimmer, the fuel tank, carburetor, fuel lines, and carburetor mount plate will come off all together.
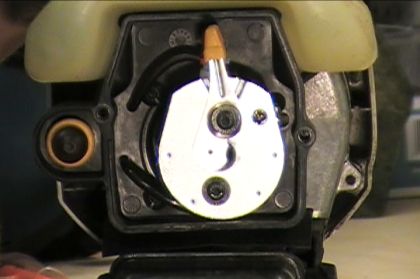
1. Remove the fuel system cover.
Every trimmer can be a little different, and this trimmer's fuel cover is located on the rear of the engine. Remove any fasteners that affix the cover to the engine so you can access the carburetor.
2. Unscrew carburetor fasteners.
Many trimmer carburetors will be affixed to the engine against a plate, sometimes called a carburetor choke plate or choke plate.
Because the entire choke plate, carburetor, and fuel tank need to be removed from the trimmer, you'll have to start by releasing any fasteners on the carburetor. 3. Release the throttle cable from the carburetor.
Like the Ryobi 767rj which we use as an example, most trimmer throttle cables thread through the carburetor choke plate and attach to the carburetor.
Simply lifting and tilting the carburetor will release the throttle cable. 4. Unscrew fasteners holding the mount plate.
Now that the carburetor is freed up, the only thing keeping you from removing the entire fuel system should be the fasteners holding the carburetor mount plate in place. 5. Remove the fuel assembly from the trimmer.
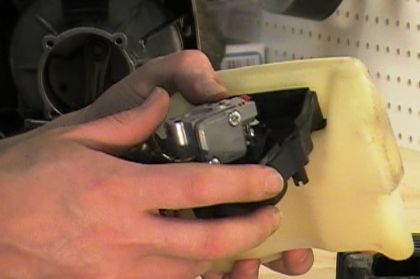
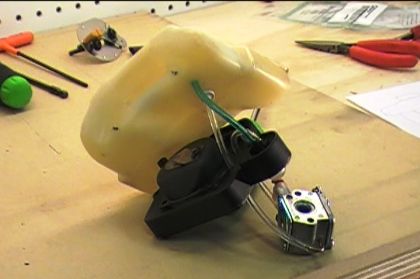
The fuel tank, carburetor plate, and carburetor will still be connected together by the system's fuel lines. Remove them together before disturbing the fuel line arrangement.
The trimmer fuel system is now removed, but it is very important to inspect and diagram the fuel line setup before continuing.
[Back to top]
Draw a Diagram of the Fuel Lines
Following this step will make your repair go a lot smoother, guaranteed.
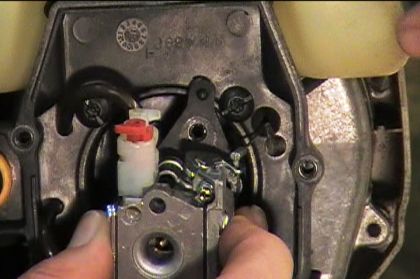
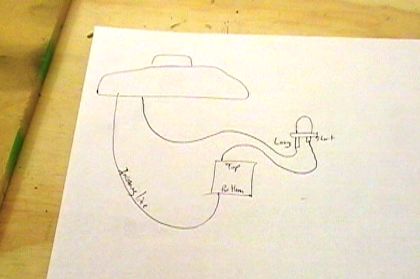
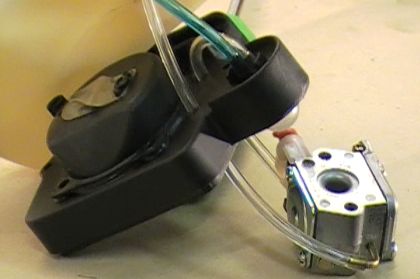
The fuel lines of the Ryobi 767rj connect the fuel tank, primer bulb, and carburetor through several holes in the choke plate that allow them to pass between.
Other trimmers may be a little different, but their fuel line set-up is likely to be similarly complicated.
Drawing a diagram of the fuel line arrangement can prevent mix-ups.
6. Draw a diagram of the trimmer's fuel lines.
- Note the hole in the fuel tank in which the fuel filter attaches.
- Note the hole in the choke plate through which the filtered "in" line from the fuel tank passes to the carburetor.
- Note where on the carburetor the "in" line connects.
- Note where the carburetor "out" line passes through the choke plate.
- Most primer bulbs make one fuel line connection longer than the other to help keep them straight. Note which primer bulb connection the "out" line from the carburetor attaches to.
- Note which is the correct line to connect to the remaining primer bulb attachment site.
- Note which is the correct hole on the fuel tank through which the primer overflow line passes.
 [Back to top]
Remove the Old Fuel Lines
[Back to top]
Remove the Old Fuel Lines
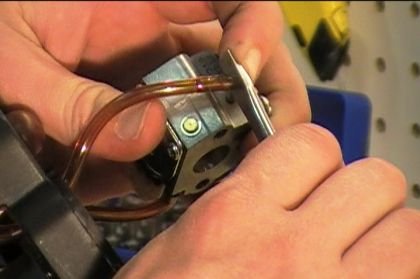
Trimmer fuel lines attach to fittings on the carburetor and primer bulb. When installed correctly, the fuel lines should be attached to their fittings tightly.
Attempting to pull the fuel lines off their fittings risks breaking them.
Hint: An easy technique for removing trimmer fuel lines from their fittings is to use a flat head screwdriver. Place the screwdriver against the end of the fuel line and use some pressure to push it off the fitting.
7. Remove all fuel lines from their fittings with a screwdriver.
 8. Remove the overflow return line from the fuel tank.
On the Ryobi 767rj, the overflow line leading from the primer bulb simply pulls out. 9. Remove the fuel filter line.
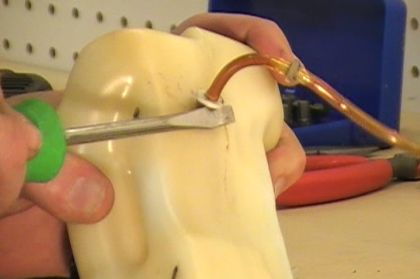
The trimmer fuel line attached to the fuel filter will often have a couple extra pieces holding it in place.
In the case of the Ryobi 767rj that we use as an example, the fuel filter line has a small retaining ring on the outside of the fuel tank helping to hold the fuel filter in place.
The fuel filter retaining ring can be easily removed with a screwdriver.
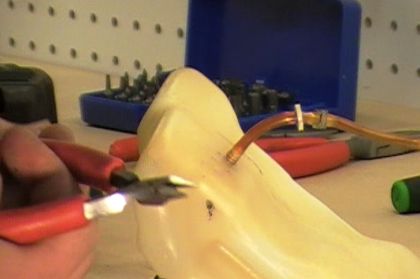
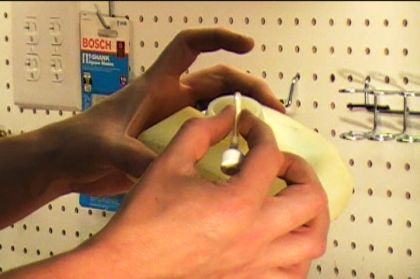
The rest of the old fuel filter line and fuel filter will just be thrown away. Instead of trying to pull the line through the fuel tank hole, it's much easier just to cut the line and push the old fuel filter into the tank.
We've used a pair of flush cut diagonals to cut the line.
 10. Replace the primer bulb.
It's a smart idea to replace a the primer bulb along with other fuel system components. The plastic on the primer bulb is likely to wear at the same rate (or faster) as the fuel lines.
The trimmer primer bulb can be held into place more than one way. The bulb on the Ryobi 767rj just snaps into and out of place.
All of the trimmer's old fuel lines should now be removed from the trimmer.
[Back to top]
Install New Fuel Lines and Other Components
With the old fuel lines removed, the diagram you drew earlier will be very handy for installing the new lines.
11. Install the fuel filter line.
A trimmer's fuel filter line will almost always be its trickiest line to replace. The line must be fed into its correct fuel tank hole through the inside of the fuel tank and then pressed firmly into position.

To be properly installed, the fuel filter must rest flush with the fuel tank. The next step will help to hold the fuel filter in its correct position.
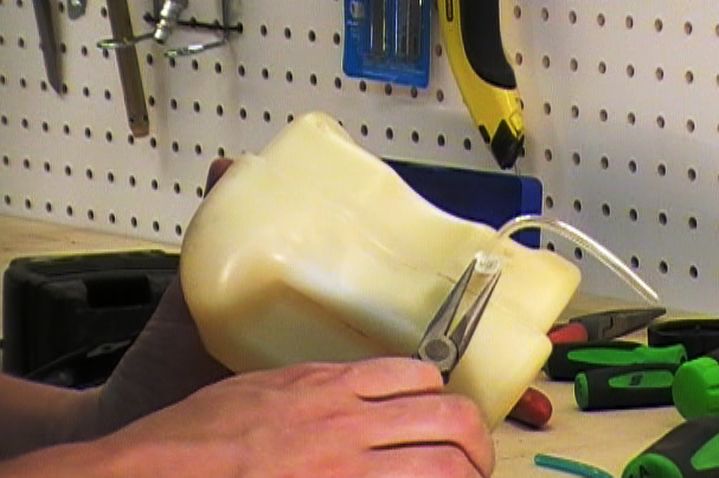
12. Install the fuel filter line retaining ring.
If your trimmer's fuel filter line has a retaining ring, it needs to be installed correctly to help hold the fuel filter in place.
Use a pair of pliers to press the retaining ring into position.
 13. Use your fuel line diagram to install the remaining new lines.
Fuel lines can be pressed onto their fittings by hand. Make sure they're pressed on about as far onto the fitting as they can go so that they hold tightly.
Follow your diagram carefully to thread each line through the right holes, attaching to correct places on your trimmer.
After installing the fuel filter line, the rest of this repair should be fairly simple.
[Back to top]
Reattach the Fuel System and Reassemble the Trimmer
Double check your installation of the new fuel lines against your diagram one last time before reassembling the trimmer.
 14. Reattach the fuel system.
For our demonstration trimmer, this means positioning the fuel tank in its place and then reinstalling the fasteners that hold the carburetor mount plate in position. 15. Reinstall the throttle cable into the carburetor.
Thread the throttle cable through its hole in the mount plate and reattach it to the carburetor. 16. Affix the carburetor to the mount plate.
This should just require reinstalling some fasteners. 17. Replace the fuel system cover.
Like with our demonstration trimmer, you may need to guide the carburetor's choke lever through an access opening.
Replace all fasteners that hold the cover in position.
The trimmer is now reassembled with new fuel lines installed.
[Back to top]
Conclusion
We strongly recommend that you watch the demonstration video for this repair. The steps used on our demonstration trimmer will be similar to other trimmers, and seeing them performed will help your own repair go more smoothly.
Visit our Trimmer Parts page to find parts for your trimmer by brand, or simply type your trimmer's model number in the search field at the top of the page.
We hope our professional repair advice helps you save time and money by performing your own tool and equipment repairs.
[Back to top]
What we're about.
