


Why Read This Article?
Finish Nailer Repair - Replacing the Driver Guide (Ridgid Part # 79004001022)
Article Breakdown
Finish Nailer Repair - Replacing the Driver Guide (Ridgid Part # 79004001022)
Video
Tools & Materials
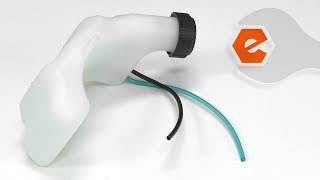
The fuel tank assembly is a fast way to solve many fuel related issues. Consists of a new fuel tank, fuel cap, fuel lines, and the fuel filter. The fuel tank assembly can be used to solve a leaking or broken fuel tank, leaking or broken fuel lines or to service the fuel filter.
Let's get started.
REMOVING THE FUEL TANK 1. Remove the rear engine cover.
a. Remove the screws securing the rear engine cover to the engine.
b. Remove the rear engine cover.
2. Disconnect the fuel lines.
a. Use long-nosed pliers to disconnect the fuel lines from the carburetor.
3. Remove the fuel tank.
a. Pull the fuel tank away from the engine assembly.
b. Remove the two rubber isolators from the fuel tank.
INSTALLING THE NEW FUEL TANK
4. Install the fuel tank.
a. Install the two rubber isolators onto the new fuel tank.
b. Install the new fuel tank onto the engine.
5. Install the fuel lines.
a. Align and cut the new fuel lines to the proper length.
b. Install the new fuel lines to the carburetor.
REASSEMBLING THE UNIT
6. Reinstall the rear engine cover.
a. Install the rear engine cover.
b. Secure the rear engine cover with the screws.
