


Video
Tools & Materials

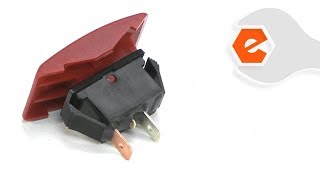
The on-off switch controls the flow of electricity to the tool's motor. It is a simple switch that interrupts just one of the wires. If you suspect the switch is bad, you can easily test if for continuity using a multimeter.
Let's get started.
REMOVING THE SWITCH 1. Remove the switch housing.
a. Remove the four screws securing the switch housing to the upper arm of the saw.
b. Lift the switch housing away from the saw.
2. Remove the switch.
a. Use long-nosed pliers to disconnect the wires from the terminals on the switch.
b. Use a screwdriver to depress the plastic tabs on the inside of the switch assembly and remove the switch assembly from the switch housing.
INSTALLING THE NEW SWITCH
3. Install the switch.
a. Install the new switch into the switch housing. (Align the intent on the top of the switch with the "ON" lettering on the housing.)
b. Press the new switch into the housing until the locking tabs engage.
c. Reconnect the switch wires to the terminals on the bottom of the new switch.
REASSEMBLING THE UNIT
4. Reinstall the switch housing.
a. Install the switch housing onto the upper arm of the saw.
b. Secure the switch housing with the four screws.
