


Video

Tools & Materials
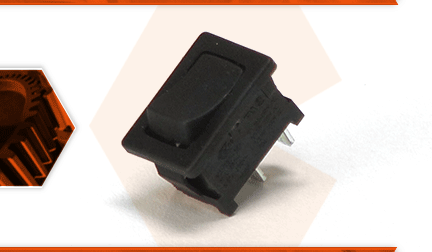
Can't turn your sander on? You might have a bad switch. The on/off switch controls the flow of electricity to the sander's motor. It is a simple switch that interrupts just one of the wires. If you suspect that the switch is bad, it can be easily tested for continuity using a multimeter.
Let's get started.
REMOVING THE SWITCH 1. Remove the top cap.
a. Remove the screws securing the top cap to the sander.
b. Remove the top cap.
2. Remove the switch.
a. Remove the switch assembly from the housing.
b. Note the location of each wire before disconnecting the switch.
c. Use long-nosed pliers to disconnect the wires from the switch terminals.
INSTALLING THE NEW SWITCH
3. Transfer the dust cover.
a. Note the orientation of the dust cover on the old switch.
b. Remove the dust cover from the old switch.
c. Snap the dust cover over the new switch.
4. Install the switch.
a. Refer to your notes to determine the correct location for each wire, and connect the wires to the new switch terminals.
b. Install the switch assembly into the housing.
REASSEMBLING THE UNIT
5. Reinstall the top cap.
a. Tuck any exposed wires into the housing to prevent pinching.
b. Install the top cap onto the sander.
c. Secure the top cap with the screws.
