Video
Tools & Materials

Trimmer out of whack? It's time to face the fix. Whether you are a legendary landscaper or a weekend weed whacker, eReplacementParts.com provides the parts, procedures and facts you need to fearlessly fix what fails you.
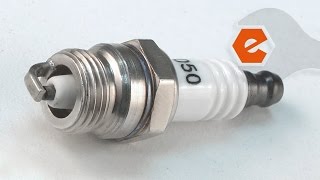
Replacing the spark plug should be part of the normal yearly maintenance on your string trimmer. The spark plug creates the spark inside the trimmer's engine, allowing combustion to occur. Symptoms of a bad spark plug include difficulty starting, misfiring or the inability to start the engine at all.
This article provides step-by-step instructions for removing and installing the spark plug on a Ryobi string trimmer.
Let's get started.
 REMOVING THE SPARK PLUG [top]
1. Remove the spark plug.
REMOVING THE SPARK PLUG [top]
1. Remove the spark plug.
Remove the spark plug boot from the spark plug.
Use a spark plug wrench (or socket) to loosen the spark plug.
Remove the spark plug from the cylinder head.
ADJUSTING THE GAP [top] 2. Set the gap on the new spark plug.
The gap is the distance between the ground electrode (metal strap) and the center electrode. This distance is measured (and adjusted) with a spark plug gapping tool. Adjustments are made by moving the strap closer to (or farther from) the center electrode.
Measure and adjust the gap (as necessary) to twenty-six thousandths of an inch. (0.026).

INSTALLING THE NEW SPARK PLUG [top] 3. Install the new spark plug.
Thread the new spark plug into the cylinder head.
Secure the spark plug with a wrench.
Replace the spark plug boot.

You don't have to leverage your savings to level your lawns. As you just learned, repairing your own equipment is easy when you follow our step-by-step guides. Not only did you restore trimmer functionality at a fraction of the cost of replacement; you have taken the edge off of future repairs, wherever you may find them.