Tools & Materials
-
a screwdriver
-
a towel
-
a pan
- compressed air (if available)
-
a can of carburetor cleaner
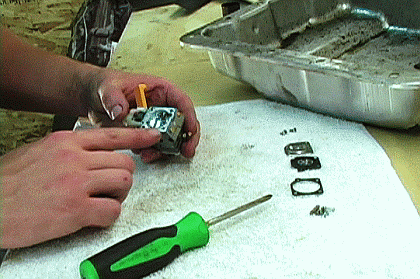 Properly cleaning a 2-cycle engine carburetor means completely disassembling and reassembling the unit.
We explain the steps to disassemble and reassemble an example 2-cycle engine carburetor below, and we also explain the correct way to clean a carburetor while it's still disassembled.
Watch this article's video for a professional demonstration of the procedure!
Carburetor Disassembly Steps
This carburetor disassembly, cleaning, and rebuild demonstration is performed on a carburetor from a Ryobi 2-cycle grass trimmer. Steps for other carburetor cleanings will be similar to these.
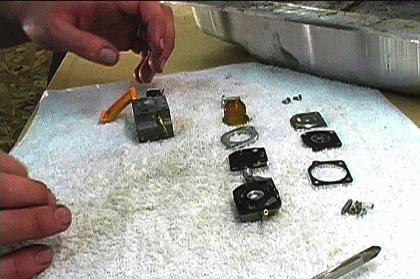 Tip! Carburetors have many small parts. Keep carburetor parts organized in the order that they are removed (like in rows) to make reassembly fast and accurate.
The Bottom Side of the Carburetor
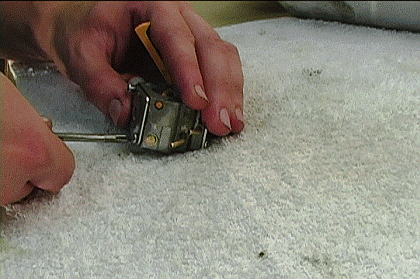
1. Remove the bottom plate.
Unscrew the two screws that affix the lower cover plate to the carburetor body.The bottom plate is held on by four screws for some carburetor models.
 [Back to top]
2. Remove the diaphragm and diaphragm gasket--separate them if needed.
The carburetor diaphragm will come off easily after the bottom plate is removed.
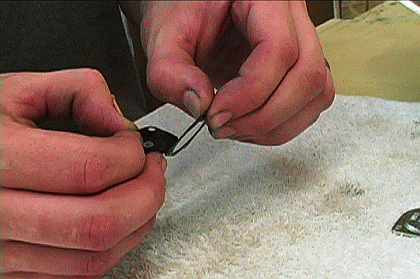
The diaphragm gasket will often stick to the diaphragm when removing it from the carburetor body. If the diaphragm and diaphragm gasket are stuck together, they must be carefully separated from one another to be cleaned later.
[Back to top]
3. Remove the needle valve mechanism.
The needle valve mechanism consists of three parts: a needle, a lever, and a spring.
It will be visible in the body of the carburetor after the diaphragm is removed.
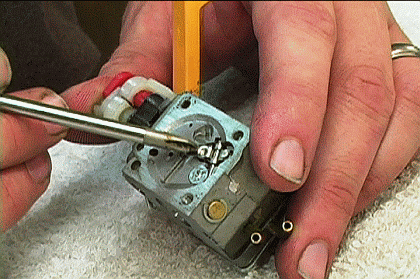
The needle valve mechanism is held into place by a retaining screw.
Unscrew the needle valve retaining screw to release the mechanism from the body of the carburetor.
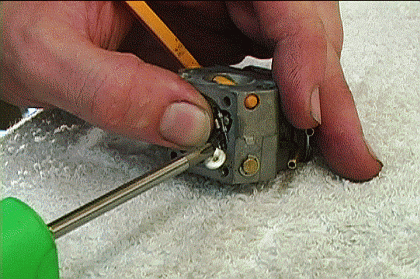
Make sure to hold the spring-loaded mechanism in place as you remove the screw. This will stop the valve parts from flying across the workbench.
[Back to top]
The Primer Bulb Side of the Carburetor
Remember to keep the carburetor parts organized as you go. This is a good place in the disassembly to start a new row of parts.
4. Remove the primer bulb and its retaining plate.
The primer bulb is held onto the primer base with the help of a retaining plate. Two screws affix the primer bulb retaining plate to the primer base.
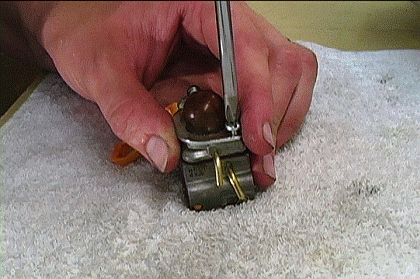
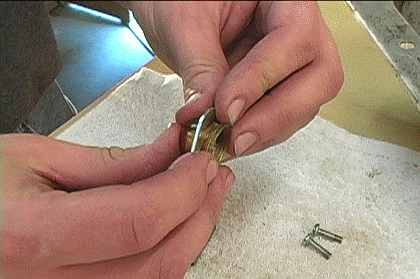
Remove the two screws that hold the primer bulb retaining plate to the primer base. [Back to top] 5. Push the primer bulb from its retaining plate.
 [Back to top]
6. Remove the primer base and carburetor reed valve.
Removing the primer base retaining screws frees up the primer base from the carburetor body.
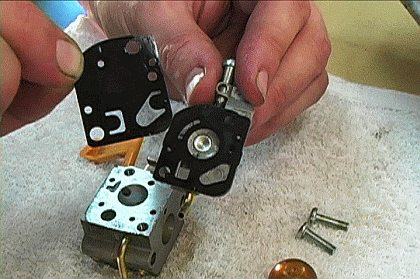
Set the primer base aside for cleaning. Look for a thin reed valve piece between the primer base and the carburetor body.
Handle the reed valve piece with care. It is important to the operation of the carburetor and very delicate.
If a fragile piece like this one is damaged on a carburetor that lacks a rebuild kit, the entire carburetor will most likely have to be replaced.
After following these steps, all the small pieces of the carburetor are now removed from the carburetor body and are ready for cleaning.
[Back to top]
How to Clean a Carburetor
For this part, you'll need:
- a pan
- a can of carburetor cleaner
- a towel, and
- compressed air (if available)
1. Clean the outside of the part.
2. Clean the inside of the part.
3. Dry the part.
4. Be very careful with sensitive parts. Start with the body of the carburetor and don't be afraid to use a lot of cleaner on it.
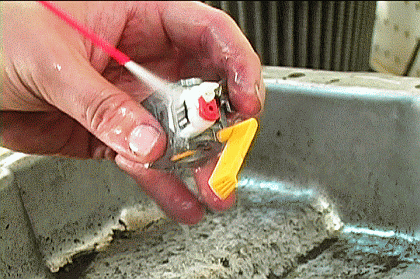 Take advantage of the openings in the carburetor body to clean its fuel pathways.
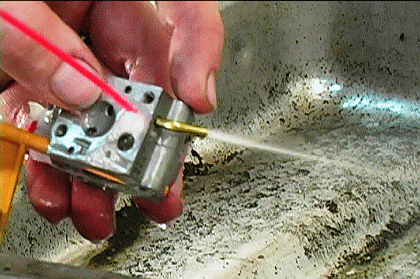 Make sure to point orifice outlets away from you when you do this!
Thoroughly air dry the carb body with compressed air (f compressed air is available) and set in on a towel to continue drying.
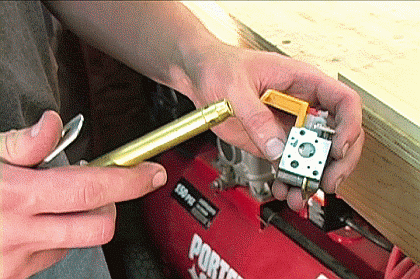 Move on to the other durable pieces of the carburetor.
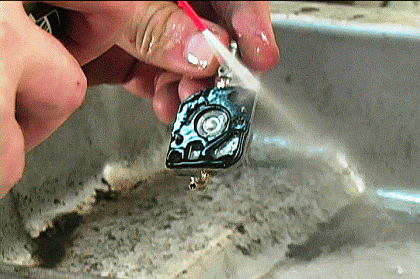 The internal orifices of the primer bulb base require cleaning just like those of the carburetor body.
[Back to top]
Cleaning Delicate Carburetor Components
There are a few pieces of the carburetor that need extra consideration when cleaning them, including the reed valve piece, the screen filter on the carburetor body (see below), and the carburetor diaphragm.
- That thin reed valve piece that goes between the carb body and the primer base must be cleaned and handled carefully.
Use as little carburetor fluid as possible and spray it at low pressure to avoid damaging the piece.
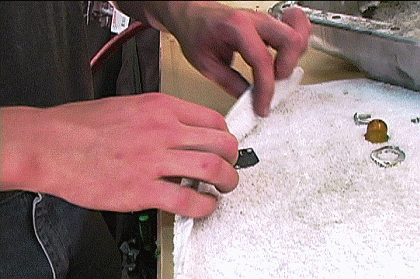
Quickly dry the reed valve on a clean towel after gently spraying it with cleaner.
- Many carburetor designs include a small screen filter on the carburetor body.
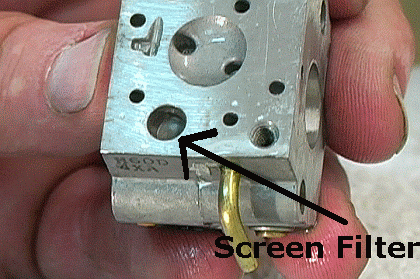
This filter is easily damaged when removed. Leaving it in place is usually the best choice when replacement filters are not available.
- The carburetor diaphragm is another piece that is often too delicate for rigorous cleaning.
The diaphragm is made of thin rubber in the case of our Ryobi demonstration carburetor. Because rebuild kits aren't available to replace it if it were damaged during cleaning, it should only be cleaned when absolutely necessary.
[Back to top]
Steps to Reassemble the Carburetor
Most of steps to reassemble a carburetor are self-explanatory in that you simply replace components in the reverse order that you removed them.
Replacing the needle valve mechanism is the trickiest step when reassembling the Ryobi 2-stroke engine carburetor that we use for demonstration in this article.
Here are the steps for replacing the needle valve mechanism:
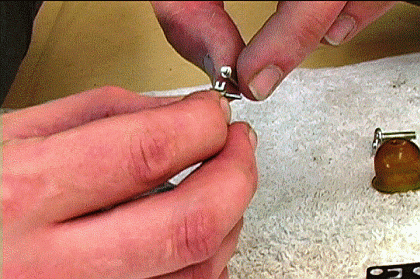
1. Place the needle on the lever.
This carburetor's needle valve lever has a forked portion on it. The top of the needle fits into the forked portion of the lever as pictured below.
 [Back to top]
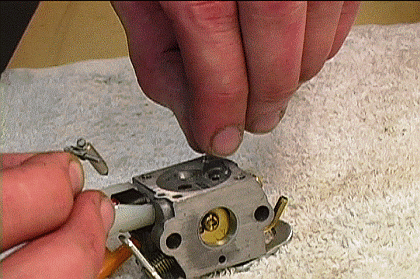
2. Replace the needle valve spring.
Just place the spring back into it's slot in the carburetor body.
 [Back to top]
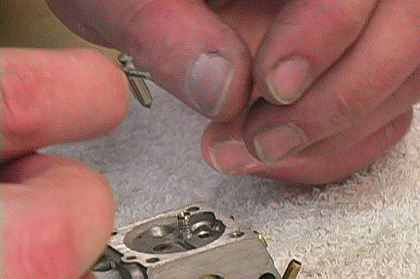
3. Drop the needle into the valve jet.
The needle valve lever will rest on top of the spring when the needled is dropped into position.
 [Back to top]
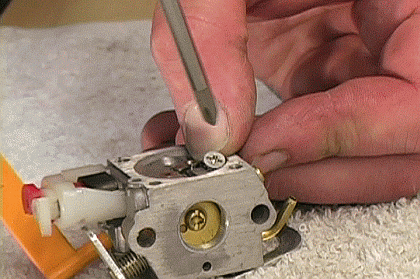
4. Reinstall the needle valve retaining screw.
Hold the needle valve mechanism in place with your finger once it is aligned into position.
Return the valve retaining screw while holding the mechanism down.
 The rest of the carburetor reassembly should be pretty straight forward if care was taken to keep parts organized while it was dismantled.
Watch this article's video demonstration of this procedure for detailed reassembly steps!
[Back to top]
Ryobi Carburetors and Cleaning Maintenance
Owning a Ryobi gas-powered tool is usually a good reason to perform a carburetor cleaning without the help of a rebuild kit. This is because carburetor rebuild kits are not available for most Ryobi 2-cycle tools.
Carburetor rebuild kits include replacement parts for many of a carburetor's small, inexpensive, easily-worn parts. When used in a traditional cleaning and carb rebuild, these kits get an old carburetor running like new with little effort on the part of the tool owner.
Additionally, the availability of replacement carburetor parts takes some pressure off of the person performing the rebuild, because delicate parts that may be accidentally damaged during the rebuild can easily be found and reinstalled.
Maintaining the life of a carburetor takes extra care when carburetor rebuild kits are not available, like in the case of Ryobi tools.
When the small parts of the carb can't be replaced inexpensively, the best way to maintain the performance of the carburetor is to dismantle and carefully clean each part.
Carburetor rebuild kits can occasionally become unavailable for tools of every make, but we chose to perform this article and video's demonstrations on a Ryobi carburetor because of how commonly rebuild kits are not available for them.
[Back to top]
Conclusion
If you're looking to check the availability of carburetor rebuild kits for your gas-powered tool, type your tool's model number in the search field at the top of this page.
Your tool's parts page will have available rebuild kits listed on its parts page just below its breakdown diagram!
You can also search for carburetor rebuild kits by visiting our Small Engine Parts page here at eReplacementParts.com.
[Back to top]
What we're about.


